
When running a donation campaign, how do you decide on a fundraising thermometer vs a progress bar to display your goal?
These simple yet powerful visuals are the secret ingredient for boosting donor motivation because they instantly show a campaign’s momentum.
The effectiveness of both tools comes down to basic human psychology. They provide what is called “social proof,” where donors are encouraged to give because they can see that others have already contributed.
This visual tracking also creates a sense of urgency, especially as you get closer to your final amount.
This article explores what both [fundraising thermometer and progress bar] actually are, how they look, work, which one works better, dos and don’ts, and much more.
Fundraising Thermometer vs Progress Bar: What are They?
Fundraising Thermometer

A fundraising thermometer is a visual tool used to track a campaign’s success against a specific financial goal. As its name suggests, it looks like an old-fashioned vertical temperature thermometer.
As donations come in, the “mercury” (or colored bar) rises to show how close you are to the top goal amount. This graphic clearly indicates the current amount raised, the overall goal, and the progress made as a percentage.
Fundraising thermometers are especially powerful for short-term campaigns and events where you want to build rapid excitement.
Progress Bar

Next, we have a progress bar, which serves the same function as a fundraising thermometer but utilizes a horizontal rectangular shape. Often, it resembles the loading bar you see when a website or application starts up. It is sometimes even referred to as a goal meter.
Like the thermometer, the progress bar fills up from one side to the other as you get closer to your total fundraising amount.
Both your goal amount and the current amount raised are displayed with the bar. The progress bar is a sleek, modern visual element that can be easily incorporated into any webpage, particularly in narrow spaces, such as floating website banners or email headers.
While they track funds raised, they are also versatile enough to be used for non-monetary goals, such as tracking the number of donors, volunteer hours, or items collected.
Why Add a Fundraiser Thermometer or a Progress Bar in WordPress?
Adding a visual progress tracker to your WordPress donation page is one of the quickest ways to encourage giving. These simple graphics tap into human psychology to drive your campaign forward and boost your results. Research shows that nonprofits using visual progress indicators see an average 18% increase in donation completion rates compared to those that don’t.
Here are more reasons why to add visuals:
- Drives action to finish line: A study in the National Institutes of Health (NIH) showed that visual progress indicators can increase completion rates by up to 40% for goal-directed activities.
- Provides social proof: These visuals show potential donors that others are already contributing. When people see that a campaign has momentum, they are more likely to join in, feeling like they are part of a winning team.
- Increases donor engagement: Campaigns with visual progress indicators can boost donor engagement by up to 30% according to NonprofitSource. Seeing the bar rise reinforces that every donation is making an impact.
- Creates urgency: As the thermometer or the progress bar gets closer to the goal line, it creates a powerful sense of urgency. Donors are more likely to help push the campaign over the finish line when they see the goal is just shy of completion, especially when a deadline is approaching.
Moreover, it also helps psychologically. The phenomenon is known as the Goal Gradient Effect. This concept states that a person’s effort to reach a goal increases exponentially as they get closer to achieving it. When donors see the progress bar near 80% or 90%, they feel a stronger, subconscious urge to donate and “complete” the goal, much like running faster when you see the finish line in a race.
In short, a progress bar or thermometer converts the abstract idea of fundraising into a compelling game. It motivates donors with the satisfying instant gratification of seeing the needle move.
This is also what this study claims, as we quote:
“The contribution rate when recipients were 33-66% of the way to their fundraising goal was notably higher than when they were 0-33%. Additionally, the contribution rate at 66-100% was significantly higher than at the 33-66% goal.“
In conclusion, encouraging donors by adding a visual representation can help achieve the desired amount through the Goal Gradient Effect.
Fundraising Thermometer vs Progress Bar: Which One Is Better?
When you compare a fundraising thermometer versus a progress bar, neither one is technically “better” than the other. Both visuals achieve the exact same function: tracking and displaying your goal progress. Their effectiveness relies on the same core human psychology, which means they are functionally equal in boosting donor motivation.
Both visuals rely on the psychological principle of the Goal Gradient Effect to drive action. This simply means people are more motivated when they are close to finishing a goal. Because they operate identically on a psychological level, the “best” choice is the one that aligns with your brand’s style and where you intend to use it.
A classic thermometer is great for traditional campaigns or an annual event. A progress bar, however, is a modern, flexible choice.
For example, if you want a visual in a narrow space, like a sticky floating bar or within an email header, the horizontal progress bar is the superior choice. If your goal is a large, exciting visual on a landing page, the vertical thermometer often captures more attention. Therefore, you should select the visual that best fits your website’s design and the specific placement you have chosen for maximum visibility.
Dos and Don’ts of Adding Fundraiser Thermometer or Progress Bar
Dos: Essential Best Practices
Getting the most out of your progress bar means using it correctly. By following some key best practices, you can turn a simple visual into a powerful fundraising tool. First, let’s look at the things you should always do.
- Set Clear, Realistic Goals: Define specific, achievable financial targets based on your organization’s history.
- Keep it Updated and Visible: Feature your progress bar prominently on your website, social media, and in email updates. Nothing kills momentum faster than an outdated thermometer, so ensure your data is current to maintain excitement.
- Focus on Impact, Not Just Dollars: Connect your visual progress to a real-world story. Explain what the funds will accomplish, such as “$5,000 will provide 100 children with school supplies.” Donors appreciate knowing exactly how their contribution is making a difference.
- Start with Momentum: People are drawn to success. Secure initial, private donations before launching the thermometer to the public so that it begins partially filled (e.g., at 10% or 20%). This instantly signals success and encourages others to join in. As we discussed psychology earlier, it will also help with the timely achievement of our goals.
- Celebrate Milestones: Make a big deal out of reaching smaller goals, such as 25% or 50%. Sending updates and publicly thanking donors at these points helps build a sense of community and maintains campaign enthusiasm. McConkey-Johnston International found that first-time donors who receive a personal thank you within 48 hours are four times more likely to give a second gift.
Don’ts: Common Mistakes to Avoid
Knowing what to do is important, but knowing what to avoid can save your campaign. These common errors can quickly sabotage your fundraising momentum and harm progress.
- Don’t Use Overly Ambitious Goals: If your goal seems impossible to reach, it can discourage donations rather than motivating. Set a target that is realistic and attainable to keep your supporters engaged.
- Don’t Neglect Design or Readability: Avoid harsh colors and ensure your font is clear, especially when text appears inside the visual. The design should be eye-catching and align with your brand for a professional feel.
- Don’t Forget the Call-to-Action: Your visual progress is meant to inspire action, so it must be placed near a clear, prominent “Donate” button or link. Make the next step for the donor as simple as possible.
- Don’t Raise the Goal More Than Once: If you exceed your goal, celebrate! You can implement a single, pre-planned “stretch goal.” However, raising the goal repeatedly can undermine donor trust and make the initial target seem disingenuous.
Now that you know the best ways to manage your goal tracker, it’s time to think about where it should go. The placement of your thermometer is just as important as the design. High visibility is the key to high conversion rates.
Where to Add Fundraising Thermometers & Progress Bars
The effectiveness of a thermometer hinges on its visibility. Placing your donation progress bar in high-traffic, relevant locations will ensure maximum impact, motivating visitors to become donors.
- Homepage and Landing Pages: These are the most critical spots. Embedding the progress bar prominently on your main page or the specific campaign landing page is vital. Visitors instantly see the goal and the momentum, which encourages them to join in.
- Near the Donation Form: Placing the progress visual directly above or beside your donation form acts as a final motivator to convert the visitor into a donor.
- Floating Bar/Sticky Footer: A floating progress bar that stays visible as a visitor scrolls down the page offers excellent continuous visibility. This non-intrusive placement ensures the fundraising goal is always in view, constantly reminding supporters of the campaign’s urgency.
- Email Newsletters: Incorporate an image of your updated progress bar into your weekly or bi-weekly email newsletters. This keeps your entire supporter base informed of the progress and acts as a strong visual cue to click the accompanying “Donate Now” call-to-action.
- Social Media and Events: A high-quality graphic of the progress bar should be shared regularly on platforms like Facebook and Instagram. For in-person or virtual events, a large, frequently updated digital or physical thermometer can create an exciting sense of real-time urgency.
How to Add a Fundraising Thermometer or The Progress Bar
WordPress does not natively include a way to show a fundraising progress bar or thermometer. Therefore, you will need to rely on a third-party plugin to add this kind of visual tracking to your site.
For a powerful and easy-to-use progress bar solution, the best choice is WP EasyPay. This plugin enables you to easily add customizable payment forms and visualize your fundraising goals on any page. The plugin offers other amazing benefits as well; let’s discuss them later, and right now, we can focus on adding the progress bar to your WordPress.
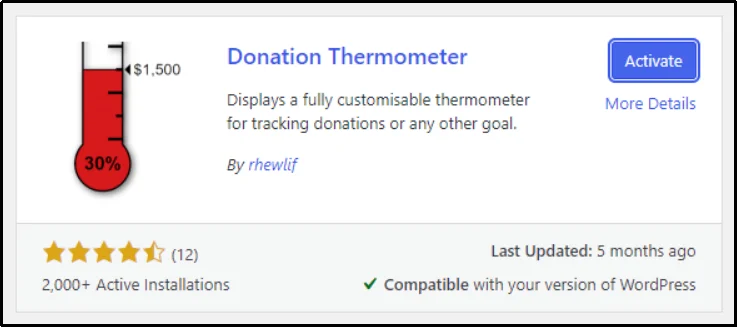
For users who prefer the classic thermometer visual, there are many excellent free options available in the WordPress repository. A highly-rated and popular free choice is the Donation Thermometer plugin. This simple tool is entirely free to use and has over 2,000 active installations.
Let’s add it to WordPress.
Adding the Progress Bar
The progress bar feature is exclusive to premium plans only. Navigate to the plugin’s pricing page and purchase a plan that suits your needs. Not only the progress bar, but the premium plan comes with other excellent benefits, such as:
- Recurring Payments and Billing: You can set up automatic payments for customers. It is essential for subscriptions, memberships, or accepting donations.
- Subscription Management: You can easily manage all active subscriptions from your WordPress admin dashboard. This includes pausing, resuming, or even manually running a subscription cycle as needed.
- Digital Wallet Support: Accepting modern digital payments increases conversions. Premium plans unlock support for major digital wallets, including Apple Pay, Google Pay, Cash App, and Afterpay.
- ACH Payments: Gain the ability to accept low-fee payments directly from a customer’s US bank account (Automated Clearing House, or ACH). This is great for large transactions or ongoing bills.
- Coupon Support: Create and manage various discount codes and promotions for your forms. This allows you to offer fixed-amount or percentage-based discounts to your customers.
- Multi-Step Forms: If your form is complex, you can split it into a step-by-step layout. This helps to organize information and significantly improves the overall user experience on your site.
- Google reCAPTCHA Security: Protect your payment forms from spam, bots, and fraudulent submissions. This feature integrates Google reCAPTCHA to add an extra layer of defense and security.
- Detailed Transaction Reporting: The plugin offers comprehensive reporting tools to help you track revenue, view detailed transaction data, and easily export all of your financial records via CSV for accounting purposes.
- And the list goes on and on.
Coming back to the topic, upload the WP EasyPay premium plugin.
⚠️ WP EasyPay Premium will not work with the free version installed. Ensure that you disable it before proceeding with the installation.
Once activated, switch between Live Payment or Test Payments:
- Test Payments: Allows for testing payments before accepting them on your WordPress. Recommended before switching to Live Payment.
- Live Payments: As the name suggests, it enables the acceptance of payments in a live environment.
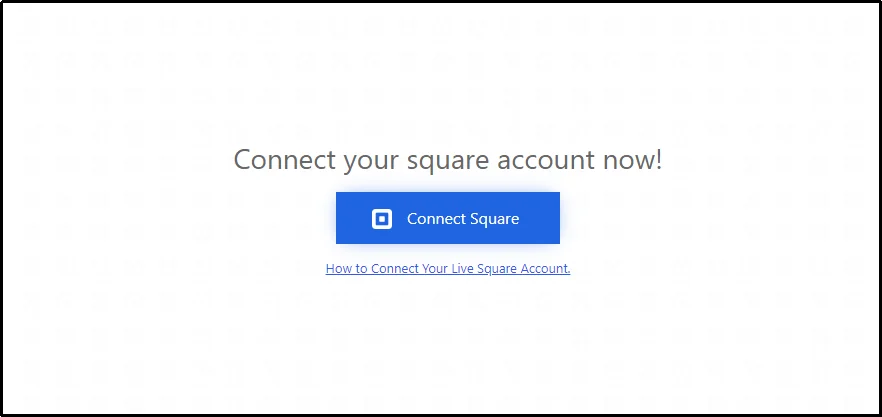
And connect to your Square Seller Account using your login credentials. If you don’t already have an account, create one.
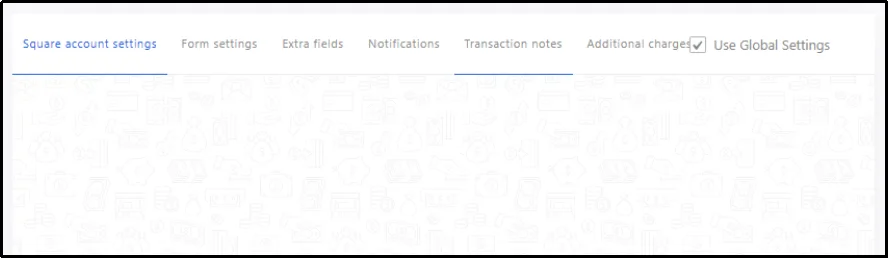
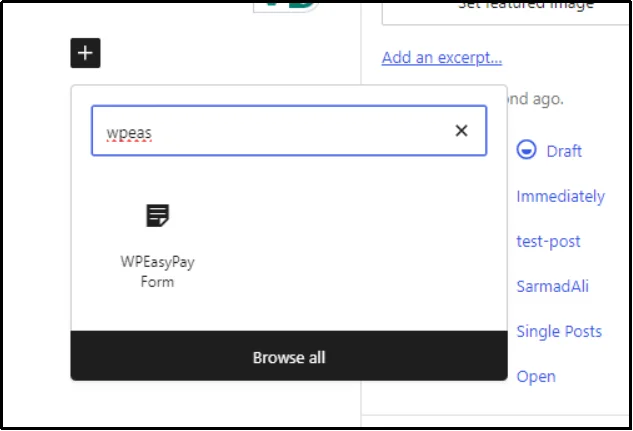
Now, create a new form by navigating to WP EasyPay ⇒ Create Payment Form.
Check the “Global Settings” checkbox at the top-right corner of the form and switch to the “Form Settings” tab.
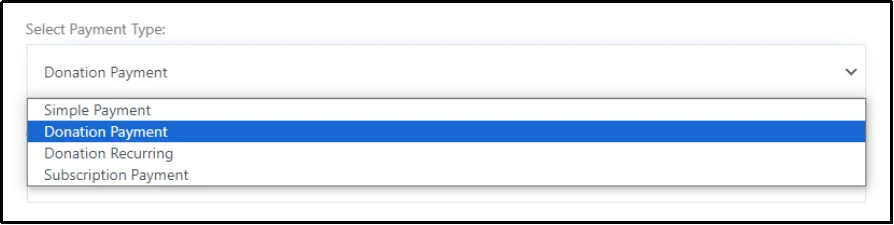
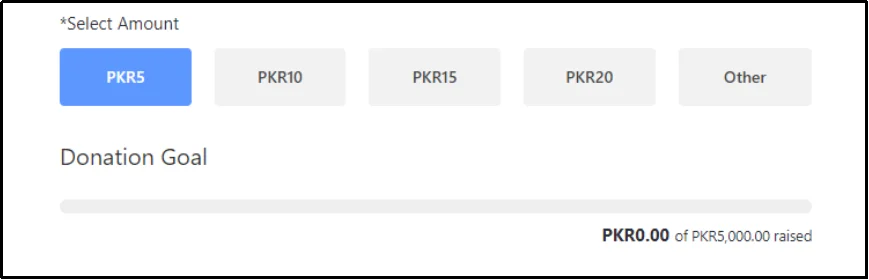
Fill out the necessary details, including Form Name, Form Description, and, using the drop-down, select Donation Payment.
That will reveal further details, including the Organization name, Enable Goal, and Goal Message.
Check the Enable Goal and Enable Goal Message checkbox.
Enter the goal amount and write a Goal Message that will appear after the goal amount is achieved.

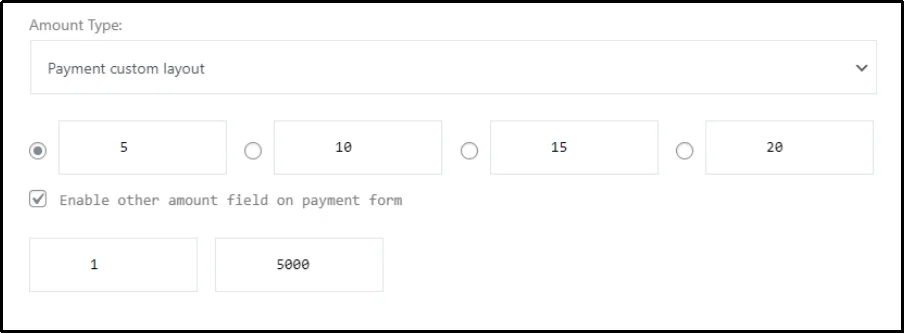
Finally, scroll down and select the type of amount. You can set up quick donation buttons and add other fields that enable you to specify a minimum and maximum amount that can be paid.
Once everything is set, publish the form and return to WP EasyPay ⇒ Forms. You can see the shortcode here. You can either copy this code and paste it on the post/page wherever you want to paste this donation form.
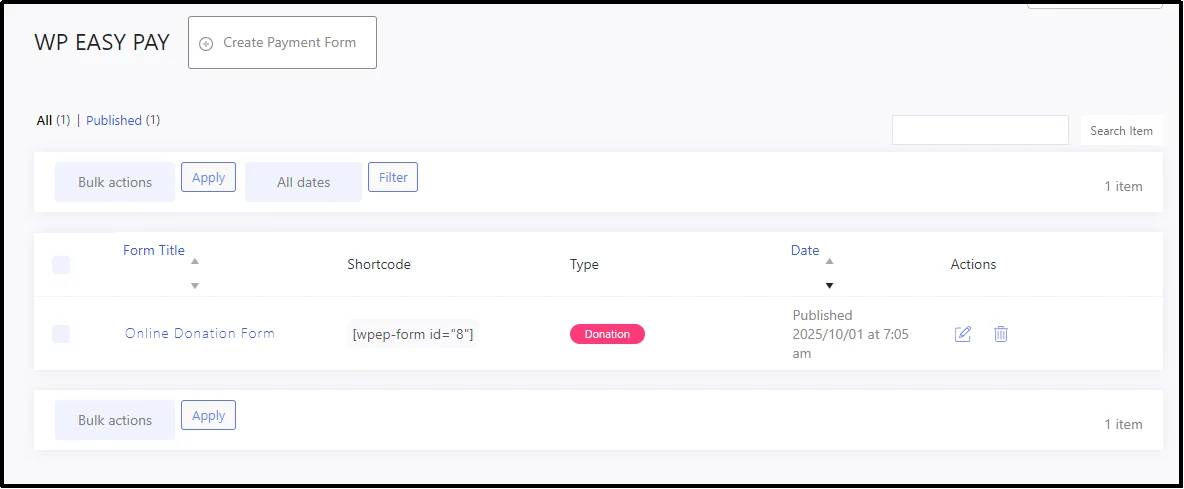
Alternatively, WP EasyPay also supports Gutenberg blocks, allowing you to add the form to any page or post using WP EasyPay’s block.
There you have it! The progress bar is live.
Adding the Fundraising Thermometer
For the fundraising thermometer, we can go with the Donation Thermometer plugin.
Install and activate it, and navigate to the Settings ⇒ Thermometer.
Enter the target value and the raised value.
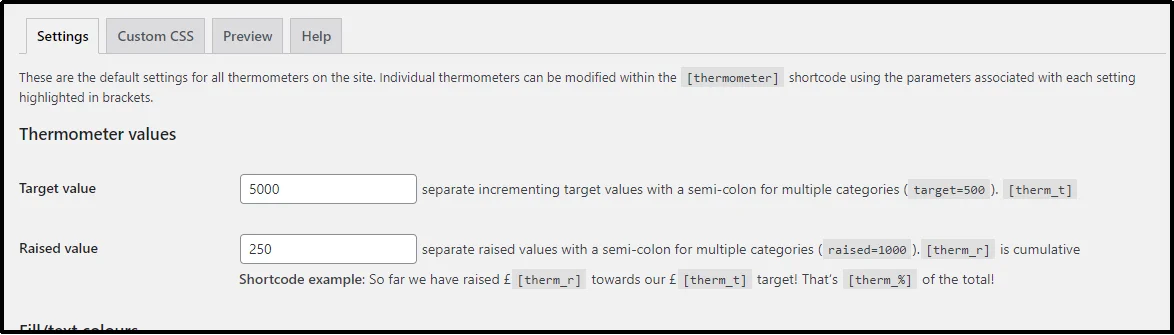
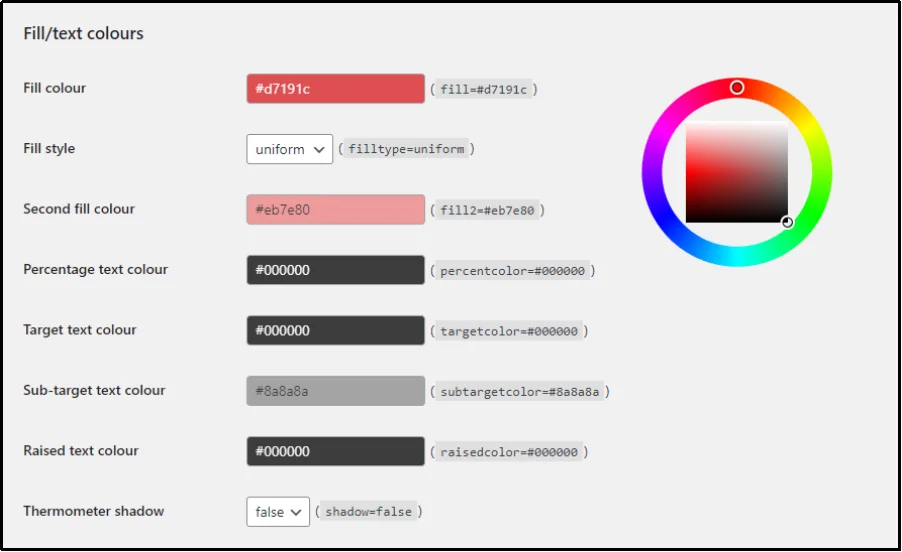
Customize your thermometer.
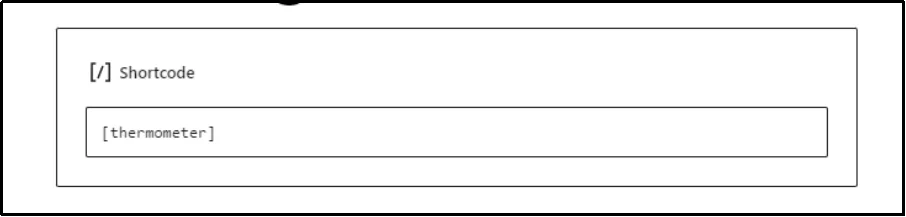
After setting it up, go to the post or the page where you want to place it and enter the shortcode [thermometer] using the Shortcode block.
There we go! The thermometer is right on our test page.

That’s about it!
You are not limited to choosing one over the other. Both together don’t hurt as well.
In fact, many organizations combine both a fundraising thermometer and a progress bar on the same campaign.
WP EasyPay and Donation Thermometer make it possible to display both simultaneously, allowing you to leverage their different strengths without conflict. This dual setup ensures that, regardless of the visitor’s preference, they can see their preferred choice and feel motivated to contribute.
Final Words
The choice between a fundraising thermometer and a progress bar comes down to style, space, and the overall feel of your campaign. The thermometer offers a classic visual, while the progress bar provides a modern look that fits easily across all devices.
To make these visuals work for you, remember the best practices. Always start your visual with some pre-secured funding to show immediate momentum and use the visual to emphasize the human impact of the funds, not just the dollar amount.
The easiest way to implement this on your WordPress site is by using a dedicated solution like WP EasyPay. The plugin integrates the payment process with the progress bar feature. This means your visual goal is updated automatically with every transaction.
Stop leaving donations on the table; implement your visual progress tracker today to turn casual visitors into motivated donors and successfully push your next campaign over the top.
Sign up with WP EasyPay today!
Frequently Asked Questions
What can I use instead of a fundraising thermometer?
You can use a simple progress bar instead of the traditional thermometer shape. A progress bar, which resembles a horizontal loading bar, is a modern and often preferred option, especially for a clean website design or when placing the visual in a narrow space, such as a sticky footer. You can use a plugin like WP EasyPay, which makes the process super simple.
Do fundraising thermometers work?
Yes, they do. Visual fundraising goals, like a thermometer or progress bar, tap into introductory human psychology, specifically the Goal Gradient Effect and social proof. Seeing the progress instantly reassures potential donors that others are contributing, making them more likely to join in. As the bar nears completion, it creates a sense of urgency, motivating people to make the final push. Studies have shown that a visual goal can lead to a significant increase in donation conversion rates.
Should I use a thermometer or a progress bar for my WordPress donation page?
The best choice depends on your campaign’s style and your website’s layout. A thermometer is a classic visual, perfect for a traditional, fun, or event-based campaign where you want maximum visibility. A progress bar is a better fit for sleek, modern, or minimalist websites and works well in confined areas. Since both rely on the same psychological principles to drive donations, choose the one that best suits your specific page.
Do thermometers or progress bars perform better on mobile devices?
Progress bars generally adapt more smoothly to mobile layouts because of their horizontal design. Fundraising thermometers can look excellent on desktop screens but may feel cramped on smaller devices if not optimized. Responsive design or a plugin with mobile previews is key to ensuring both work well.