If you are looking for an easy and reliable way to accept donations on your WordPress website, you have landed on the right page!
Whether you’re running a nonprofit, a personal fundraising campaign, or even supporting a community project, having a reliable donation system on your website can make all the difference.
The challenge, however, is that setting up donation payments in WordPress isn’t always straightforward. Many plugins only allow basic payments, while others lock important features, such as recurring donations or custom donor fields, behind complicated setups.
But you don’t have to worry, because we have a simpler solution!
In this guide, we will walk you through exactly how to accept donations on your WordPress site using a donation form plugin, such as WP EasyPay.
Keep reading to learn why WP EasyPay is the best option.
Why Use WP EasyPay for Donations?
When it comes to accepting donations on your WordPress site, you need a tool that’s not only easy to use but also powerful enough to handle different types of payments. That’s exactly what WP EasyPay offers.
Here’s why it stands out:
- Built for Donations: Unlike generic payment plugins, WP EasyPay is designed with nonprofits, fundraisers, and charities in mind. You can create dedicated donation forms with flexible options for your donors.
- Square Integration: The plugin connects directly with Square, one of the most trusted payment processors, allowing you to safely accept credit cards, digital wallets, and recurring payments without additional gateways.
- Multiple Payment Options: Debit and credit cards, Apple Pay, Google Pay, Afterpay, Cash App, Square Gift Card, and ACH Payments with a recurring subscription option, allowing donors to choose the method that works best for them.
- Customizable Donation Forms: Every organization has unique needs. With WP EasyPay, you can add custom fields, set donation goals, and design forms that match your website’s look and feel.
- Easy Setup: No coding skills required. Installing, connecting to Square, and creating your first donation form takes just a few minutes.
For organizations looking to accept one-time gifts, recurring contributions, or even event-based fundraising, WP EasyPay offers a complete solution without the complexity that many other plugins bring.
WP EasyPay Features for Donation Websites (Premium)
The free version of WP EasyPay works well for simple payments, but if you want a donation system that feels professional and flexible, the Pro version is the way to go. It unlocks advanced features that make donor management and fundraising much easier.
Here’s a quick look at what you get with WP EasyPay Pro:
- Payment Options: Accept donations via credit/debit cards, Apple Pay, Google Pay, Cash App, ACH payments, Afterpay, and Square gift cards.
- Donation Flexibility: Offer custom or fixed donation amounts, recurring billing, multi-currency support, and even subscription-based donations.
- Security & Compliance: Stay protected with PCI compliance, SCA compliance, a secure OAuth Square connection, and Google reCAPTCHA.
- Form Customization: Build forms with a drag-and-drop editor, multi-step layouts, file uploads, color controls, and custom thank-you pages.
- Donation Goals & Progress: Add fundraising goals with real-time progress tracking to motivate donors.
- Subscription Management: Manage recurring donations with auto-billing, pause/resume options, and detailed subscription reports.
- Coupons & Promotions: Run campaigns that utilize discount codes, allowing users to apply them directly during form submission.
- Reports & Notifications: Generate transaction receipts, export reports, and send personalized donor emails.
- Integrations: Connect with Mailchimp to grow your donor list and keep supporters engaged.
These features give you full control over how donations are collected, tracked, and displayed, turning your WordPress site into a powerful fundraising platform.
4 Easy Steps to Accept Donations on Your WordPress Website
As discussed, WP EasyPay is an easy-to-use plugin that doesn’t require any coding. Let’s break down the process into four easy steps to make it easier to follow.
Step 1: Install and Activate WP EasyPay (Pro Version)
Before you can start collecting donations, you’ll need to install and activate WP EasyPay Pro on your WordPress website. The process is quick and straightforward:
- Go to the WP EasyPay official website and get any premium plan of your choice.
- After purchasing, you will receive a welcome email that includes a link to download the zip file to your computer.
- Next, in your WordPress dashboard, go to Plugins → Add Plugin → Upload Plugin.
- Click Choose File and select the WP EasyPay Pro plugin file from your computer.
- Click Install Now

- Once installed, click Activate Plugin
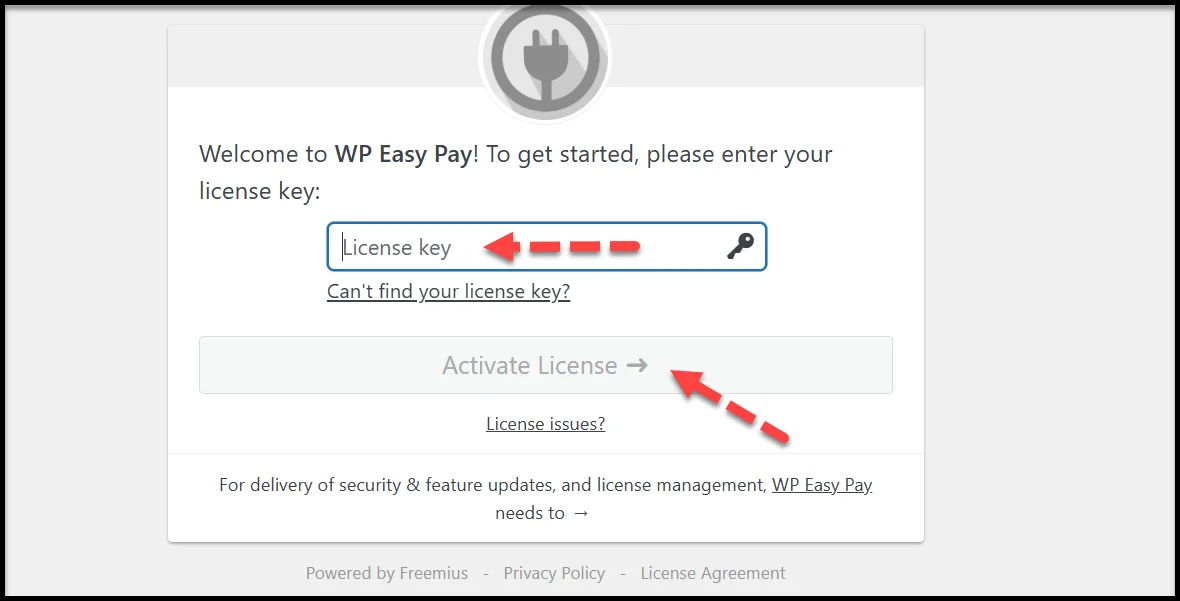
- After activation, go to Plugins → Activate License.
- Enter your license key (provided when you purchased WP EasyPay Pro).
- Click Agree & Activate License.
At this point, WP EasyPay Pro is active on your site, and you’re ready to connect it with Square so you can accept live payments.
Step 2: Connect WP EasyPay With Square
Once WP EasyPay Pro is installed, the next step is to connect it with your Square account. This will allow you to process real donations securely.
Here’s how to set it up:
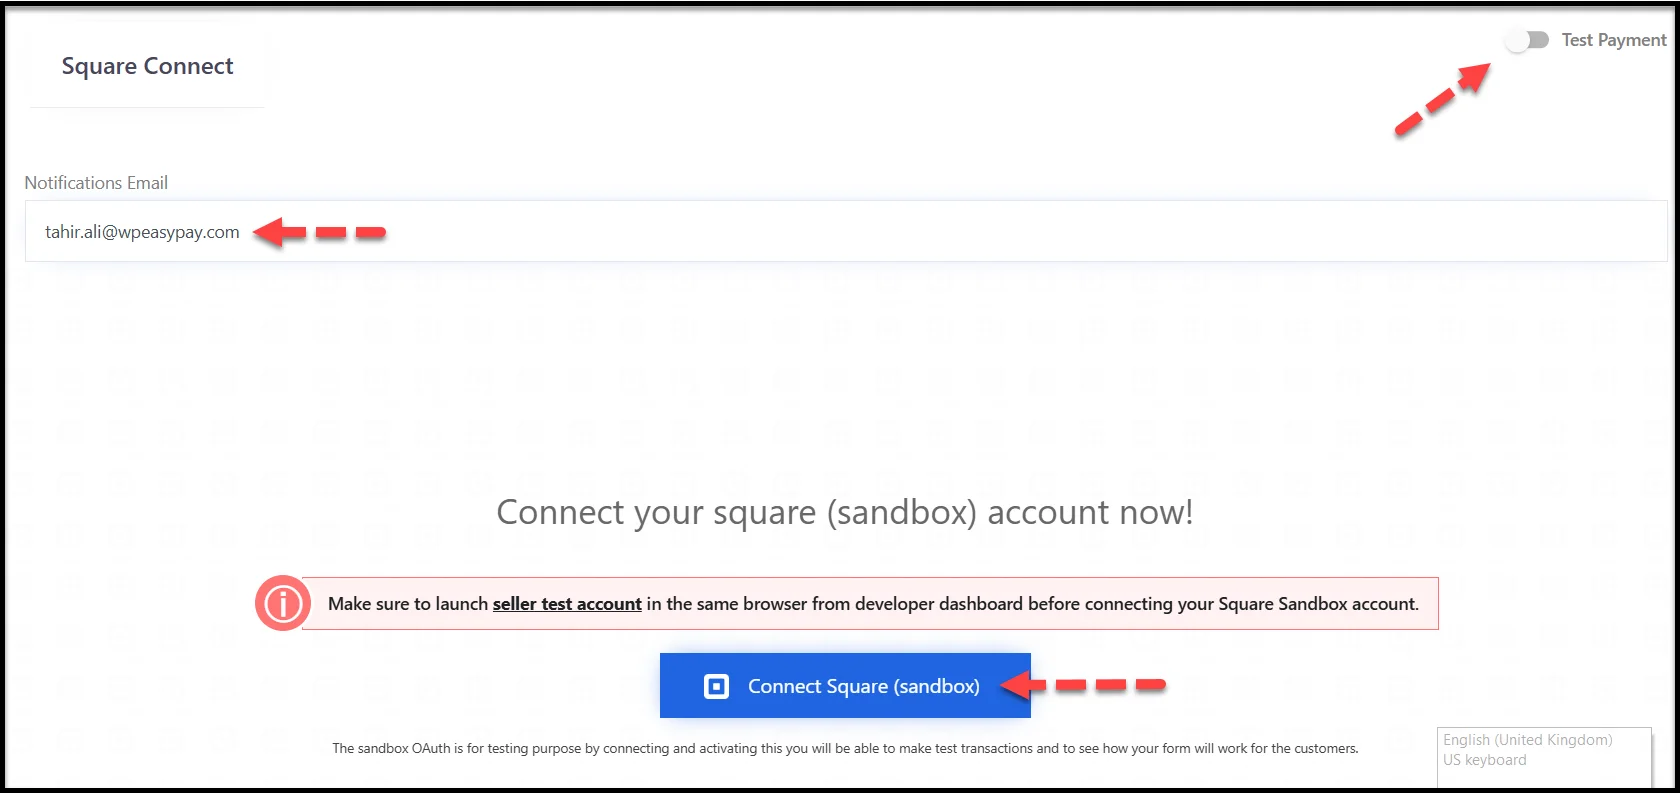
- In your WordPress dashboard, go to WP EasyPay > Square Connect.
- At the top right, you’ll see a toggle for Test Mode and Live Mode.
- Test Mode allows you to run trial transactions, enabling you to check everything before going live.
- Live Mode is where you’ll process actual donations from supporters.
- For live payments, keep the toggle off.
- Click Connect Square.
- Log in with your Square Seller Account credentials.
- Click ‘Allow’ for the necessary permissions.
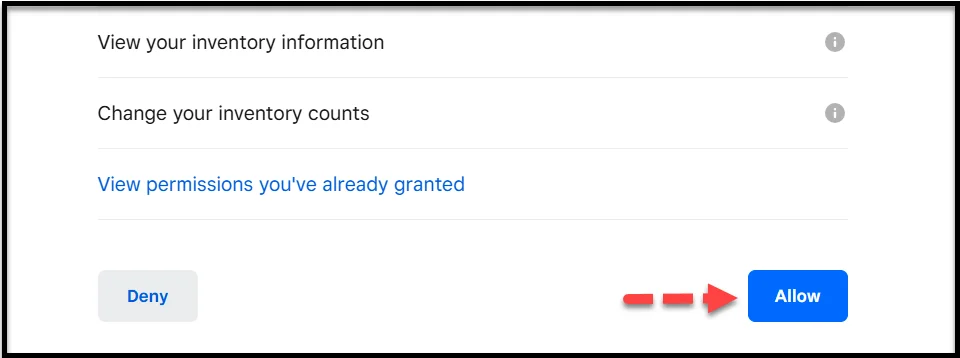
- You’ll be redirected to a confirmation page. Click “That’s My Site – Redirect Me.”
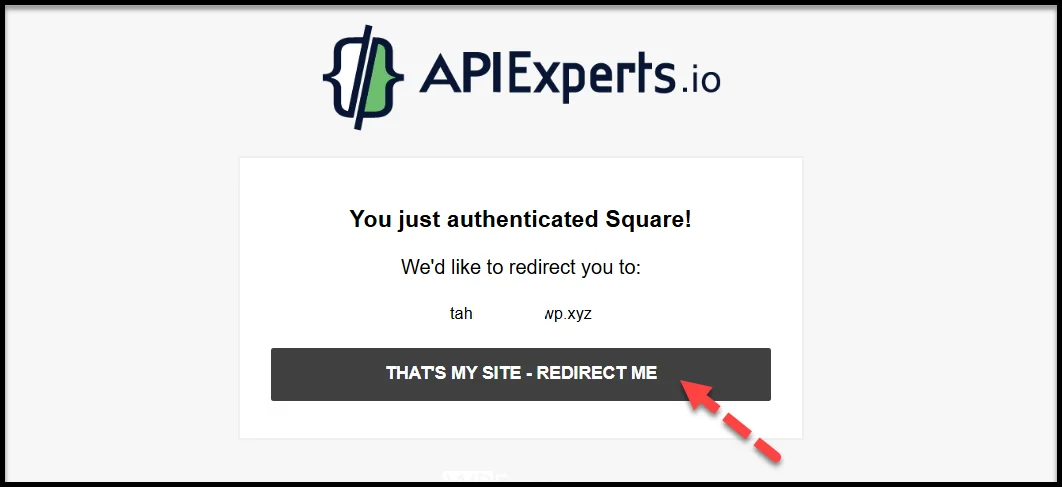
- You’ll now be taken back to WP EasyPay Dashboard, where you can select payment options..
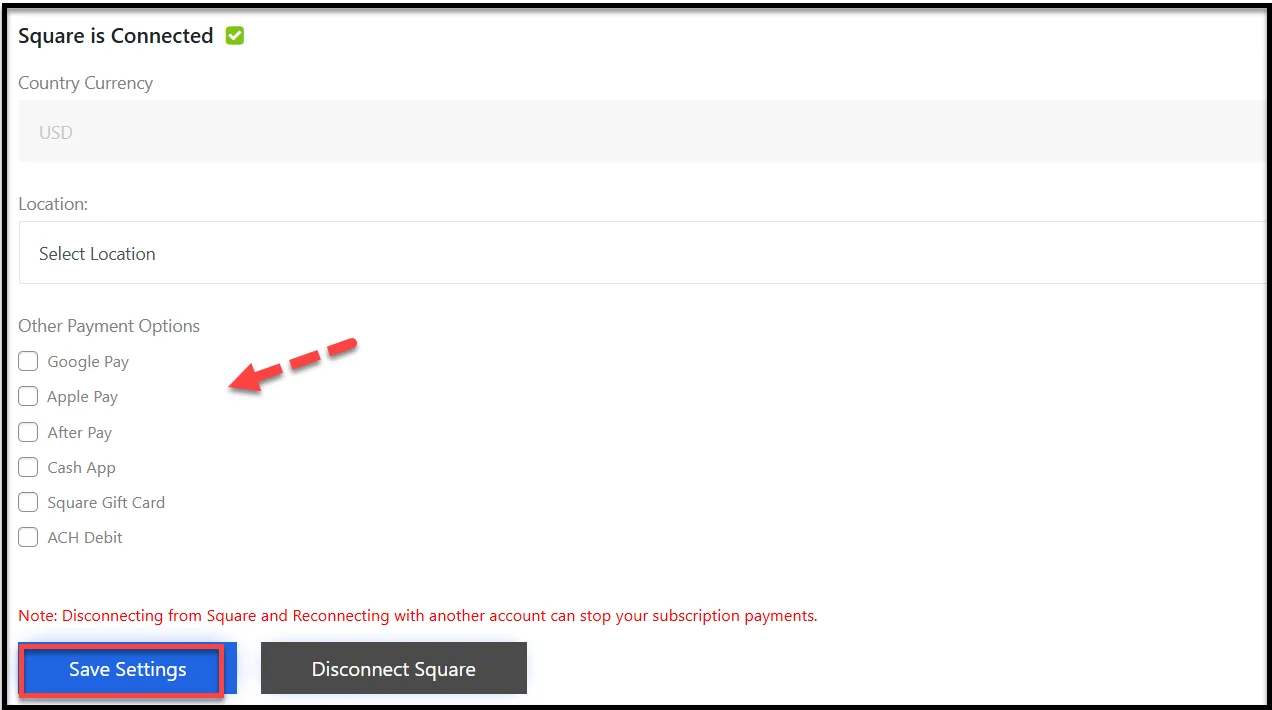
From here, you can enable the specific payment options you’d like to offer: credit cards, Apple Pay, Google Pay, or recurring payments. This gives your donors the freedom to donate in the way that suits them best.
Step 3: Create a Donation Form in WP EasyPay
Now that WP EasyPay is connected to Square, it’s time to create your first donation form. This is where you’ll set up how donors interact with your site when making contributions.
Here’s how to build your form:
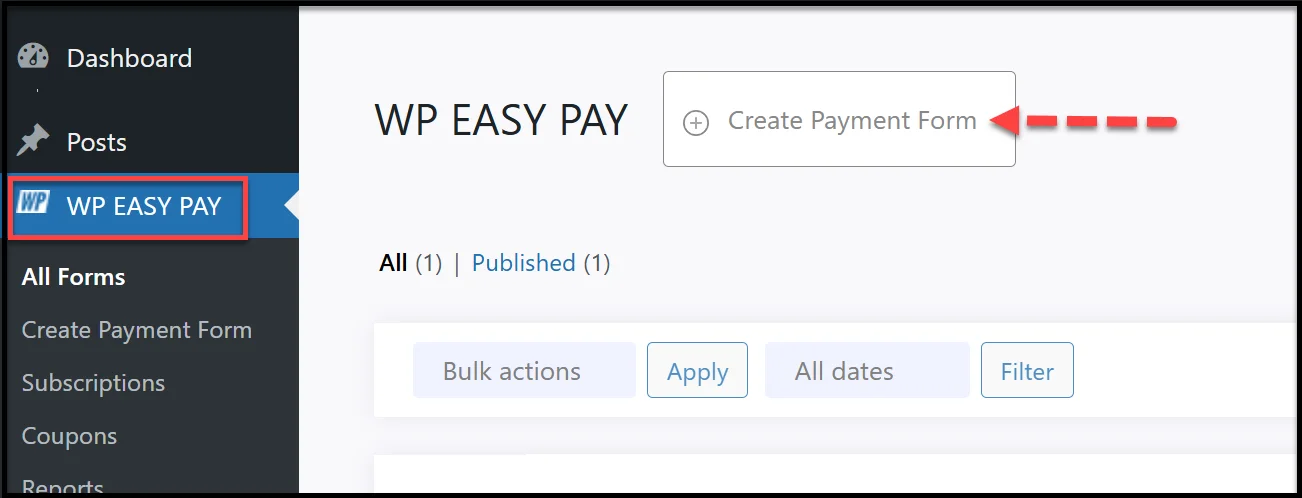
- In your WordPress dashboard, go to WP EasyPay → Create Payment Form.
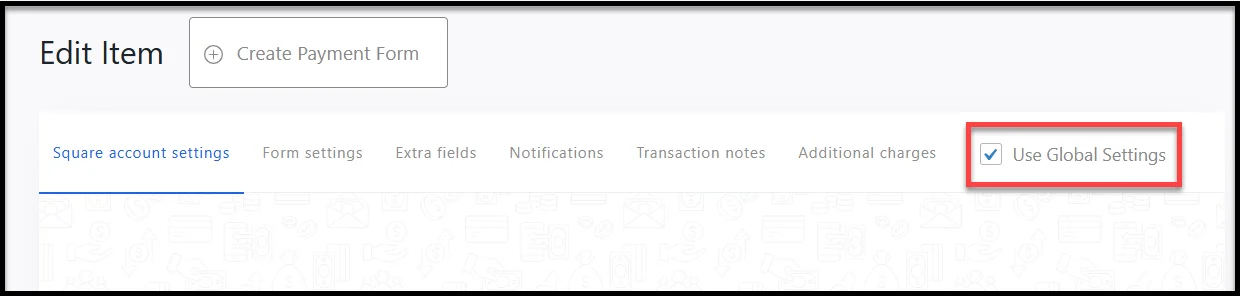
- At the top right, check the Use Global Settings box. This makes sure the form uses the Square connection and payment options that you already set up.
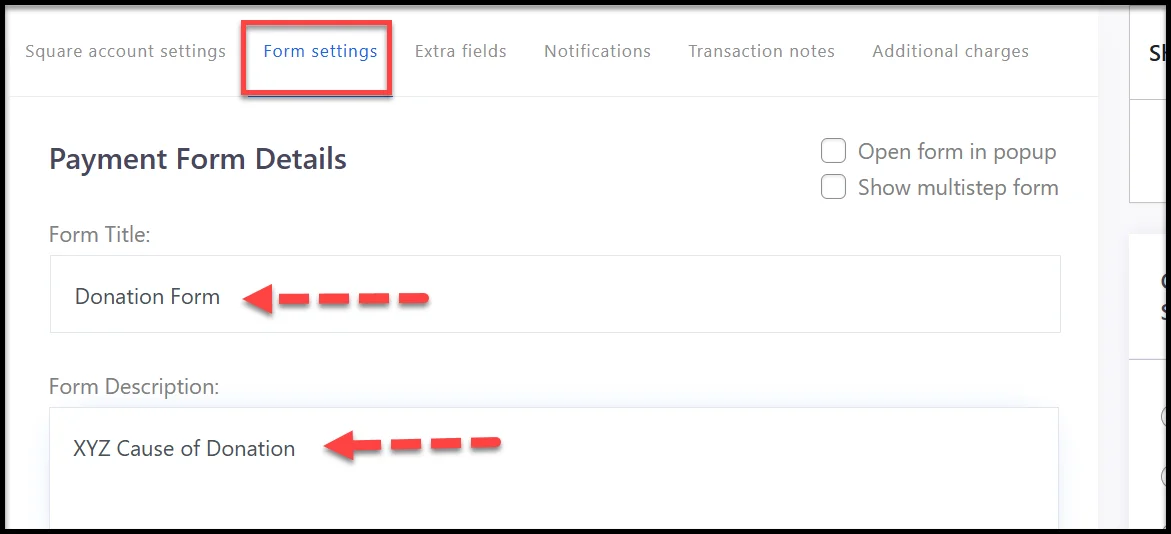
- Switch to the Form Settings tab.
- Add a Form Name and Description so you can easily identify it later.
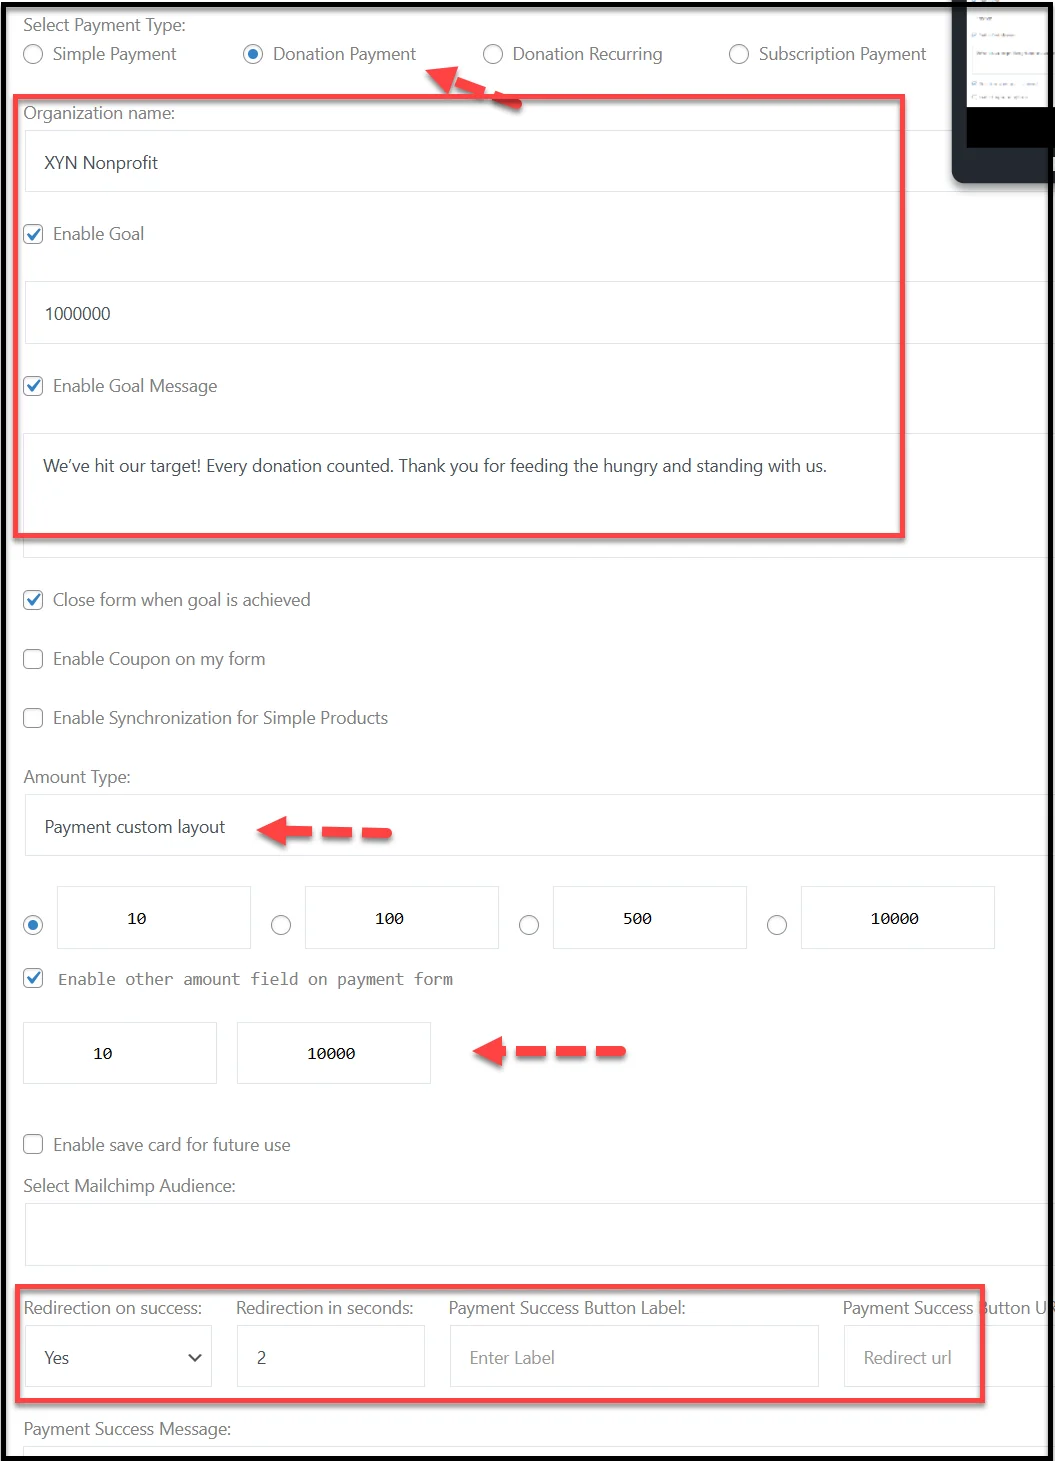
- Next, choose the Donation Payment option under Payment Types.
- Enter your Organization Name.
- Enable a Donation Goal and add a goal message.
- Offer a fixed amount, a custom donation field.
- Add a Payment Success URL (where donors will be redirected after completing the donation).
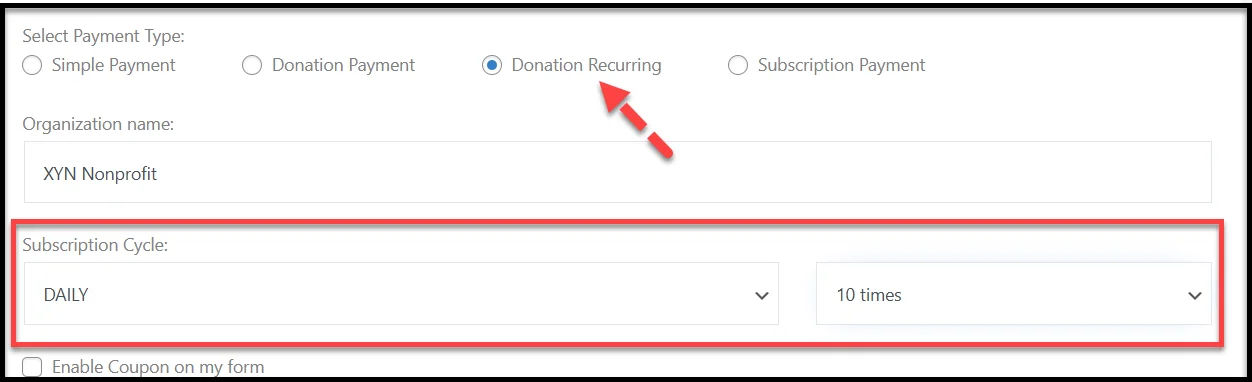
- If you want donors to give on a regular basis, select Donation Recurring as the Payment Type. From here, you can:
- Define the subscription cycle (e.g., daily, weekly, monthly, etc.).
- Allow set or custom amounts.
- Add a Payment Success URL.
This flexibility allows you to create different forms for one-time contributions, recurring donations, or even specific fundraising campaigns.
- Finally, click the Publish button option from the right-hand side menu of the Create Form page.
Step 4: Display Donation Form on Your Website
Creating a donation form is only half the job; you also need to display it where visitors can see and use it. WP EasyPay makes this simple by giving you two options: shortcodes and Gutenberg blocks.
Option 1: Using Shortcodes
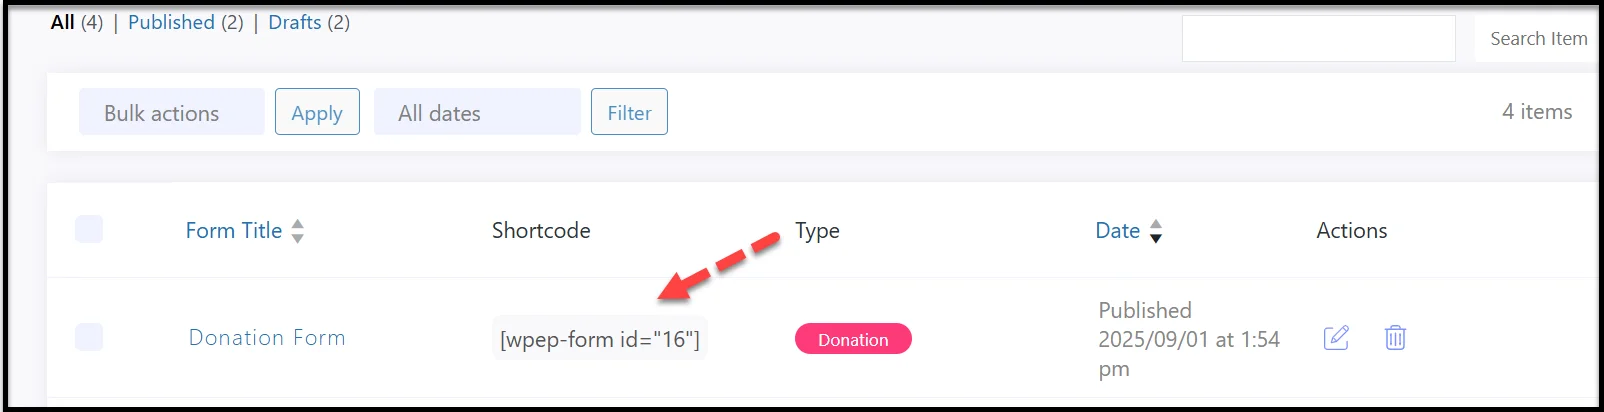
- Go to All Forms in WP EasyPay.
- Copy the shortcode for the donation form you created.
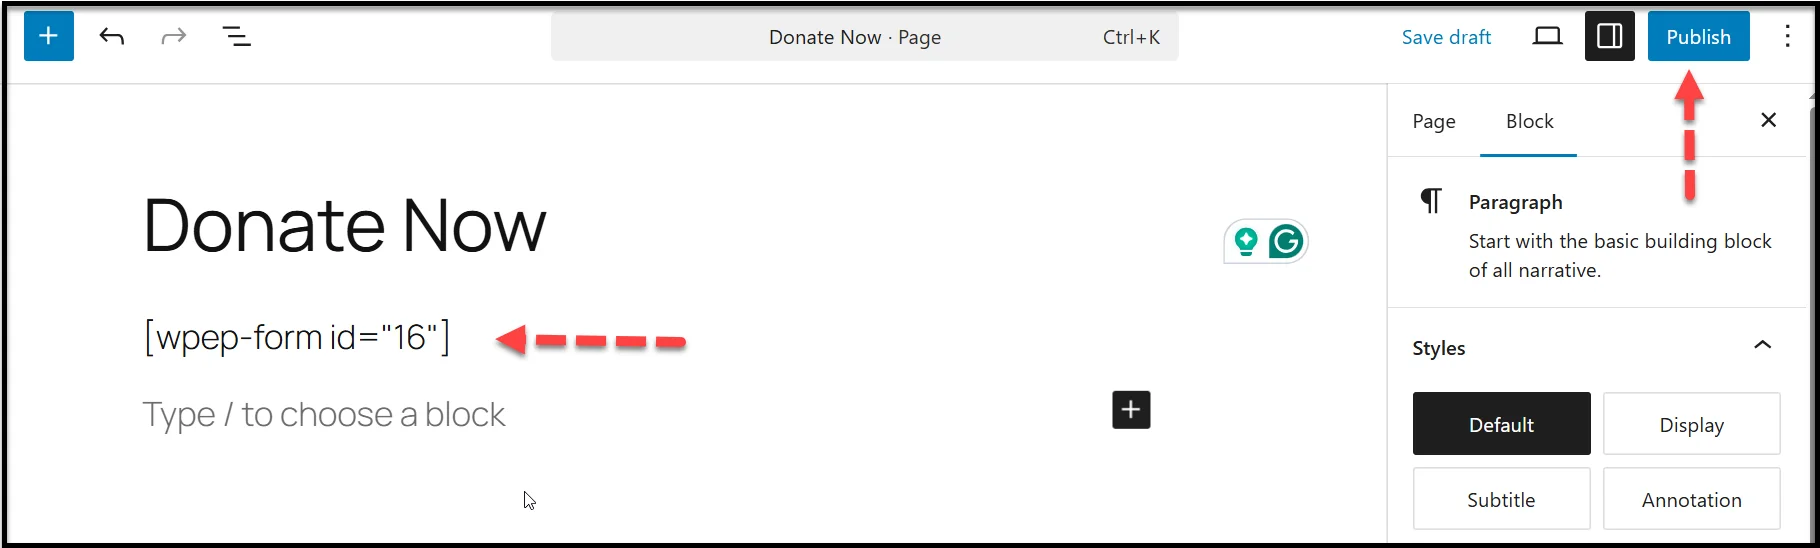
- In WordPress, navigate to Pages → Add Page (or edit an existing page).
- Give your page a title, such as “Donate Now”.
- Paste the shortcode into the editor where you want the form to appear.
- Click Publish.
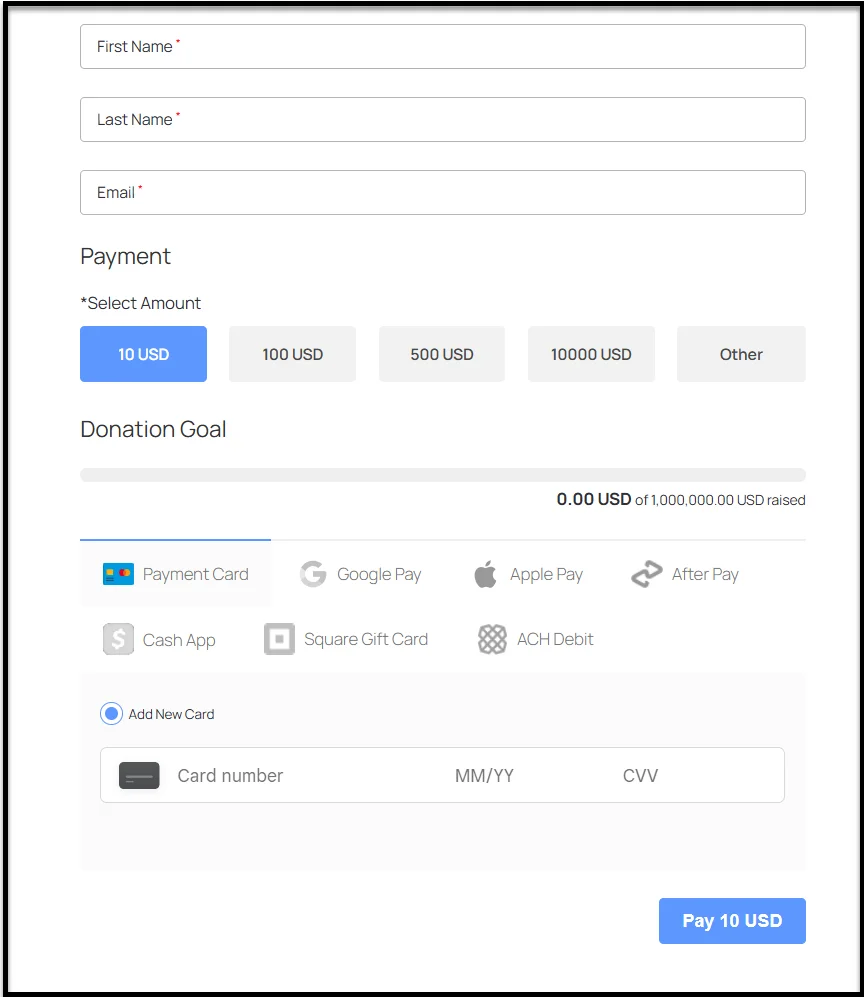
When you visit the page on the frontend, your donation form will be ready to use. Depending on your settings, it can appear directly on the page or open in a pop-up when donors click a button.
Option 2: Using Gutenberg Block
If you’re using the WordPress block editor (Gutenberg):
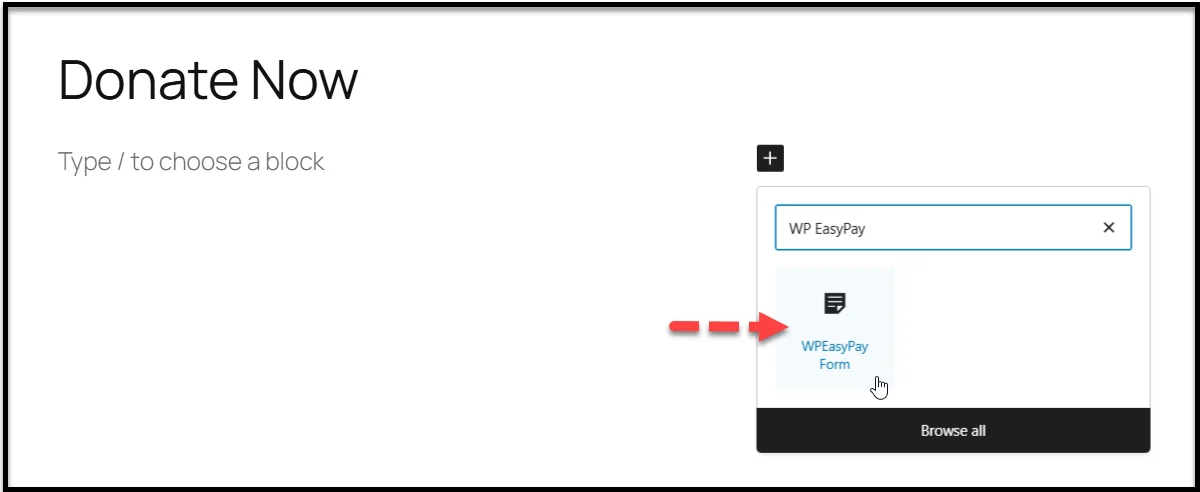
- Edit the page where you want the donation form to appear.
- Click the “+” icon to add a new block.
- Search for WP EasyPay and select it.
- Choose the donation form you created from the dropdown menu.
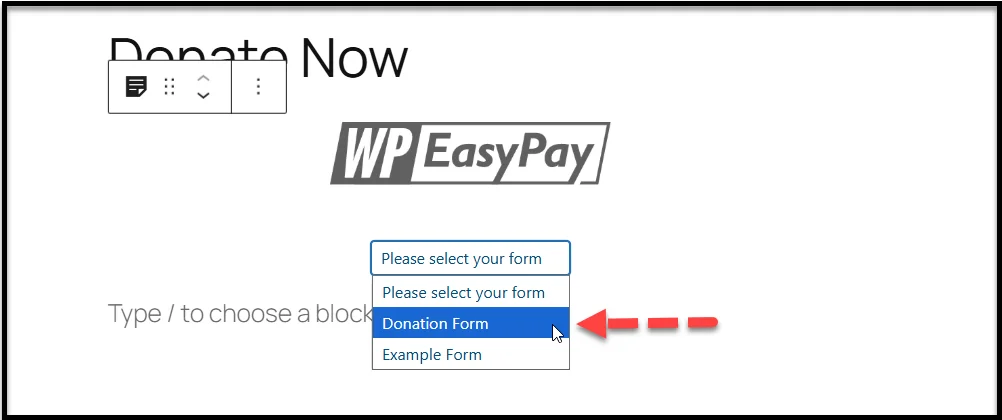
- Update the page to save changes.
The Gutenberg block option is ideal if you want a faster way to add donation forms without copying shortcodes.
That’s it, you are now ready to accept donations on your WordPress website.
🚨 Want to create a payment form? Check out our guide on How to Make a Payment Form in WordPress [Step-by-Step]
Tips to Increase Donations on Your WordPress Website
Having a donation form is just the start. To actually grow contributions, you need to make the experience simple, trustworthy, and motivating for donors.
Here are some proven tips:
- Keep the Form Simple
Long or complicated forms discourage giving. Stick to the basics—name, email, amount, and payment method. If you need extra details, add them as optional fields.
- Offer Multiple Payment Options
Not every donor uses the same method. By enabling credit/debit cards, Apple Pay, Google Pay, ACH, and recurring billing, you cover a wider audience and remove barriers to giving.
- Add Recurring Donations
One-time gifts are great, but recurring donations build long-term support. Set up weekly, monthly, or yearly cycles so donors can commit automatically without extra effort.
- Show Social Proof
Adding a donation goal with a progress bar or sharing testimonials from past donors can encourage new supporters to donate. People are more likely to donate when they see others contributing toward a common cause.
- Say Thank You
A personalized thank-you page or email goes a long way. Use WP EasyPay’s customizable notifications to show gratitude immediately after a donation.
- Use a Clear Call to Action
Instead of a bland button like Submit, use action-driven text like Donate Now or Support Our Cause. Minor tweaks like this can significantly improve conversion rates.
By combining these strategies with WP EasyPay’s powerful features, you’ll build stronger relationships with your supporters.
Conclusion – Start Accepting Donations with WP EasyPay
Accepting donations on your WordPress site doesn’t have to be complicated. With WP EasyPay Pro, you can go from installing the plugin to launching a fully functional donation system in just a few steps.
Here’s a quick recap of what we covered:
- Install and activate WP EasyPay Pro.
- Connect it with your Square account.
- Create donation or recurring donation forms.
- Add a fundraising goal with real-time progress tracking.
- Display the form on your website using shortcodes or Gutenberg blocks.
- Test everything, then switch to Live Mode to start collecting real donations.
Whether you’re running a nonprofit, funding a personal project, or supporting a community cause, WP EasyPay gives you the flexibility and reliability to accept contributions securely. Now it’s your turn, set up WP EasyPay today and start collecting donations directly on your WordPress site.
