Struggling to add Square payments in WordPress? Setting it up is easier than you think. In 2026, WordPress powers 42.5% of all websites worldwide, and WooCommerce stores process over $35 billion annually, making secure payment integration essential for growth. With the right payment plugin, you can integrate Square without hiring a developer, even in 2026.
After testing different plugins for setting up Square payments, WP EasyPay stands out as the best and easiest to use. Just a few clicks and you will connect your Square account, create and publish a payment form, and Voila, you are ready to collect Square payments.
In this guide, we will show you how to easily set up Square payments independently and troubleshoot some common issues.
What is Square Payments?
Everything becomes easier to set up once you understand what Square is. Square is a payment gateway, similar to PayPal and Cash App, designed to simplify online and in‑store transactions for both digital and physical businesses.
If you are offering B2B or any services or products through WordPress, Square enables you to collect payments without complexity.
Here’s why Square stands out among its competitors:
- POS Integration: Square connects with point‑of‑sale systems, so your in‑store (physical) and online sales stay perfectly in sync.
- Online Payments: Accept credit cards, debit cards, and even digital wallets directly from your WordPress site via payment forms.
- Recurring Billing: Perfect for memberships, subscriptions, or service packages, Square supports recurring payments.
These capabilities have helped Square earn a reputation as one of the most trusted solutions for small businesses and eCommerce sites worldwide. It’s reliable, secure, and built to grow with your business. If you’re comparing Square vs PayPal, Square offers stronger POS integration, and unlike Stripe, it’s often easier for beginners to set up. That makes Square the perfect choice.
Square Payments Setup: Requirements and Installation Steps
We’ve broken the process into two clear parts: pre‑requisites and setup steps. This way, you’ll know exactly what to prepare before diving in. And if you’ve already handled the pre‑requisites, you can skip straight to the 2nd step and start setting up Square payments right away.
Prerequisites
- WordPress site (updated version) with SSL certificate (for trust and compliance).
- Square account.
- Square Payment Plugin – WP EasyPay.
Start with this step only if WP EasyPay is not installed; otherwise, go to Step 2.
Step 1: Install and Activate WP EasyPay
- Log in to your WordPress dashboard.
- Go to Plugins → Add Plugin.
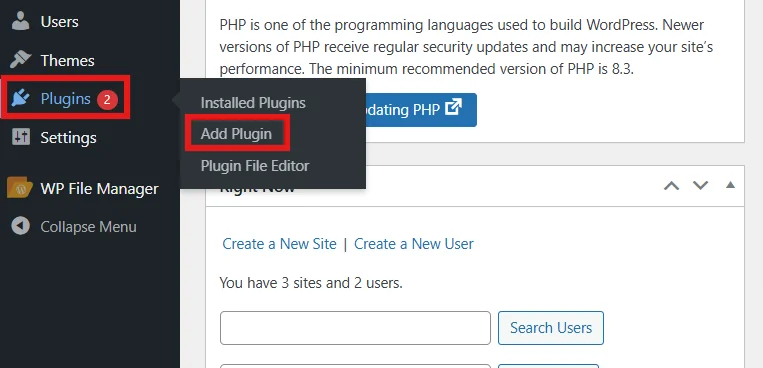
- In the right search bar, type “WP EasyPay”.
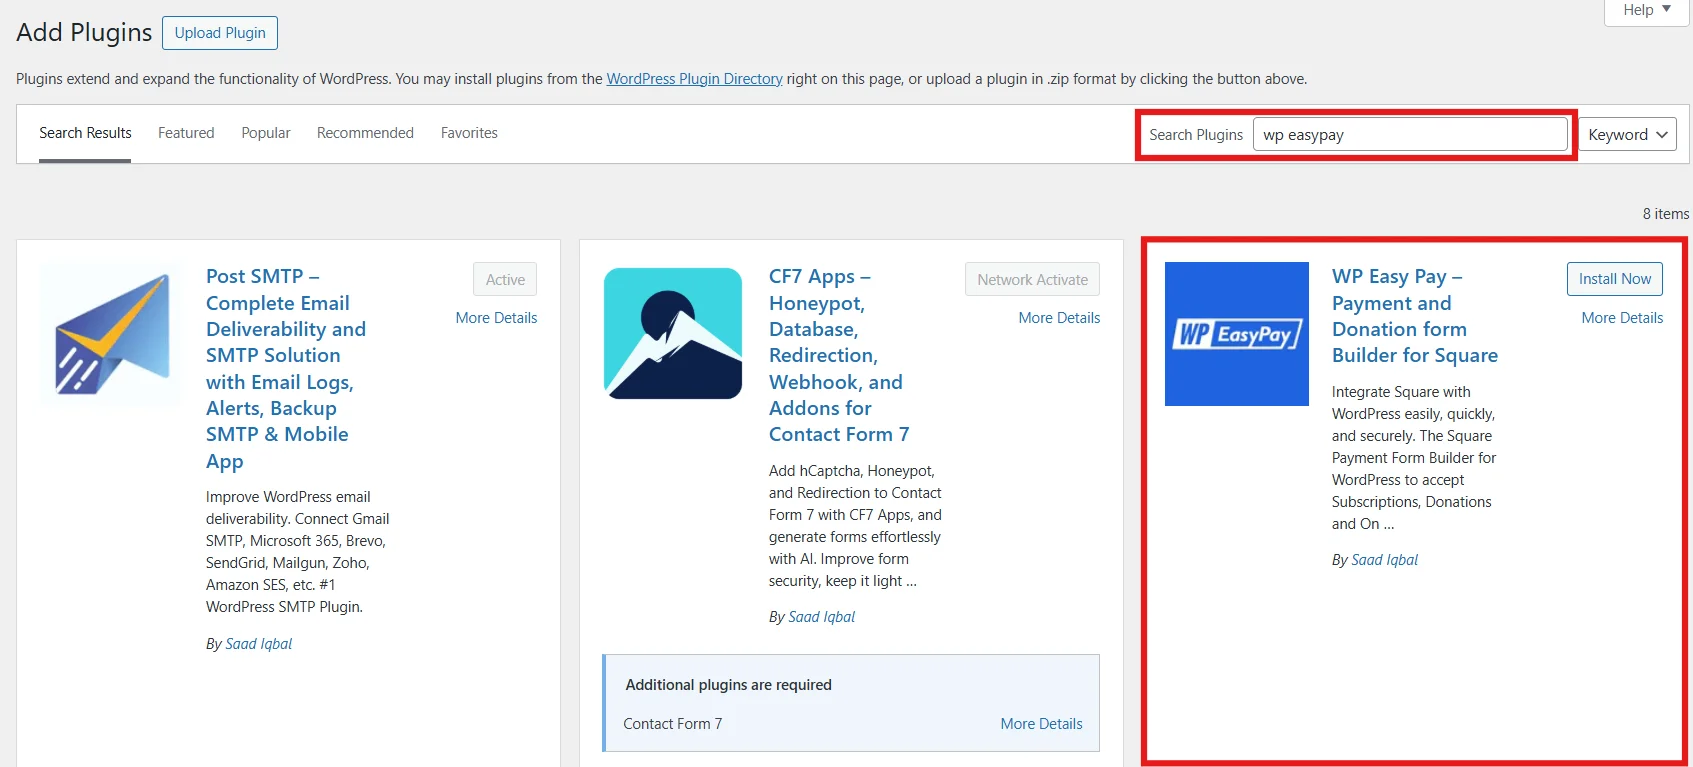
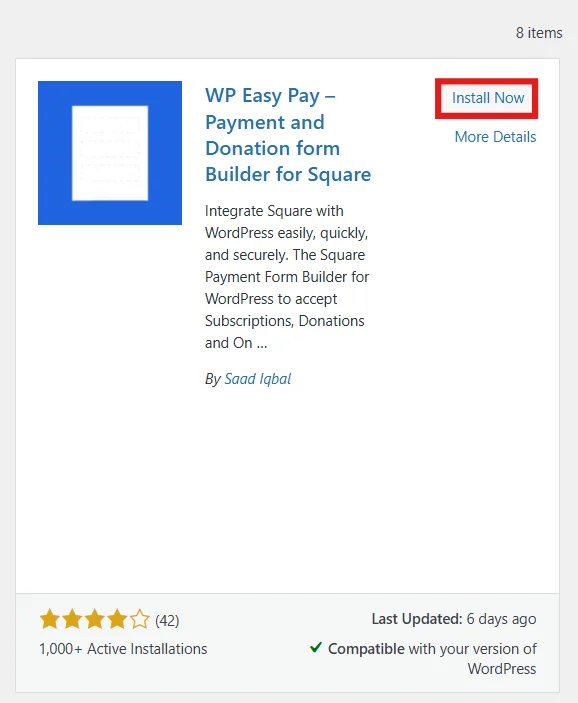
- Find the correct plugin, click Install Now, and after a few seconds, click Activate.
You have successfully activated the WP EasyPay Free plugin.
Note: The free version supports basic Square credit and debit card payments, while WP EasyPay Pro unlocks advanced features, including Apple Pay, Google Pay, Cash App, and recurring billing.
Here’s how you can install the WP EasyPay Pro/Business.
- In a new tab, go to the WP EasyPay Pricing page, and purchase any plan of your choice – we recommend Business for the best features.
- You will receive an email containing a ZIP file and your activation license key.
- Log in to your WordPress dashboard and go to Plugins → Add Plugin → Upload Plugin.
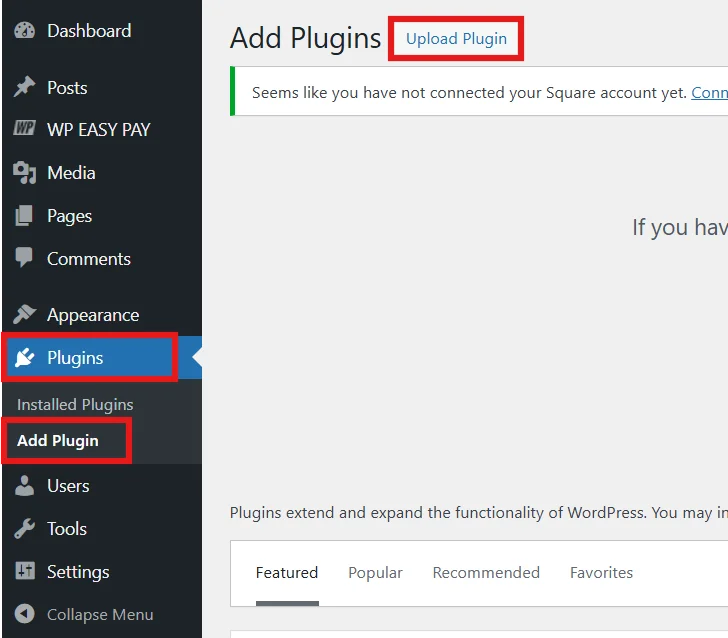
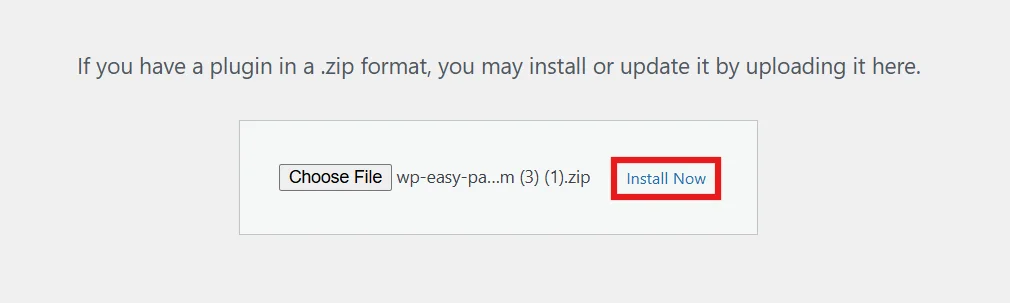
- Click on Choose File, select the correct ZIP file, and click Install Now.
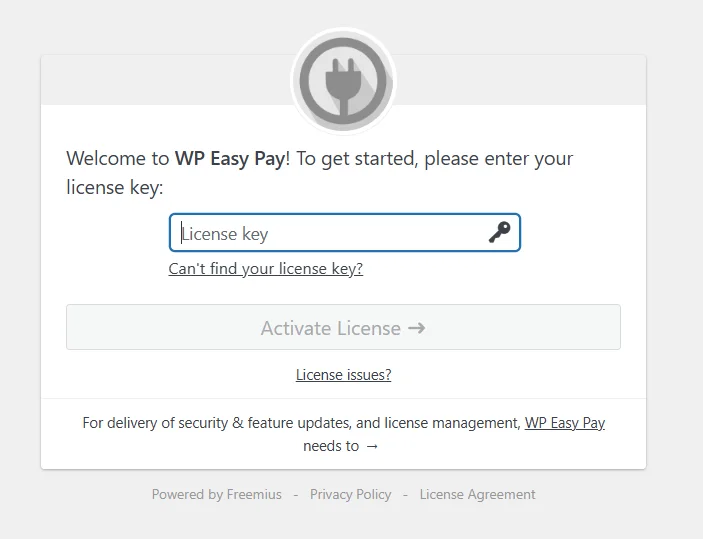
- You will be redirected to the Activation page. Click on Activate Plugin.

- Enter or paste your license key and click on Activate License.
Congratulations! You have successfully installed WP EasyPay Business.
Now, let’s move to the main steps to set up Square payments in WordPress.
Step 2: Connect Your Square Account to WordPress
- Once activated, you will be redirected to the WP EasyPay dashboard.
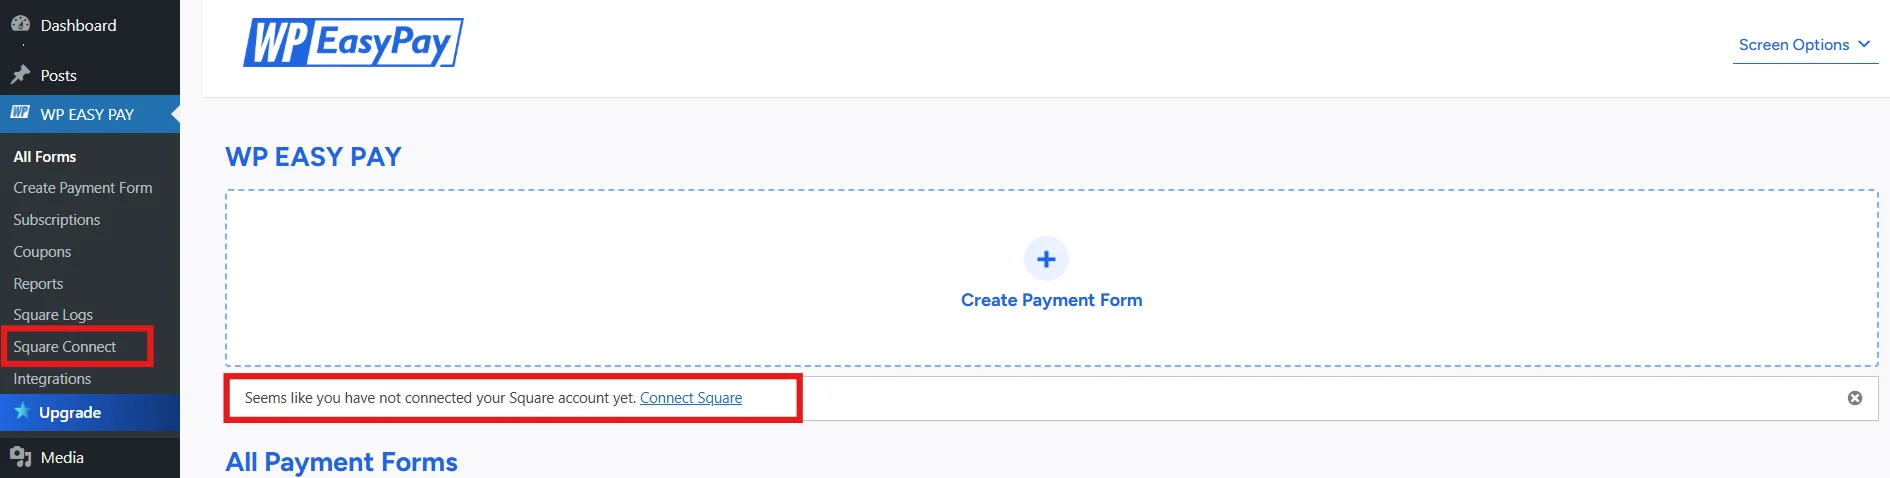
- You will find a notification there with a link to Connect Square. You can either click on “Connect Square” OR on the WordPress dashboard, go to WP Easypay → Square Connect. We suggest you go through the WordPress dashboard route.
- If you click the Connect Square link directly, you will be redirected to the Square login page. Else, on the Square Connect through WordPress sidebar, you will be redirected to another page.
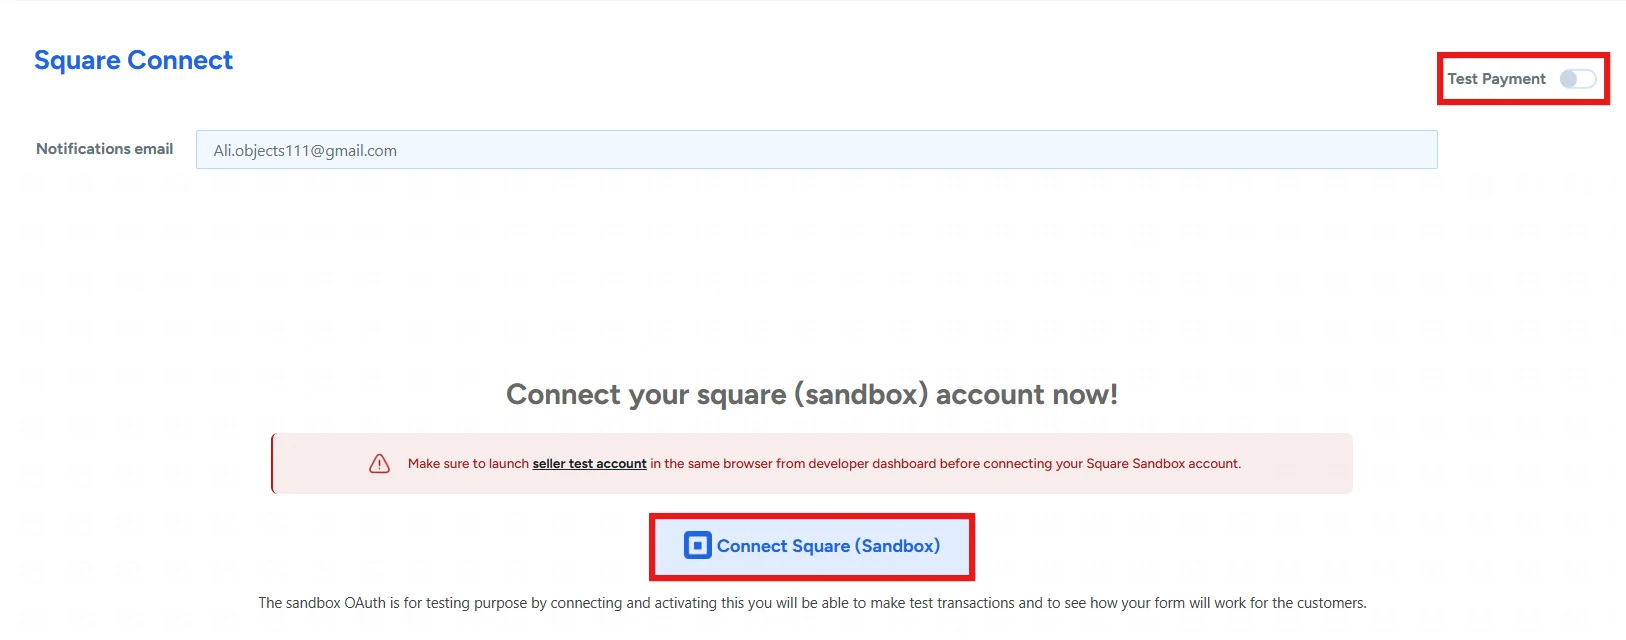
- Click on Connect Square to connect your WordPress site to Square as your payment processor. You can opt for Sandbox for testing or Production for live transactions.
- Upon redirection to the official Square page, enter your Square account credentials and click Sign In.
- Click Allow to securely connect Square with your WordPress site. This authentication ensures safe payment processing and compliance with PCI standards.
- Once you’ve authenticated Square, you have to click “That’s My Site – Redirect Me” to return to your WordPress site’s dashboard.
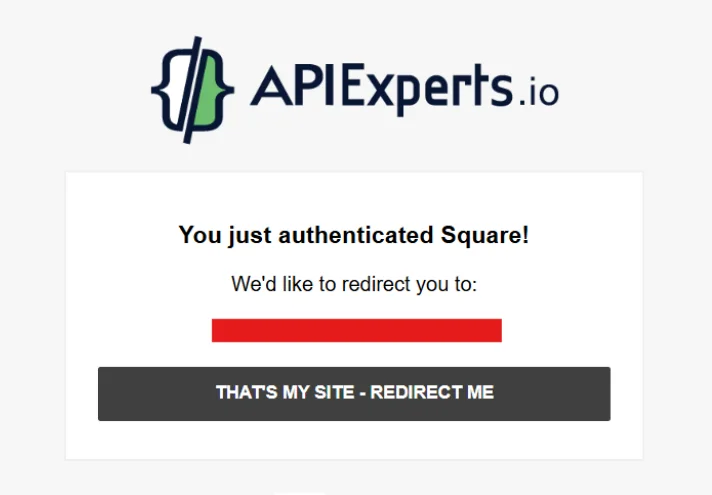
Your Square account has established a connection with your WordPress site.
Step 3: Create Your First Square Payment Form
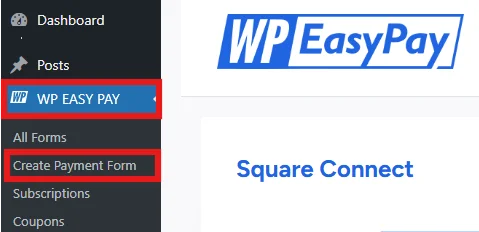
- Go to WP EasyPay → Create Payment Form.
- Enter any form title and its description based on your product/service. Also, select a payment type.
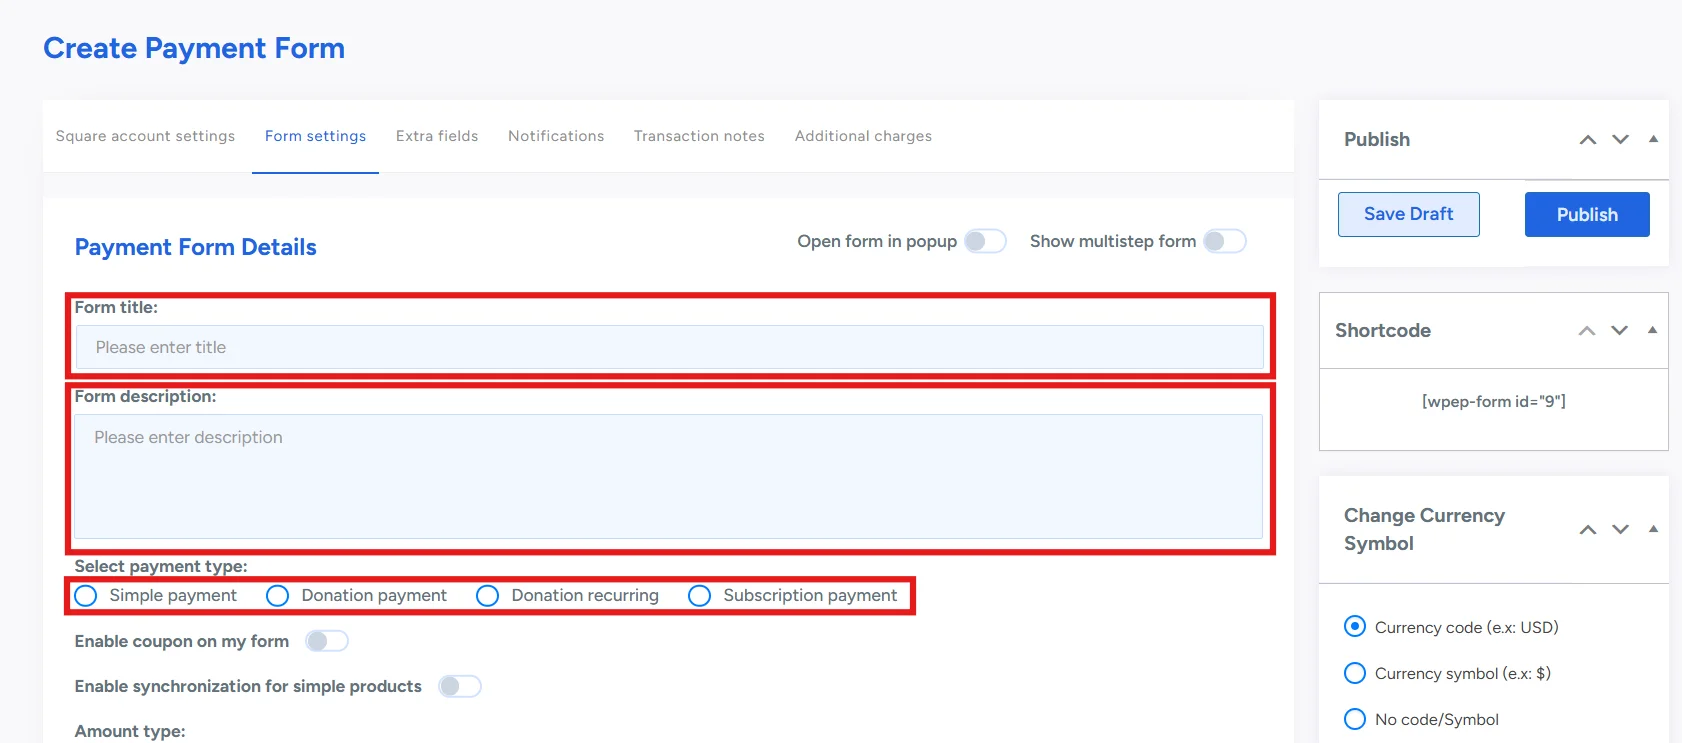
There are 4 different payment types to choose from:
- Simple Payment: A one-time payment option for products or services.
- Donation Payment: A one-time, flexible payment where users can contribute any amount.
- Donation Recurring: A recurring donation setup where users contribute automatically on a scheduled basis.
- Subscription Payment: A recurring payment model for ongoing access to products or services.
Usually, for products or services, it’s either a simple payment or a subscription payment. If you want to scale recurring revenue, read how to grow your business using WordPress subscription payments.
- Pick an Amount type – a layout of your choice, and enter the Product/Service charges. You can add multiple prices at once.
- You can enable redirection on success and enter your own success message.
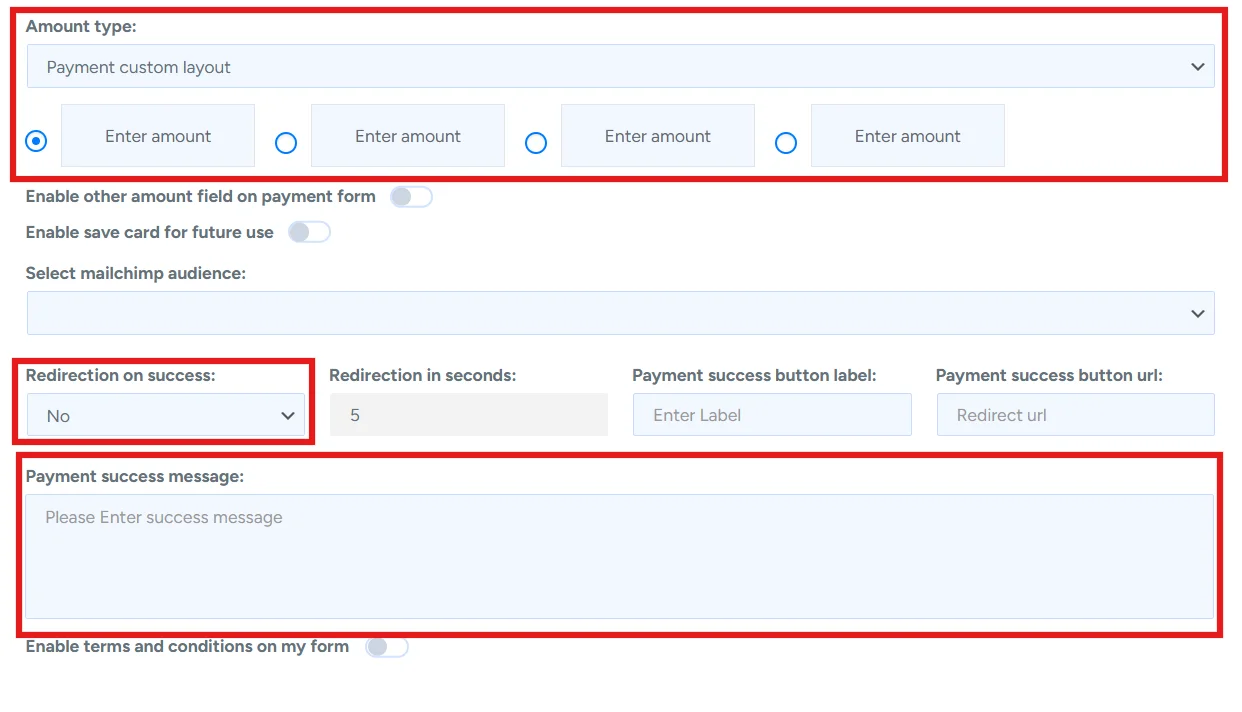
You have successfully created your first Square payment form. This form allows customers to make secure transactions directly on your WordPress site.
Before publishing, it’s important to get the most out of this plugin. Follow the next steps to select the desired payment methods and customize your form.
Step 4: Select Your Desired Payment Methods
- Go to the Square Account Settings tab.
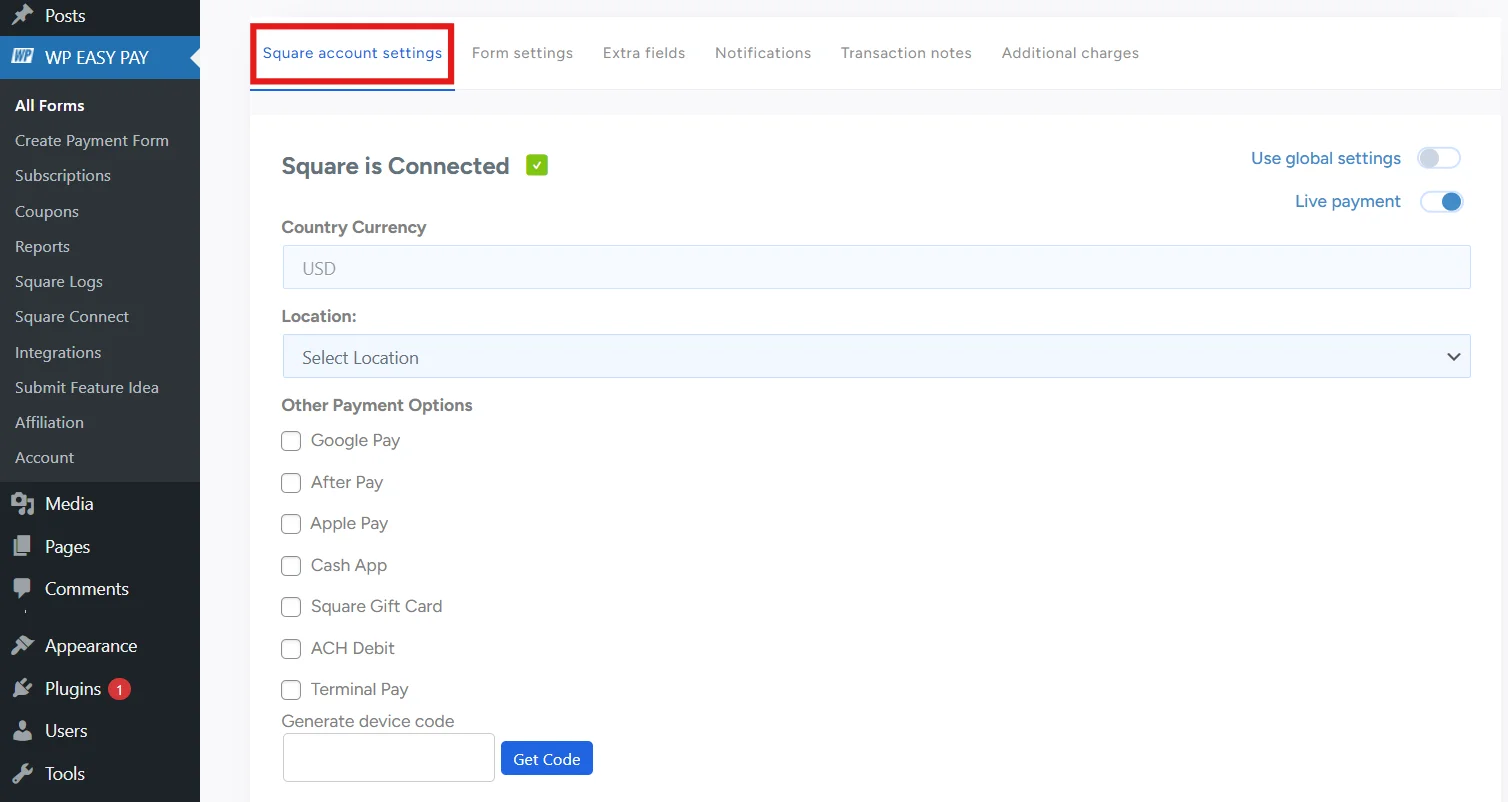
- Select your store location.
- Under other payment options, tick your desired payment methods.
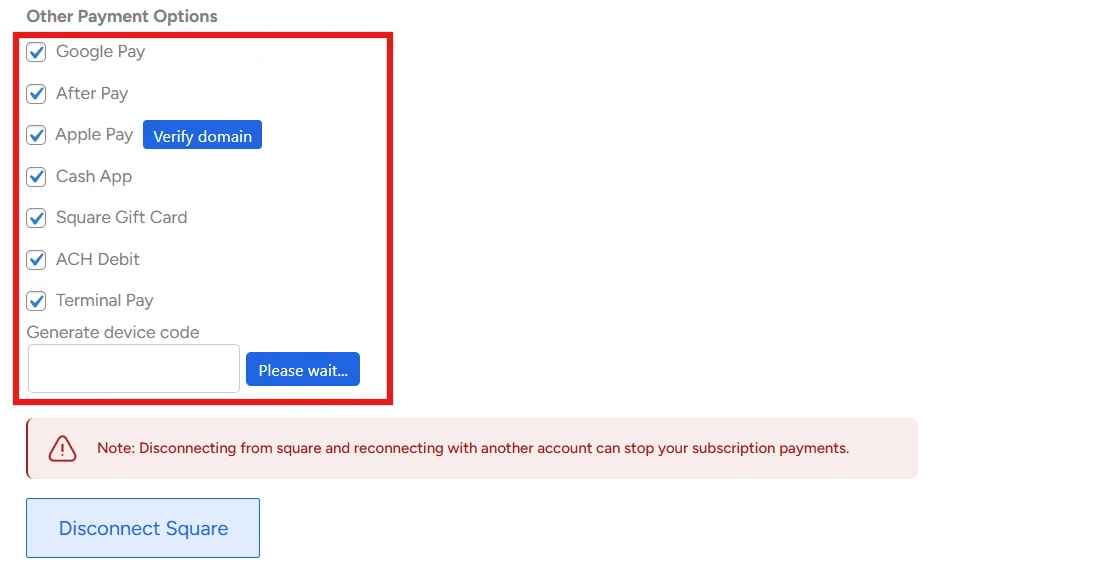
For Apple Pay and Terminal Pay, it is a bit different than the other payment methods. For Apple Pay, you have to Verify Domain, and for Terminal Pay, you have to generate a device code and link it with the POS device. Here is the tutorial for setting up Square Terminal.
- Once you have selected your desired payment methods, its time to move to the next step.
Step 5: Customize Your Payment Form
- Go to the Extra Fields tab.
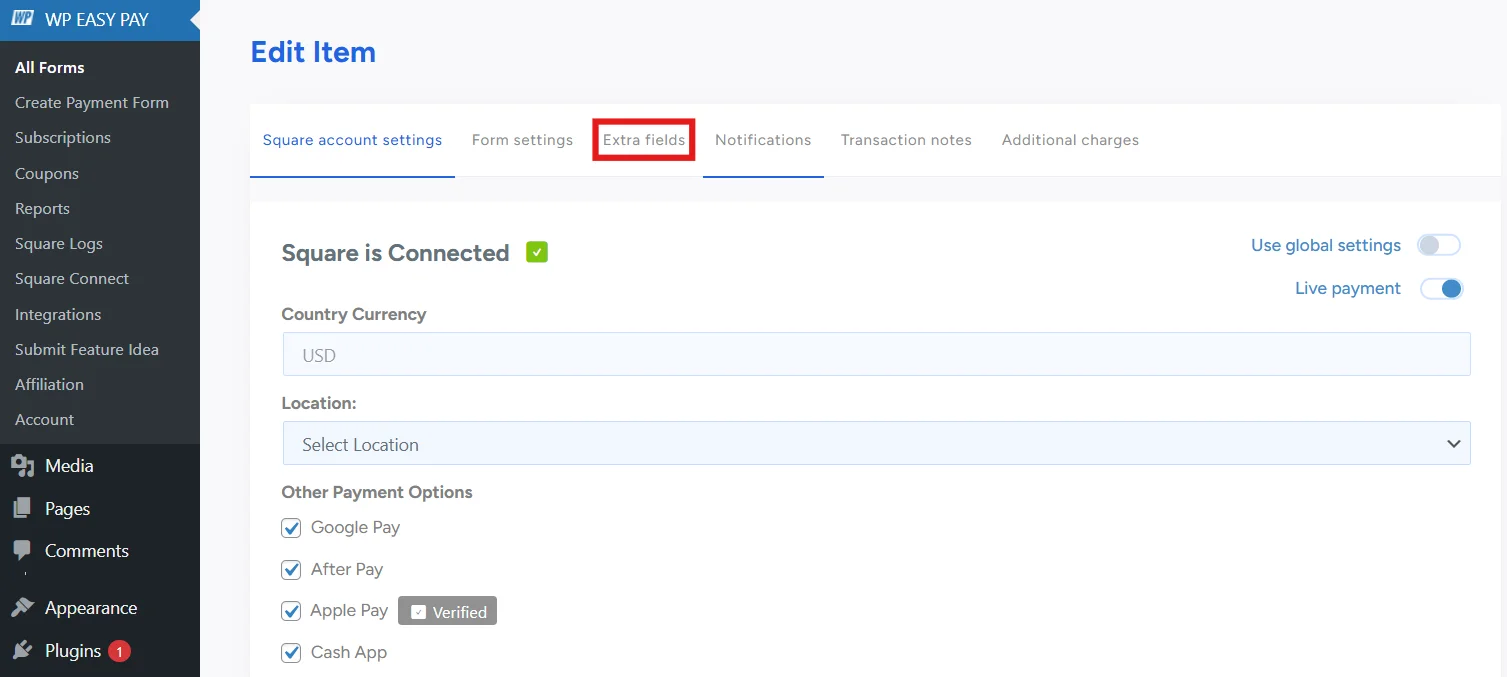
- You can easily drag and drop any of the respective fields to your form.
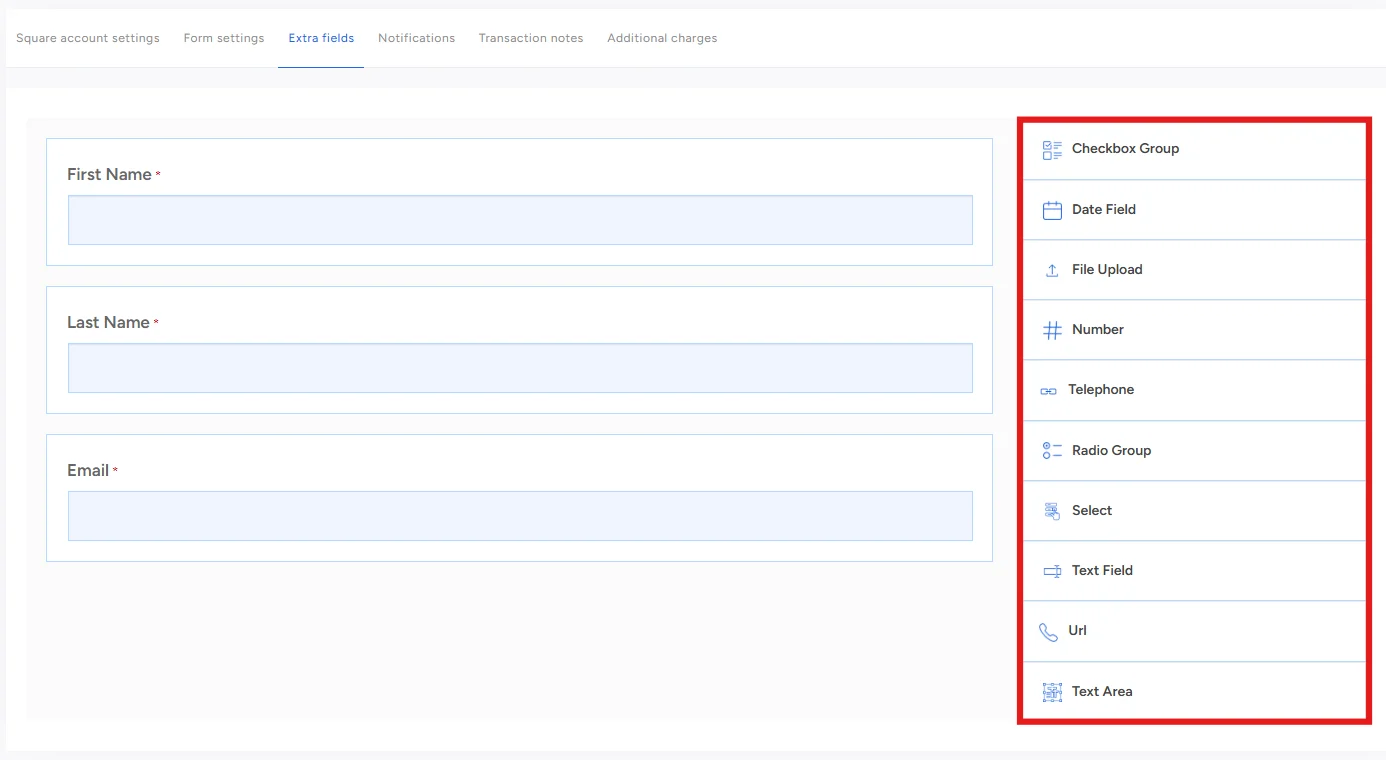
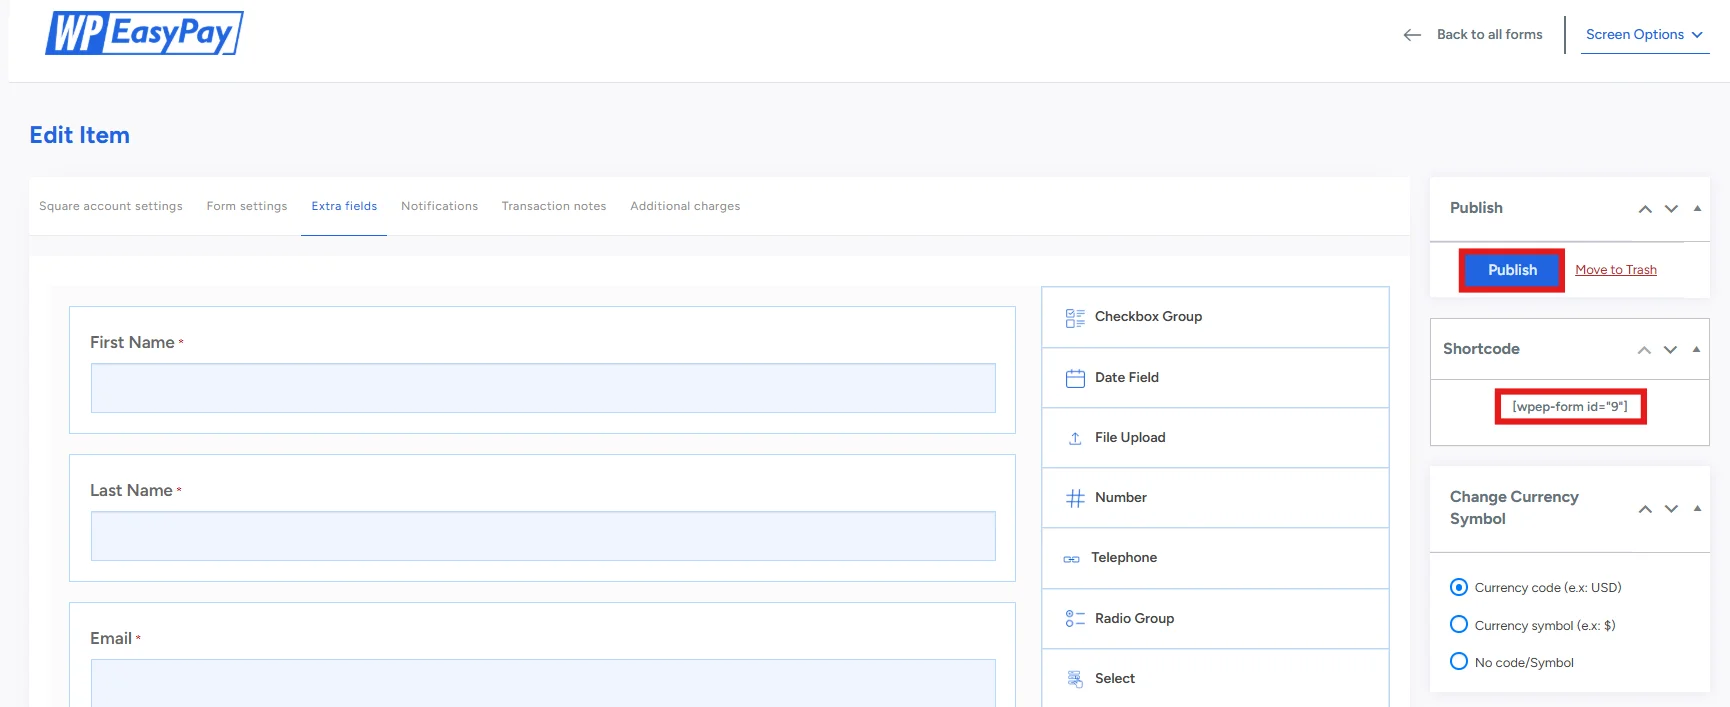
- Once you have finalized your fields, it’s time to publish the form.
- Click Publish on the right-hand side, then copy your shortcode for later use.
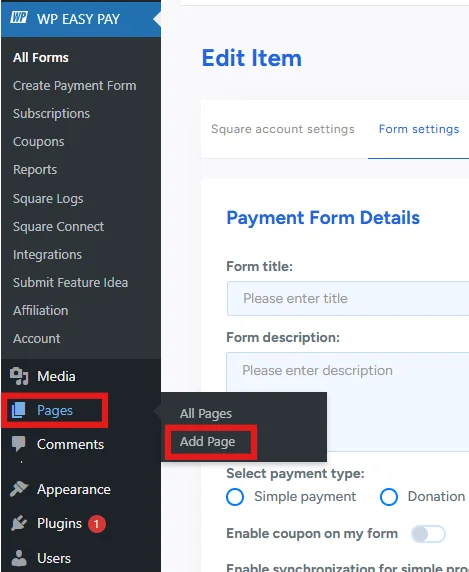
Step 6: Embed Your Payment Form
Upon successfully publishing your payment form and copying the short code.
- Head to Pages → Add Page.
- Write any desired title for your page.

- Either paste your shortcode into a new block, or enter /wpeasypay, then select your form from the dropdown menu.
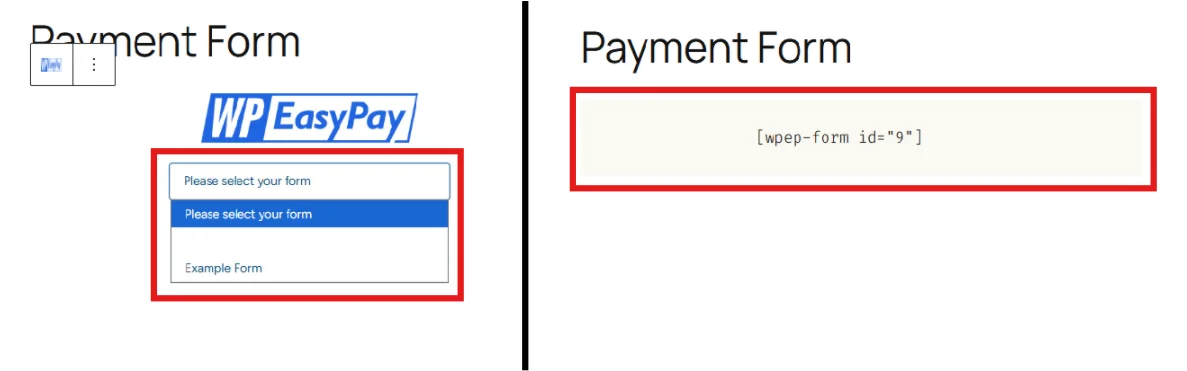
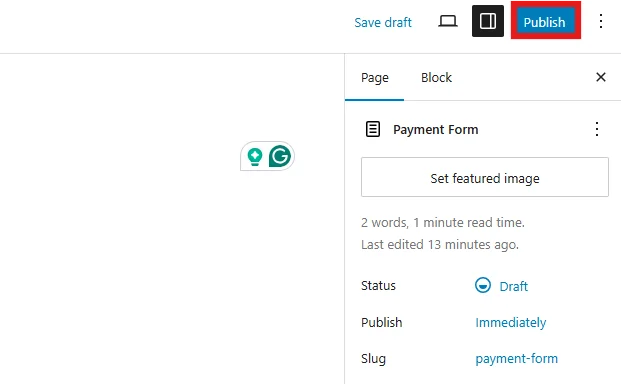
- Now click on Publish on the top-right.
Congratulations! You have successfully embedded the payment form, and it is live on your WordPress site.
Always test your Square payment form in sandbox mode prior to launching it live.
Troubleshooting Common Issues
Even with a smooth setup, you might run into a few hiccups when using Square with WordPress. Here’s how to handle the most common ones:
- Failed Transactions: If payments fail, confirm your WordPress site runs on HTTPS with a valid SSL certificate. Also, verify your Square plugin settings and ensure you’re using the correct mode (Sandbox vs. Production).
- API Errors: These usually happen if your Square account isn’t properly connected. Re‑authenticate your API keys through the plugin settings and make sure they haven’t expired.
- Plugin Conflicts: Other plugins sometimes interfere with Square. Try deactivating plugins one by one to identify the culprit, or ensure everything is updated to the latest version.
- Quick Fix Approach: Clear your cache, update your plugins, and re‑test in Sandbox mode. Most issues resolve with these simple steps.
Best Practices for Square + WordPress Integration
To keep your payment system running smoothly and securely, follow these best practices:
- Always run the latest version of WP EasyPay (or whichever Square plugin you’re using) to avoid bugs and security risks.
- Run a test transaction periodically to ensure everything works as expected. This helps catch issues before your customers do.
- A slow or clunky checkout process can reduce conversions and increase cart abandonment. Optimize your WordPress site with caching, a lightweight theme, and mobile‑friendly design to maximize sales.
- Enable two‑factor authentication on your Square account, keep backups of your WordPress site, and make sure your SSL certificate is always active. For more insights, check 10 Best Practices for Safe and Secure Online Payment Processing.
By following these best practices, you’ll ensure your Square + WordPress integration stays reliable, secure, and customer‑friendly.
Ready to Receive Square Payments in WordPress?
With Square successfully integrated into your WordPress site, you’re now ready to accept secure and seamless payments online. From simple one-time payments to recurring subscriptions, you have the flexibility to align with your business model and customers’ needs.
A well-optimized payment system improves reliability and builds confidence with your users. When you’re ready to go beyond the basics, premium features can help you unlock greater control and better functionalities.
Upgrade to WP EasyPay Premium today and start accepting Square payments without limitations.
FAQs
Can I customize the Square checkout form in WordPress?
Yes. Most Square plugins let you adjust the checkout form to match your site’s branding. You can change colors, add or remove fields, and even style the button text to make the payment experience feel seamless for your customers.
How secure is Square when used with WordPress?
Square is PCI‑compliant and uses strong encryption to protect payment data. On your WordPress site, you’ll also need an SSL certificate to ensure all transactions are processed safely over HTTPS. Together, these measures keep customer information secure.
Can I manage transactions directly from WordPress?
Definitely. Plugins like WP EasyPay sync payments with your WordPress dashboard. You can view transaction history, issue refunds, and keep track of sales without logging into Square separately.
Does Square support recurring payments in WordPress?
Yes. If you run a subscription service or membership site, Square supports recurring billing. Plugins such as WP EasyPay make it easy to set up automatic payments for your customers.
Do I need an SSL certificate to use Square on WordPress?
Yes, it’s mandatory. Square requires your site to run on HTTPS. Without SSL, you won’t be able to process live transactions. Most hosting providers offer free SSL certificates, so enabling one is quick and easy.
Is Square available in all countries?
Not yet. Square is currently available in select regions, including the United States, Canada, Australia, Japan, and the United Kingdom. If you’re outside these areas, check Square’s official site for updates on availability.
