

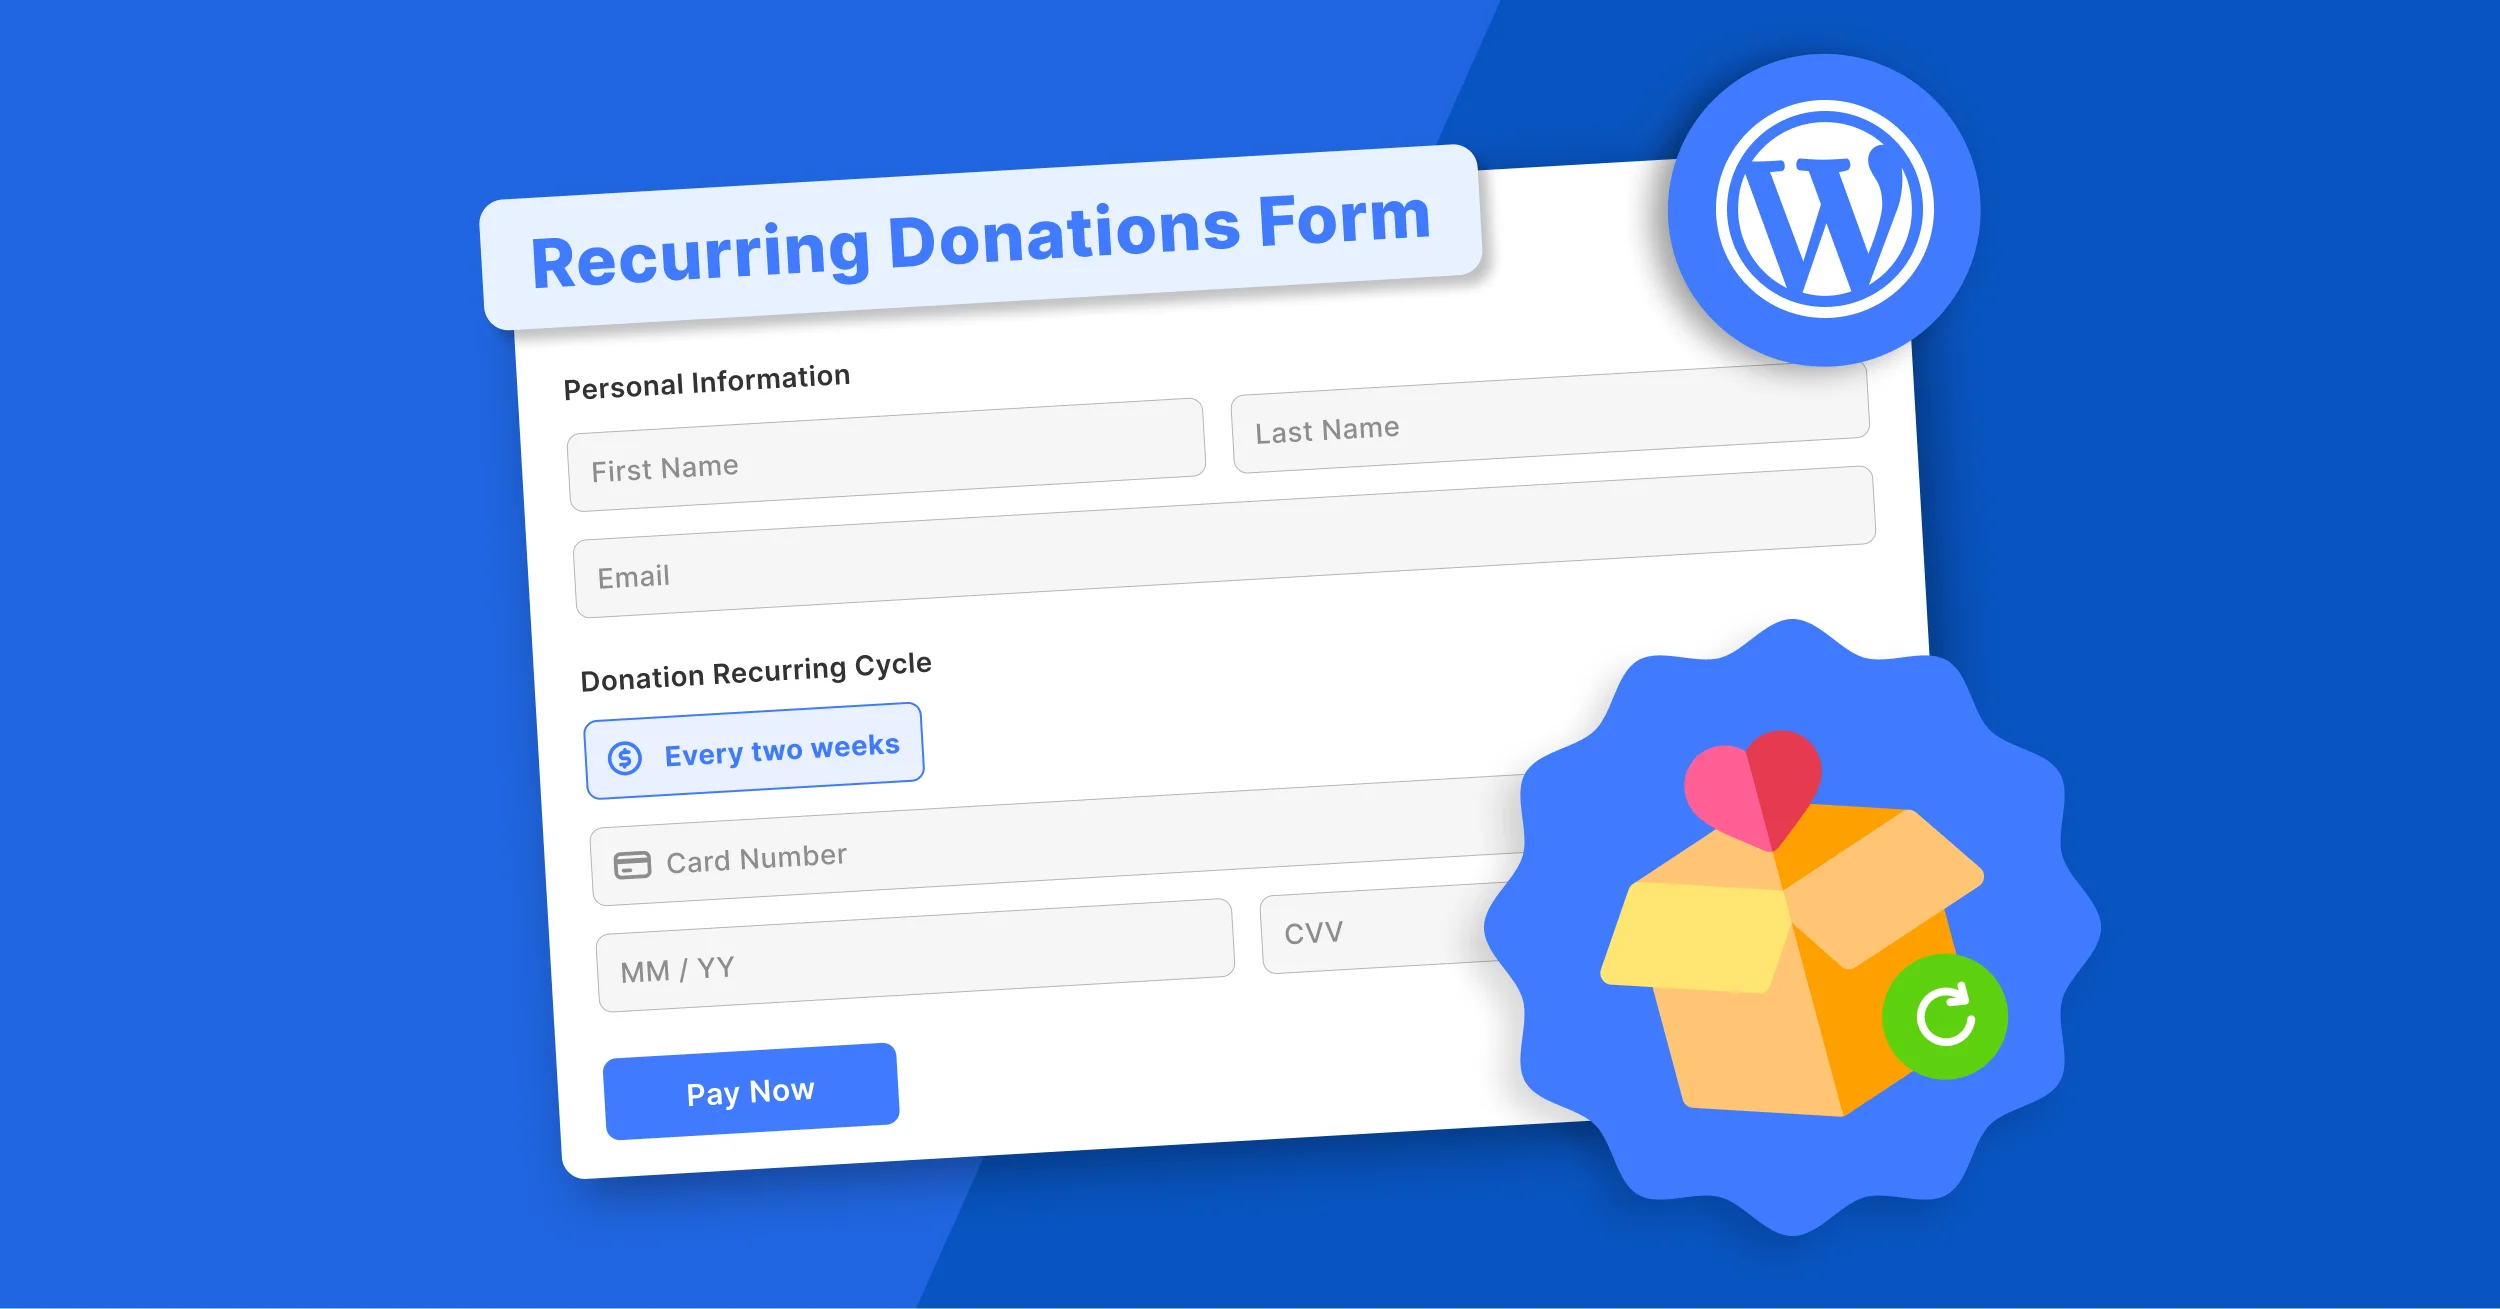
Most nonprofits and fundraising websites accept one-time donations, but they rarely offer a recurring giving option. A donor gives, leaves, and may never return. That’s the problem a recurring donation form solves.
Instead of relying on unpredictable one-time gifts, a WordPress recurring donation form automatically charges donors on a schedule they choose—monthly, quarterly, or annually. No manual follow-ups. No chasing people down.
In this step-by-step tutorial, you’ll learn how to create a recurring donation form in WordPress using WP EasyPay and Square, from installation to publishing your live donation page.
What Is a Recurring Donation Form in WordPress (And Why It Increases Donor Retention)?
A recurring donation form is an online payment form embedded in your WordPress website that securely collects donor details and automatically processes recurring payments on a fixed schedule.
Basic payment forms don’t have this feature. A proper recurring donation form handles:
- Scheduled billing – weekly, monthly, quarterly, or annual charges without manual intervention
- Donor data collection – name, email, giving amount, and billing preference in one place
- Automated receipts – instant confirmation emails after each successful charge
- Subscription management – allowing donors (and you) to pause, update, or cancel giving plans
Because a recurring donation form processes automatic payments, it must integrate with a secure payment gateway (like Square), follow PCI compliance standards, and support subscription management.
What You Need Before You Start
Before building your form, make sure the following are in place:
- A self-hosted WordPress website
- An active Square account (for recurring payment processing)
- WP EasyPay Pro (recurring billing enabled)
- SSL certificate (required for secure online payments)
- Clear donation campaign messaging
Why is WP EasyPay the Way to Go for Recurring Donation Forms?
Most WordPress payment plugins are designed for eCommerce stores—not nonprofit fundraising or recurring donations. WP EasyPay is designed specifically for recurring payments through Square, without WooCommerce or complicated configurations.
Here’s what makes it the right fit:
- Native Square Integration: Connects directly to Square — no third-party bridges, all transactions in one dashboard.
- Built-In Recurring Billing: Configure weekly, monthly, quarterly, or annual recurring donations without custom code or WooCommerce.
- Square Payment Options: Accept Debit/Credit Card, Apple Pay, Google Pay, Cash App, Afterpay, and even ACH Payments.
- Flexible Amount Options: Offer preset amounts, a custom entry field, or both.
- Automated Donor Emails: Instant confirmation on every donation, automatic renewal notifications.
- Subscription Management Dashboard: Track every active, paused, and canceled donation from one screen.
Step-by-Step Process to Create a Recurring Donation Form in WordPress
Step 1: Install and Activate WP EasyPay Business
This WordPress recurring donation form tutorial for beginners is very easy, just follow the steps in order.
- Go to the WP EasyPay pricing page and purchase anyplan of your preference.
- You’ll receive a confirmation email with two things: the plugin ZIP file and your license key. Download both.
- In your WordPress dashboard, navigate to Plugins → Add Plugin → Upload Plugin.
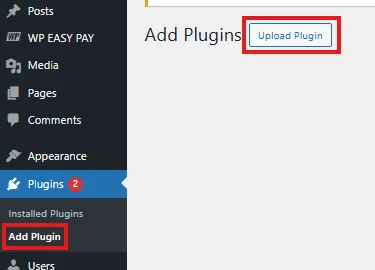
- Click Choose File, select the WP EasyPay Pro ZIP file, and click Install Now.

- Once installed, click Activate Plugin.
- An activation popup will appear. Paste your license key and click ACTIVATE LICENSE.
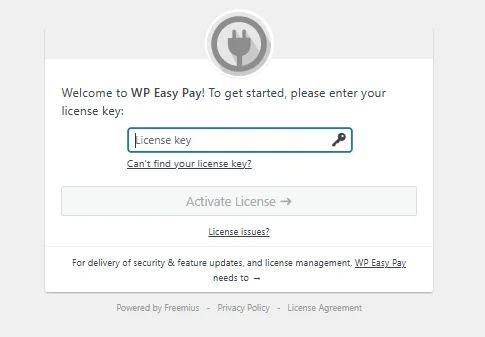
WP EasyPay will now appear as a menu item in your WordPress admin sidebar. All recurring donation features are now unlocked.
Step 2: Connect Your Square Account
Before creating your WordPress recurring donation form, connect your Square account so recurring payments can be processed and deposited automatically.
- In your dashboard, go to WP EasyPay → Square Connect.
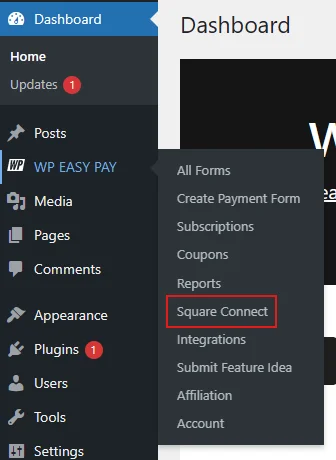
- Switch the environment toggle to Live Payment for real transactions. Leave it on Sandbox if you want to test first.
- Enter your notification email and click Connect Square.
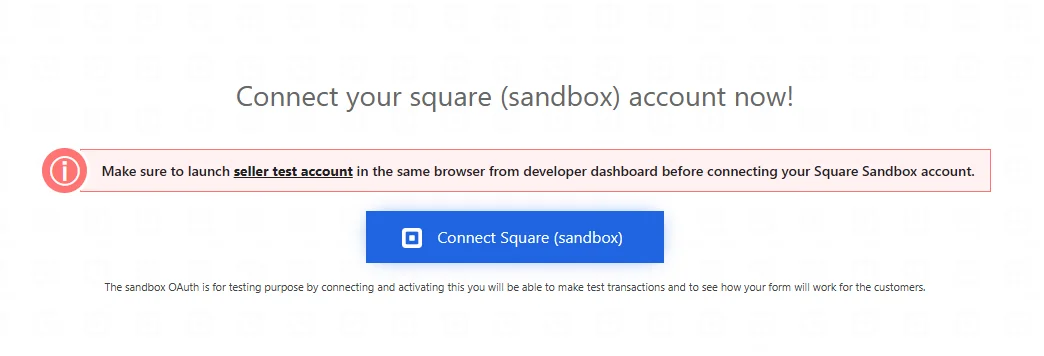
- You’ll be redirected to Square’s login page. Sign in with your credentials.
- Authorize the connection by clicking THAT’S MY SITE – REDIRECT ME.
- Once redirected, click Save Settings.
Square is now connected. To understand how the payment infrastructure works behind the form, read payment gateway vs payment processor differences.
Step 3: Create a New Recurring Donation Form
- In your WordPress dashboard, go to WP EasyPay → Create Payment Form.
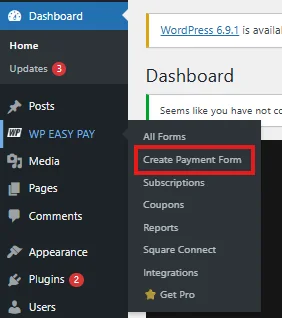
- Under the Form Settings tab, enter a form title. Write “Support Our Work – Recurring Donation” as it outperforms a generic “Donate Now.” Also, write a short description that answers: what will this money do?

- For Payment Type, select Donation Recurring.

- Set the Subscription Cycle – monthly is the default for most donor programs, but you can choose any from the available options.

- Select Amount type as Payment Custom Layout, and set donation amount preset values based on your preference.
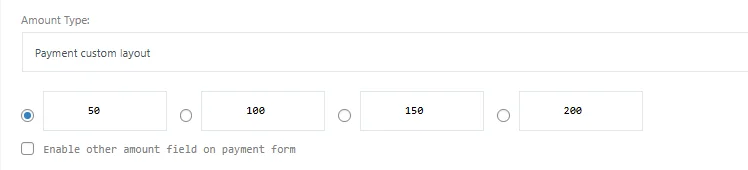
- Thank your donor by writing a custom thank you Payment Success Message. You can also redirect them to a different page by setting Redirection on Success as YES.

Now that the recurring donation form is set, you can choose and configure form fields by following step 4.
Step 4: Choose and Configure Your Form Fields
Remember: only ask for what you will actually use. Every extra field reduces form completions. This is the most consistent finding in recurring donation form research.
- On the top bar, click on the Extra Fields tab.

- Add first name, last name, email, number, and your comment fields.
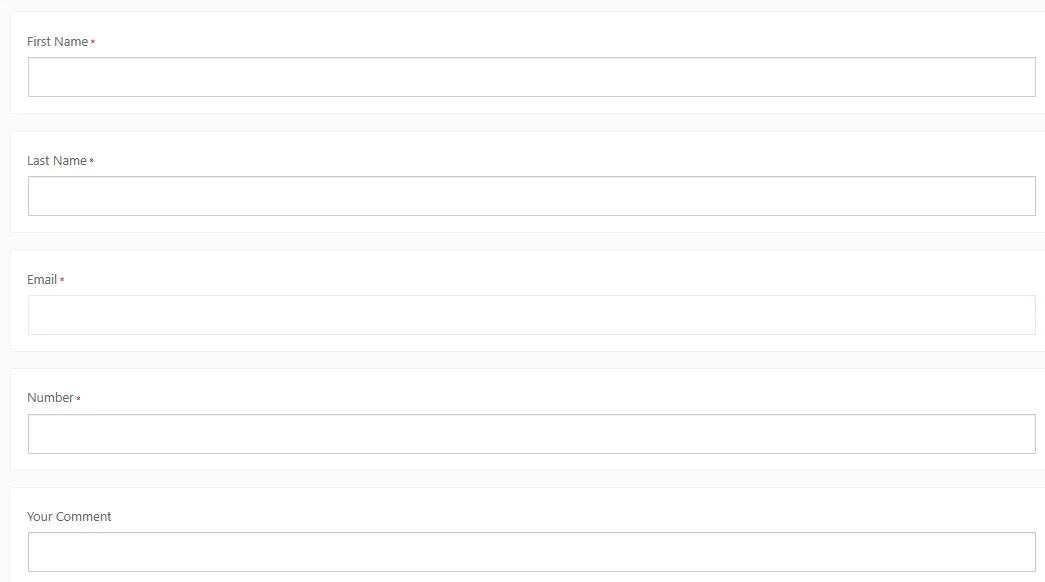
- You can drag and drop any of the fields to complete your recurring donation form.
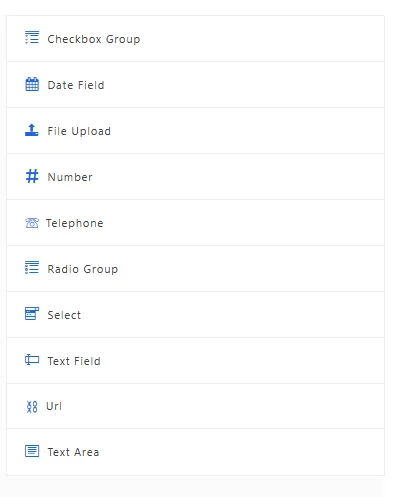
After double checking your form and its necessary fields, it’s time to publish and embed the form to your WordPress site.
Step 5: Publish and Embed Your Form
- Click Publish in the form builder. A shortcode will be generated – copy it.
- Go to Pages → Add Page → Add Page (or edit an existing Donate page).
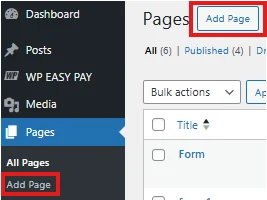
- Paste the shortcode into the page editor, or insert it as a block if you’re using the block editor. Type /wpeasypay and select your form.

- Click Preview and test the form on both desktop and mobile before publishing. Use Sandbox mode to run a complete test transaction.
- Once confirmed, click Publish to make your donation page live.
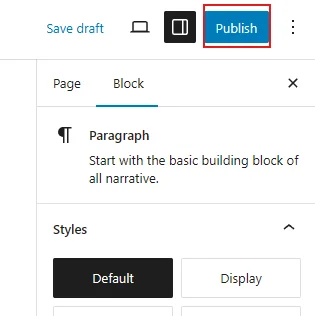
Congratulations! Your recurring donation form is now active. It will accept donations, process charges on schedule, send receipts automatically, and log every transaction in your Square dashboard.
If you want to restrict your form to verified donors or members only, you can also create a private payment form in WordPress.
Where to Place Your WordPress Recurring Donation Form for Maximum Conversions
Form placement is as important as form design. Here’s where recurring donation forms perform best:
- Dedicated Donate page: Your primary form location. Link to it from your main navigation — “Donate” or “Give Monthly” should be a top-level menu item, not buried under “About.”
- Homepage: A secondary CTA on your homepage — either a small embedded form or a prominent button — captures donors who land on your site and are immediately moved to give. Keep it above the fold.
- Blog posts and impact stories: When you publish a story about your work, embed or link the form at the end. Readers who’ve just connected emotionally with your mission are more likely to act.
- Exit intent or scroll-triggered popups: Use sparingly, but a well-timed prompt — “Before you go — can you commit to $10 a month?” — can convert visitors who otherwise would have left without donating.
- Confirmation and thank-you pages: After a one-time donation, redirect donors to a page that introduces your recurring giving program. “Want to make your impact automatic?” is a high-converting upgrade prompt.
- Email campaigns: Link directly to your donation form in every donor communication — newsletters, impact reports, and campaign emails.
Start Accepting Recurring Donations in WordPress Today
You now know what a recurring donation form is, how to build one in WordPress, and what to check before going live. The setup is straightforward – WP EasyPay and Square handle the billing, receipts, and subscription management once everything is connected.
The only thing left is building the form. Install WP EasyPay today and start accepting secure recurring donations in WordPress—without manual billing, follow-ups, or complex setup.
FAQs
What is the difference between a subscription form and a recurring donation form in WordPress?
A WordPress subscribe form for newsletters collects an email address — no payment involved. A recurring donation form collects payment details and processes charges automatically on a schedule. The fields may look similar, but a donation form requires a payment processor, security compliance, and subscription management tools underneath.
How do I make my WordPress recurring donation form GDPR compliant?
Add a consent checkbox explaining what data you’re collecting and link to your privacy policy. Don’t pre-check it – donors must opt in actively. Only collect data you have a legitimate reason to hold, and honor any deletion requests.
What are the common mistakes to avoid when creating a recurring donation form?
Too many fields, generic button text, no confirmation message, skipping Sandbox testing, and publishing before Square is connected. Each one directly reduces how many donors complete the form successfully.
How can I track recurring donation form submissions in WordPress?
WP EasyPay’s subscription dashboard shows every active, paused, and canceled donation — including billing status, payment dates, and transaction history. Square’s dashboard provides a parallel log for accounting and reporting.