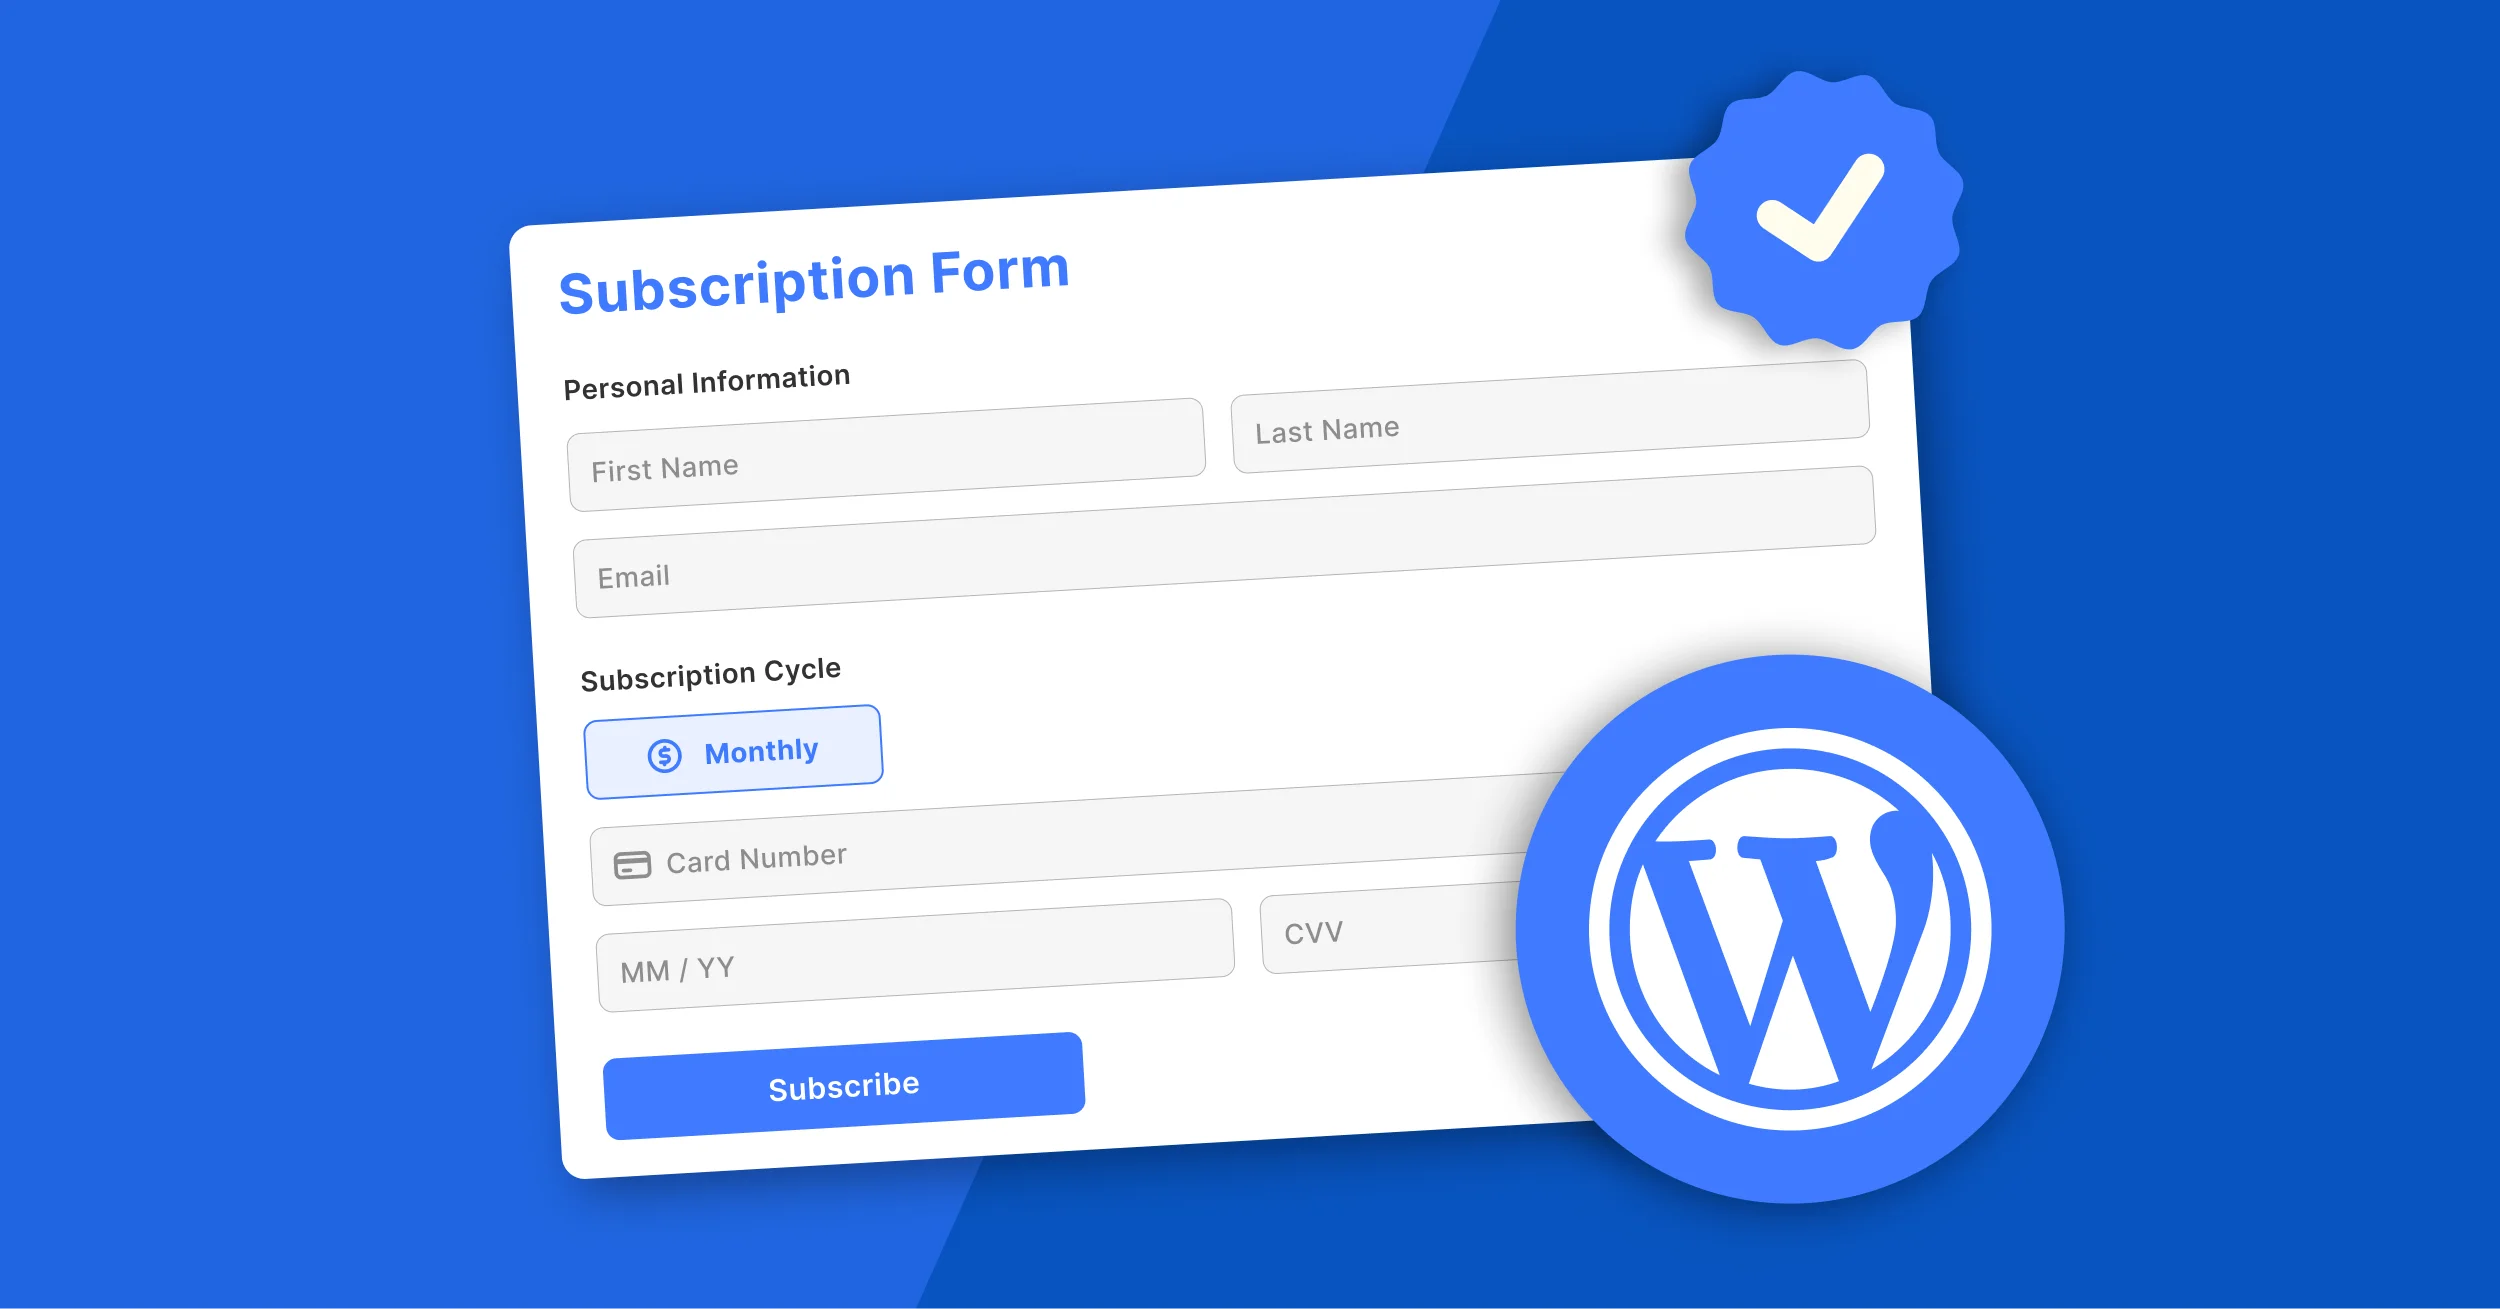
If you run a newsletter, coaching program, membership site, or recurring service, you need a reliable way to accept subscription payments in WordPress. Recurring revenue creates predictable income—but many website owners assume setting up subscriptions is expensive or technically complex.
The good news? You don’t need WooCommerce, complex membership plugins, or custom development to set up WordPress subscription forms.
With WP EasyPay, you can create flexible, professional subscription payment systems directly on your site, without bloated setups or developer dependency.
In this guide, we’ll explore why subscriptions matter, how WP EasyPay makes them accessible, and exactly how you can set up and manage recurring payments with confidence.
Why Offer Subscriptions on WordPress?
Subscriptions aren’t just for SaaS companies anymore. From creators and consultants to nonprofits and service providers, recurring payments have become one of the most reliable business models online.
Below are some key reasons why offering subscriptions on WordPress can transform how you generate revenue and engage your audience.
Predictable Recurring Revenue
Subscription payments generate consistent monthly or annual income instead of relying on one-time transactions. This improves cash flow, simplifies financial forecasting, and reduces the pressure to constantly acquire new customers.
Stronger Customer Relationships
Rather than a single transaction, subscriptions foster ongoing relationships. Continued engagement–through content, services, or support–builds trust, increases customer lifetime value, and lowers churn.
Scalable Growth Without Complexity
As your subscriber base grows, so does your revenue, without the need for major technical changes. Once set up, scaling depends on marketing and value delivery, not infrastructure.
Better Retention & Subscriber Data Insights
Recurring billing allows you to track renewal rates, failed payments, churn trends, and lifetime value, helping you optimize pricing, improve retention strategies, and grow subscription revenue over time.
Competitive Edge
Flexible subscription options, such as tiers, trials, and custom billing cycles, help you stand out from competitors relying only on one-time payments, making your business more accessible and appealing.
Understanding WP EasyPay’s Subscription Features
Subscription functionality in WP EasyPay is available in the Business plan, designed specifically for WordPress users who want to generate recurring revenue without complicated setups or third-party tools. Instead of forcing you into rigid payment models, WP EasyPay gives you the flexibility to build subscription experiences that align with your business goals.
Multiple Pricing Tiers & Subscription Plans
Create multiple subscription plans to serve different audience segments, whether it’s basic access, premium content, or high-touch services. This allows you to maximize revenue while giving customers options that fit their needs and budget.
Flexible Billing Cycles
Choose how often your customers are billed. WP EasyPay Business supports weekly, monthly, and annual billing cycles, making it easy to offer short-term commitments or long-term discounts, all from a single platform.
Free or Discounted Trial Periods
Reduce friction and increase conversions by offering trial periods. Let customers experience your value before committing, which is especially effective for memberships, coaching programs, and subscription-based content.
One-Time Setup Fees
Need to charge an onboarding or initiation fee? WP EasyPay lets you configure one-time setup fees alongside recurring payments, perfect for service-based subscriptions or premium programs.
Built-In Subscription Management & Cancellations
Give both you and your customers control. Subscribers can manage or cancel their plans easily, while you maintain full visibility and oversight, reducing support requests and improving user trust.
Automated Customer Communication
Keep subscribers informed with automatic confirmation emails and renewal reminders. Clear communication reduces failed payments, improves retention, and creates a professional checkout experience.
Unlike complex WooCommerce subscription setups that require multiple extensions, WP EasyPay Business lets you create subscription forms directly, without cart systems, product configuration, or heavy database overhead.
Why Upgrading to WP EasyPay Business Makes Sense
Upgrading to WP EasyPay Business Plan is not just a feature upgrade; it’s a strategic investment in predictable revenue. Even a small number of active subscribers can quickly offset the cost of the paid version, making the return on investment clear and measurable. With fewer manual tasks, better customer experience, and scalable recurring income, you grow smarter, not harder.
Setting Up Subscription Payments with WP EasyPay
Getting started with subscriptions in WP EasyPay is straightforward, even if you’re not technically inclined.
Step 1 — Install and Activate WP EasyPay Business
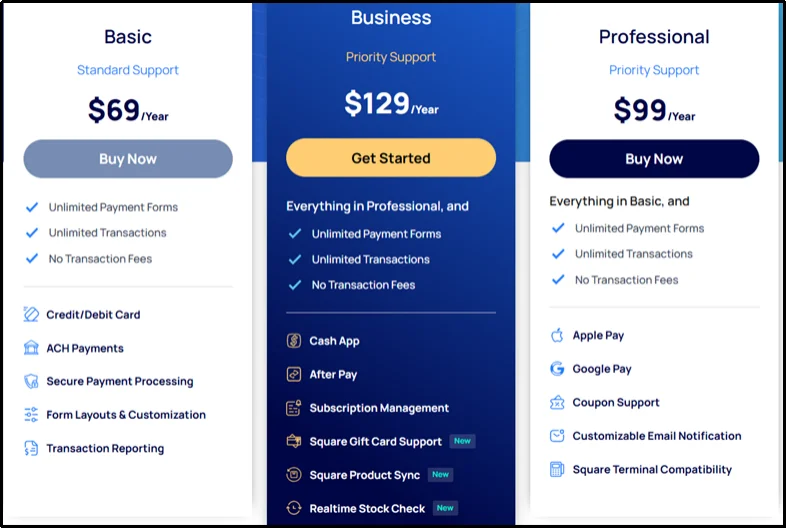
- Go to the pricing page on WP EasyPay. Select the type of license you want (Annual or Lifetime).
- Enter your personal details and card information. Click “Review Order.”
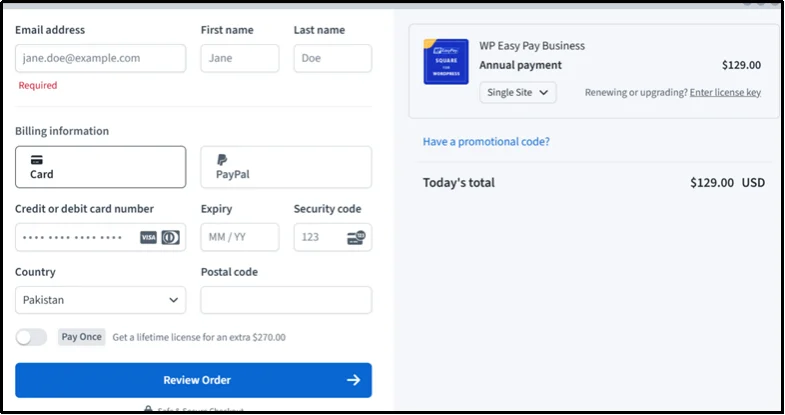
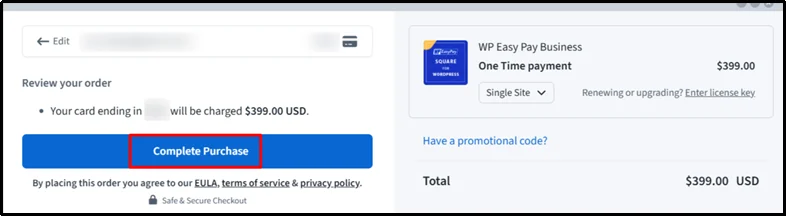
- Then, click Complete Purchase.
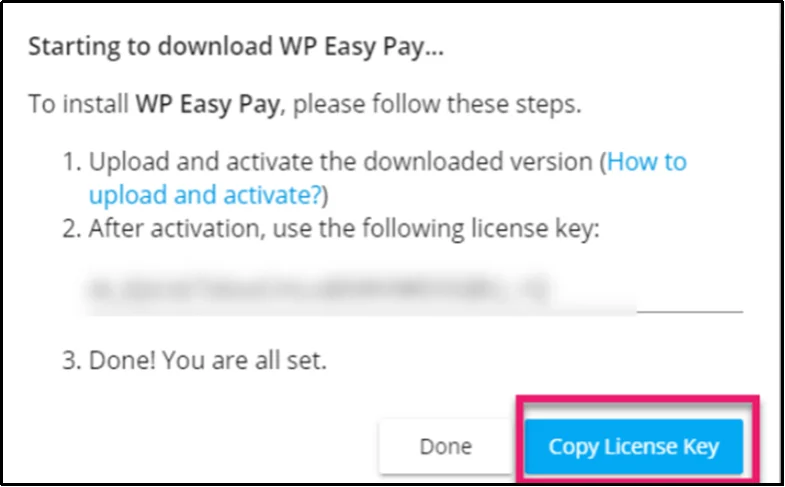
- Check your inbox for the confirmation email. If you have received it, click “Got it”. If not, click “Resend Email”. In your email, you will find:
- The plugin download link
- Your License Key
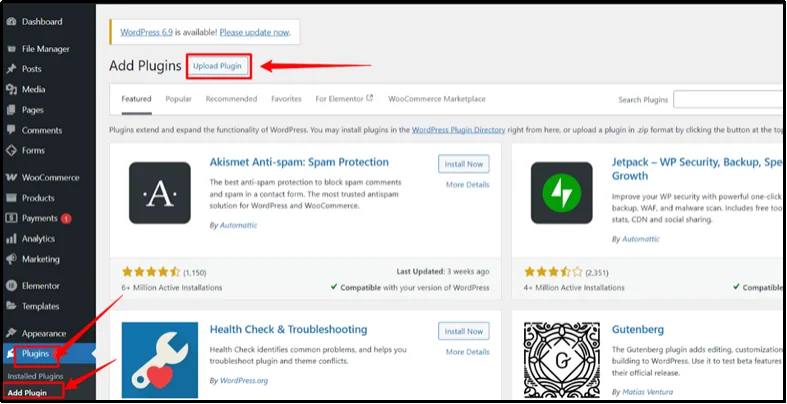
- In your WordPress dashboard, go to “Plugins”, then click “Add Plugin”, and select “Upload Plugin”.
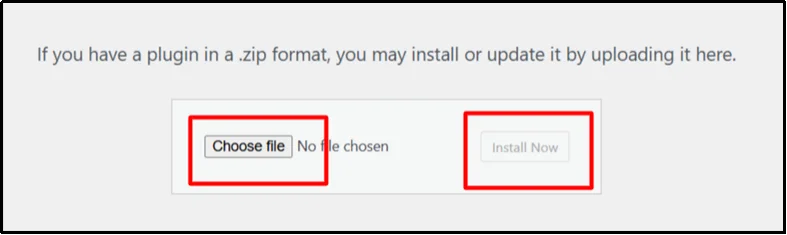
- Click “Choose File”, select the “WP EasyPay” ZIP file, and click “Install Now”.
- Once installed, navigate to “Plugins”. Go to “Installed Plugins” and then “Activate License”.

- Paste your License Key into the field. Click “Agree & Activate License”. Once activated, WP EasyPay will appear as a menu item in your admin panel.
Step 2 — Connect Your Square Account
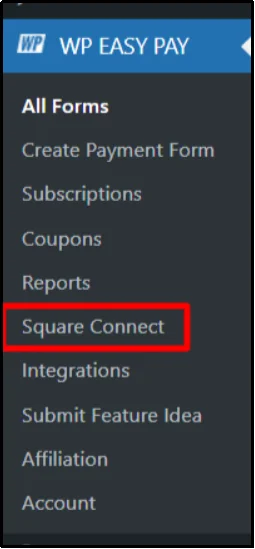
- Open your WordPress Admin Dashboard in a new tab. Navigate to the WP EasyPay menu and go to “Square Connect”.
- Switch the Payment Type toggle to “Live Payment”. Enter your “Notification Email” and click “Connect Square”.

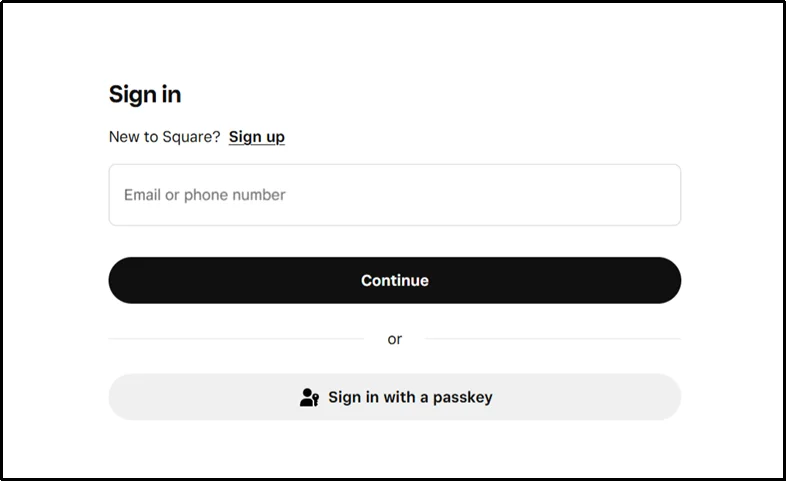
- You will be redirected to the Square login screen. Enter your email address (or phone number) and password, then click “Sign In”.
- On the next screen, click “Redirect” to complete the connection.
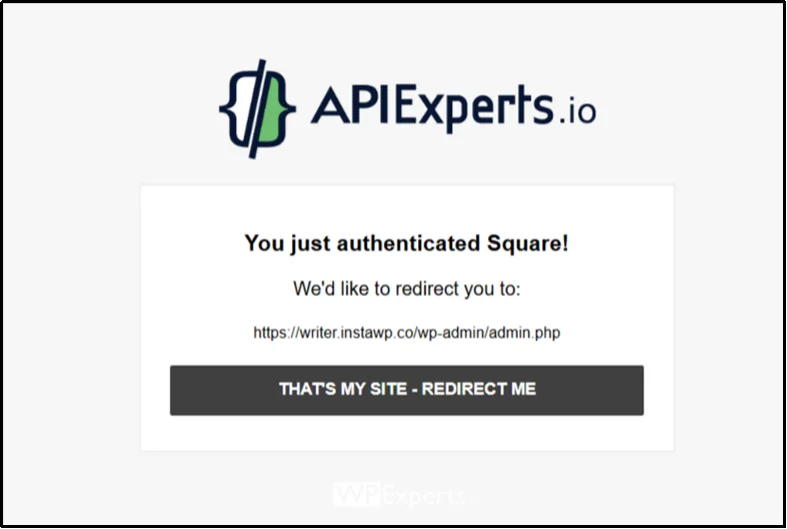
- You will be redirected back to the WordPress Admin dashboard automatically. From the Location dropdown menu, select the store or business location you want to use for payments and click “Save Settings”.
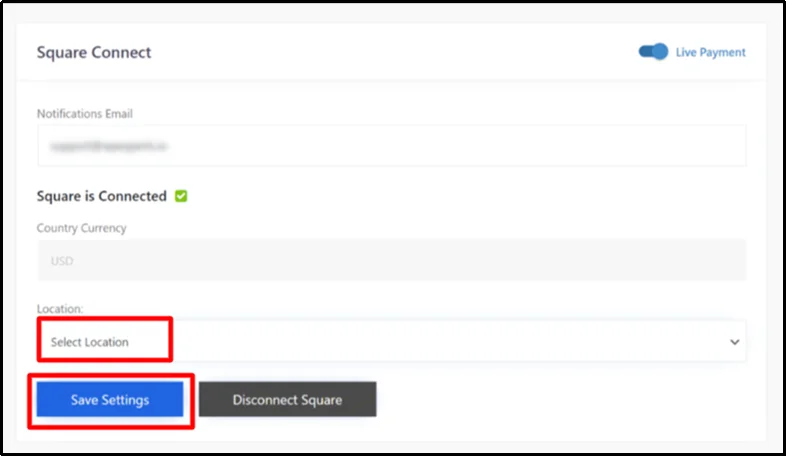
Your Square account is now successfully connected and ready to process payments.
Step 3 — Create Your Subscription Forms in WordPress
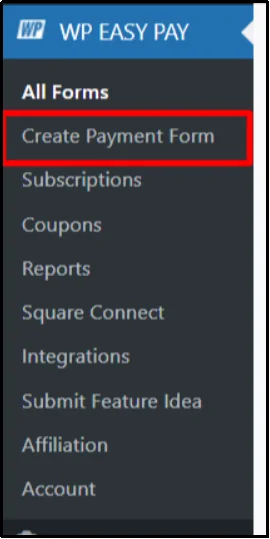
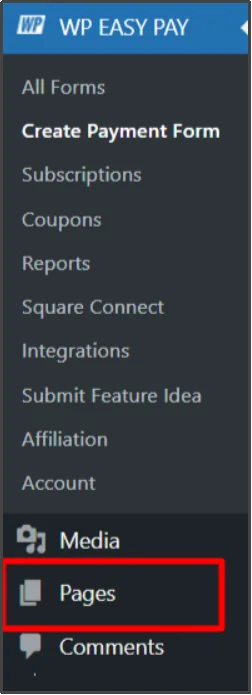
- From your WordPress dashboard, navigate to the left-hand sidebar and click WP EasyPay, then select “Create Payment Form”.
- Select “Subscription Payment” as the payment type to enable recurring billing instead of one-time payments.

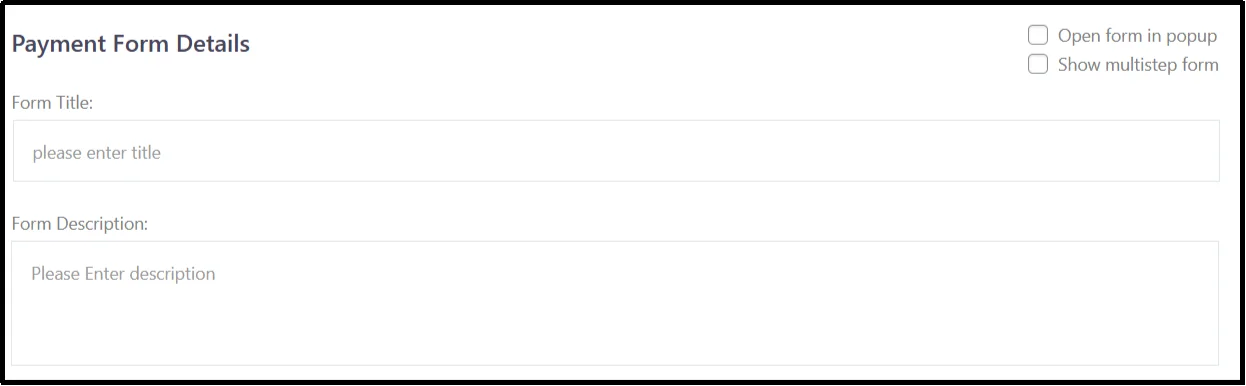
- Configure general settings such as:
- Form title
- Description explaining the value of the subscription
- Set up pricing options and tiers
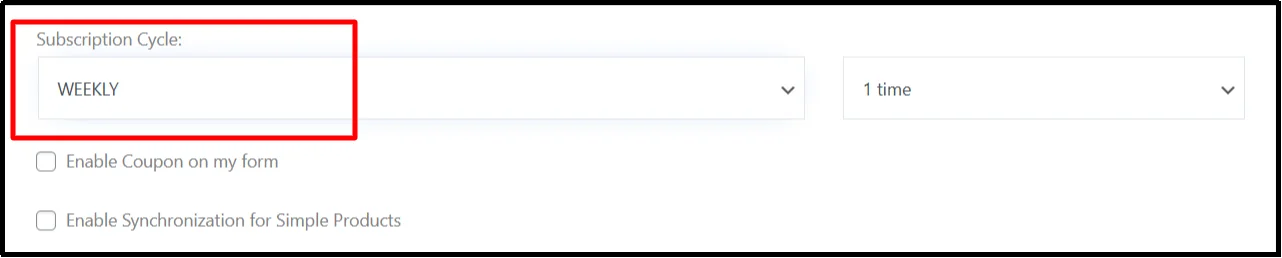
- Define the billing cycle (weekly, monthly, or yearly) and configure optional trial periods or setup fees if required.
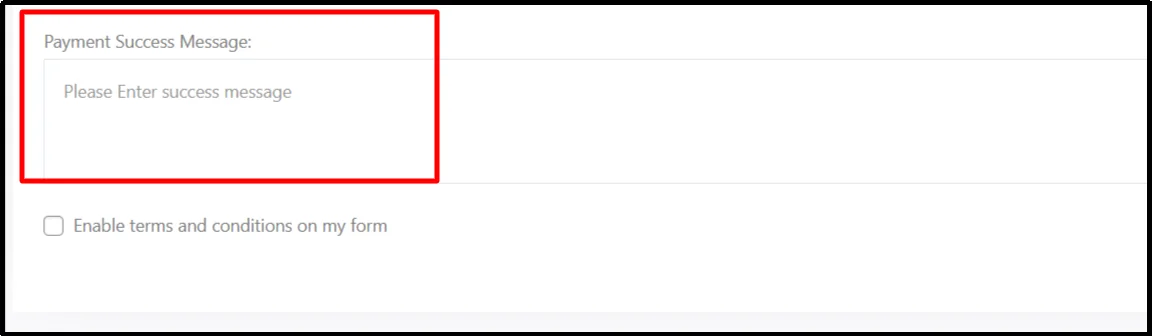
- Configure the success message users see after subscribing.
This step ensures clarity for both you and your subscribers.
Step 4 — Customize Form Fields
- Add customer information fields such as name and email
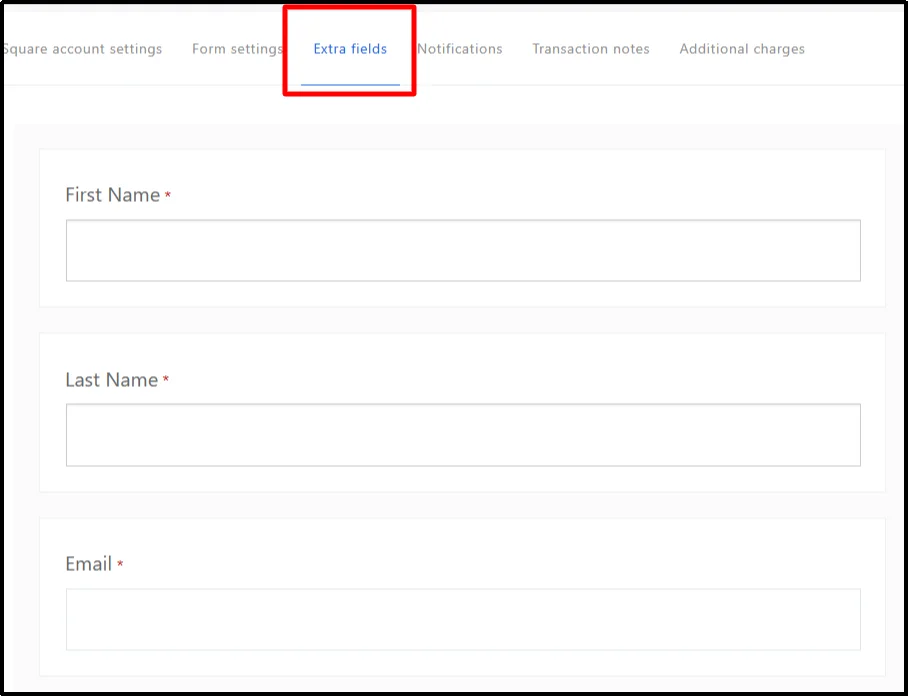
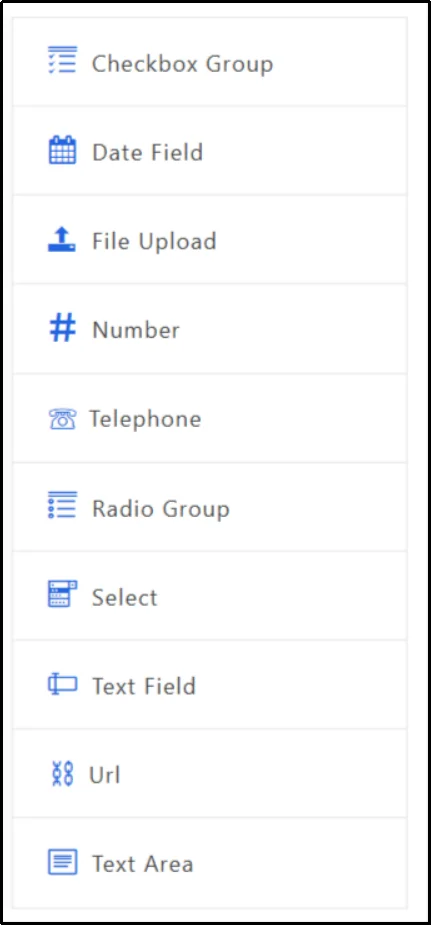
- The extra field options let you add different types of inputs to a form, such as text, numbers, dates, phone numbers, file uploads, URLs, single or multiple choice selections (radio, checkbox, select), and longer text areas, to collect specific kinds of information from users.
- Customize button text to match your brand voice.
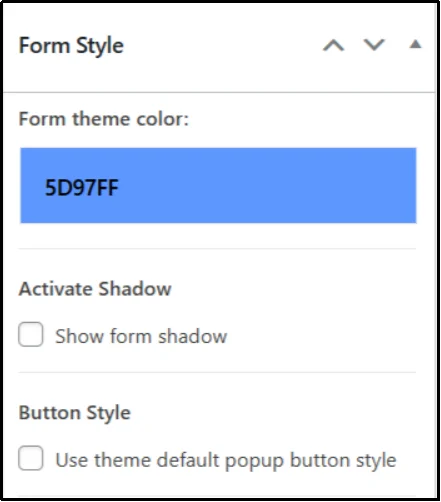
- Adjust styling to blend seamlessly with your website design.
A clean, intuitive form increases conversions and builds trust.
Step 5 — Preview and Test the Form
Before going live, always preview your setup.
- Publish the subscription form on WordPress.
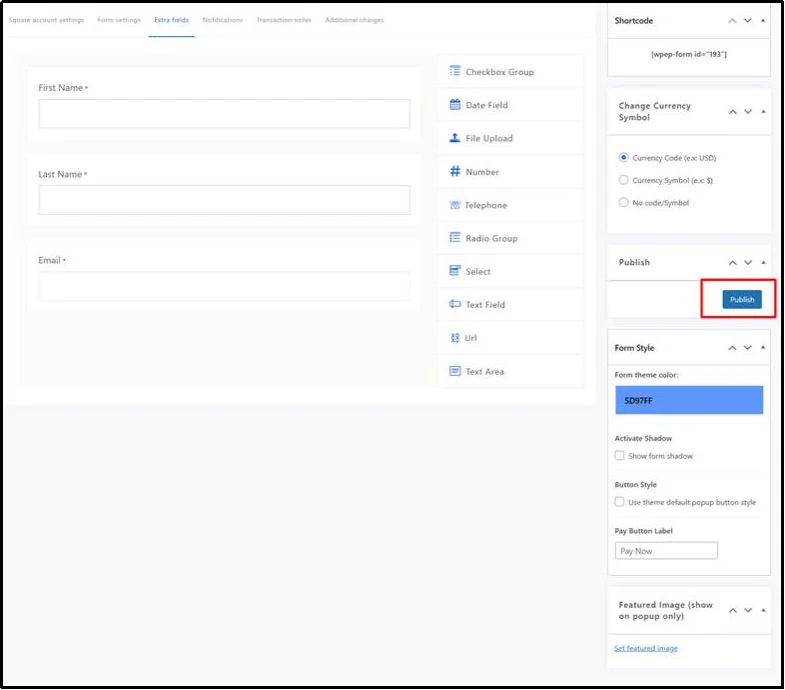
- Copy the shortcode or use the Block editor.
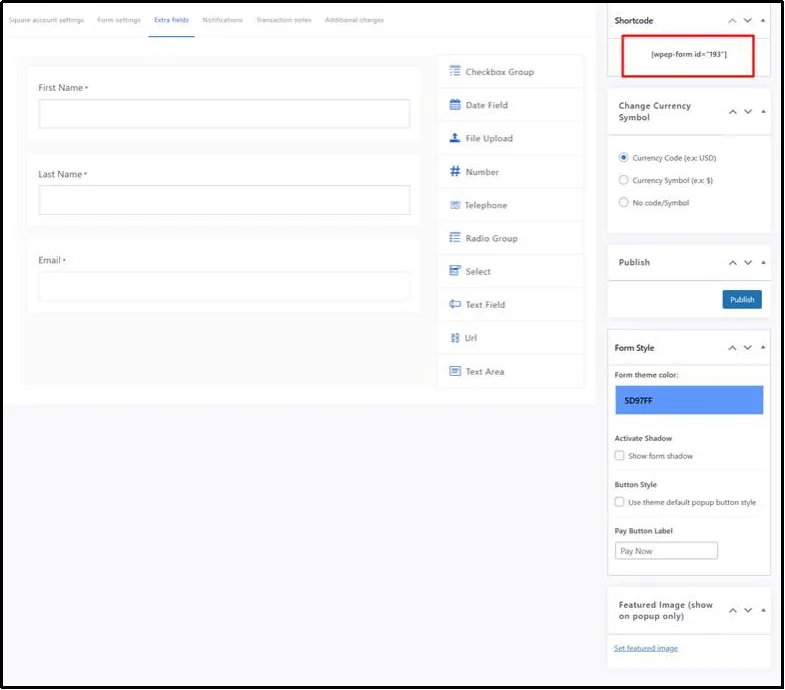
- Navigate to the target page or post by going to Pages and then All Pages in your WordPress dashboard.
- Paste the shortcode on the page.
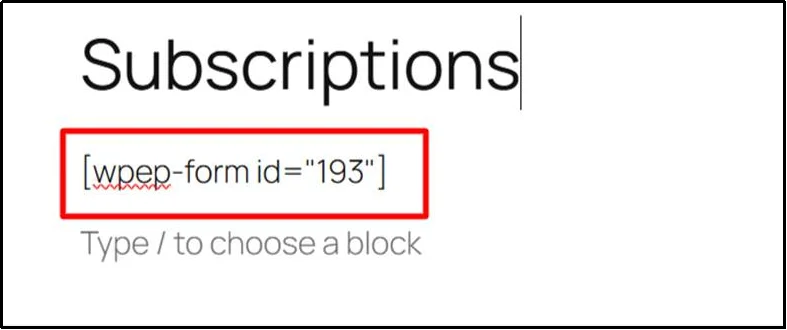
- Preview the page to ensure everything works correctly.
- Publish and make it live.

Testing helps avoid errors and ensures a smooth checkout experience for users.
Managing Subscriptions with WP EasyPay
Once subscriptions are live, managing subscriptions is simple and centralized.
Subscription Dashboard: Track Recurring Payments in Real Time
The subscription dashboard gives you a clear view of each subscription, including the plan name, pricing, customer details, current status (active, paused, or canceled), and important dates such as start date and next payment. This makes it easy to track subscriber activity and recurring revenue at a glance.
Subscription Actions & Controls
From the Subscription Actions panel, you can quickly pause or cancel subscriptions as needed. These built-in controls give you full flexibility while keeping billing accurate and up to date.
Self-Service Customer Subscription Portal
Customers can manage their own subscriptions through a self-service portal where they can view details, pause or cancel their plans, and stay in control. This reduces support requests and improves user experience.
Invoicing & Payment Visibility
Each subscription includes a clear transaction and invoicing history showing invoice numbers, payment dates, status, and amounts. This transparency helps you track payments easily and resolve issues faster.
Build Predictable Revenue with WP EasyPay Business
Subscriptions are no longer optional. They’re a powerful way to create stability, deepen customer relationships, and scale sustainably. With WP EasyPay Business, you don’t need complex systems or expensive developers to get started.
From flexible pricing and billing cycles to built-in subscription management, WP EasyPay Business Plan gives you everything you need to accept recurring payments confidently on WordPress.
If you’re ready to move beyond one-time transactions and start building predictable revenue, now is the time to upgrade. Try WP EasyPay Business Plan and take the first step toward recurring income today.
