You must be here because you want to set up Afterpay in WordPress.
In that case, you are at the right place because this step-by-step guide can definitely help. We will also answer your common questions about Afterpay.
With over 16.4 million users worldwide, Afterpay is one of the first choices for merchants implementing the buy-now-pay-later payment method. Being a merchant, you don’t want to miss out on this market, do you?
But before jumping into how, let’s first understand the Afterpay service.
What is Afterpay? —A Brief Introduction
Afterpay is a buy-now-pay-later (BNPL) service that allows users to pay in up to 4 installments over a short period, which makes it easier for shoppers to pay consciously without breaking the bank. Afterpay is completely free if you pay on time.
For now, Afterpay is only available in eight countries, including Australia, New Zealand, the United States, the United Kingdom, Canada, Spain, Italy, and France. The service has over 14 million users globally, and over 85k top retailers worldwide offer Afterpay as a payment option.
Benefits of Integrating Afterpay in WordPress
Afterpay helps customers spend money responsibly and without any interest or hidden fees, which makes it easier for customers to pay higher prices—which get lower when split. Moreover, adding Afterpay can allow another payment option for your customers, which reduces abandoned carts and enhances customer satisfaction.
As we discussed, it is widely spread and used by the top retailers. By implementing Afterpay in WordPress, you also keep up with an industry trend your competitor may not currently use. Giving you an edge over your competition.
Requirements for Running Afterpay in WordPress
To implement Afterpay, you require:
- Supportable WordPress version.
- Supportable WooCommerce Version.
- Square Account (aka Square Payment Gateway)
- Appropriate currency.
- WP EasyPay.
Afterpay requires WordPress version 5.1.1 or greater and WooCommerce version 2.6 or greater. If you’re on a lower version, please update it before proceeding.
You can check your WordPress version by going to the admin dashboard and scrolling to the bottom. The version is in the bottom right corner.

For WooCommerce, navigate to the plugins section and then look for the version in front of the plugin’s name.

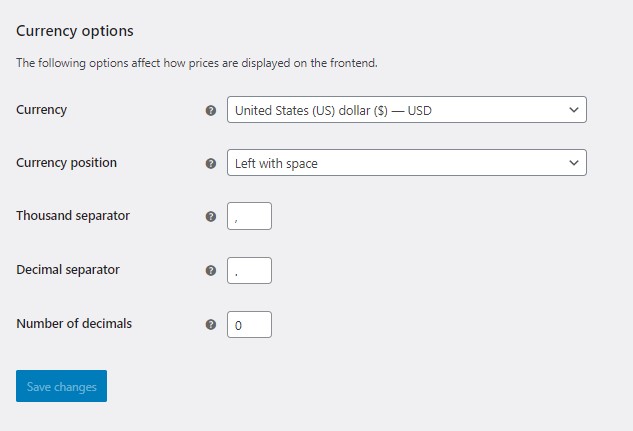
There are also currency constraints. Ensure your store is using a currency that the plugin supports. Afterpay currently supports these four currency options:
- The United States dollar ($)
- Australian dollar ($)
- New Zealand dollar ($)
- Canadian dollar ($)
Before getting started, make sure to change your store’s currency to one of the above; you can do that from WooCommerce settings >> General.
If you meet the requirements, you can proceed. Otherwise, update your WordPress and WooCommerce.
Now, follow the steps below to integrate Afterpay in WordPress.
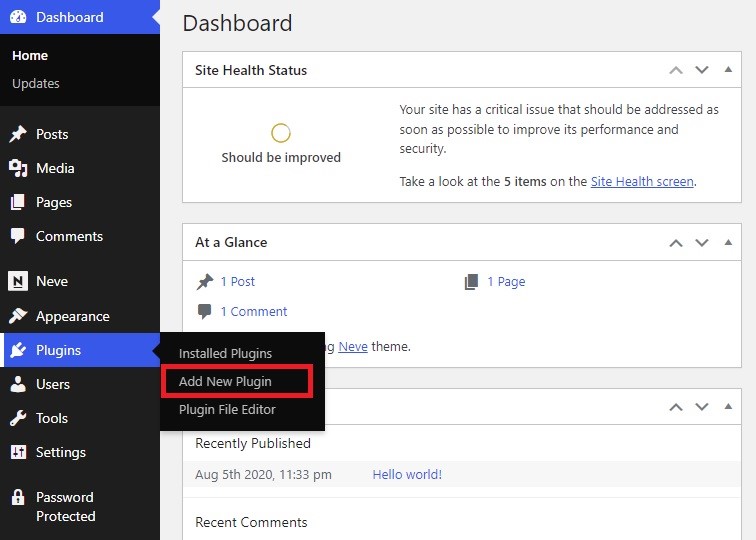
Step #1: Install and Activate WP EasyPay
Firstly, install the WP EasyPay plugin from the WordPress plugin directory.
To do that, navigate to the Plugin menu from your admin dashboard and select ‘Add New Plugin.’
Once you are in the plugin directory, use the search bar to search for WP Easypay.
Install the plugin using the ‘Install Now’ button.
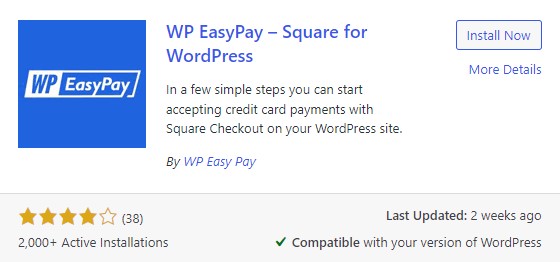
Wait for a few seconds until the plugin is installed, then press the Activate button that replaces the Install Now button post installation.
If you have finished installing, let’s set up Afterpay using the plugin you just installed.
Step #2: Set Up Afterpay in WordPress via WP EasyPay
Go to the plugin’s settings, and you will see a screen like this.
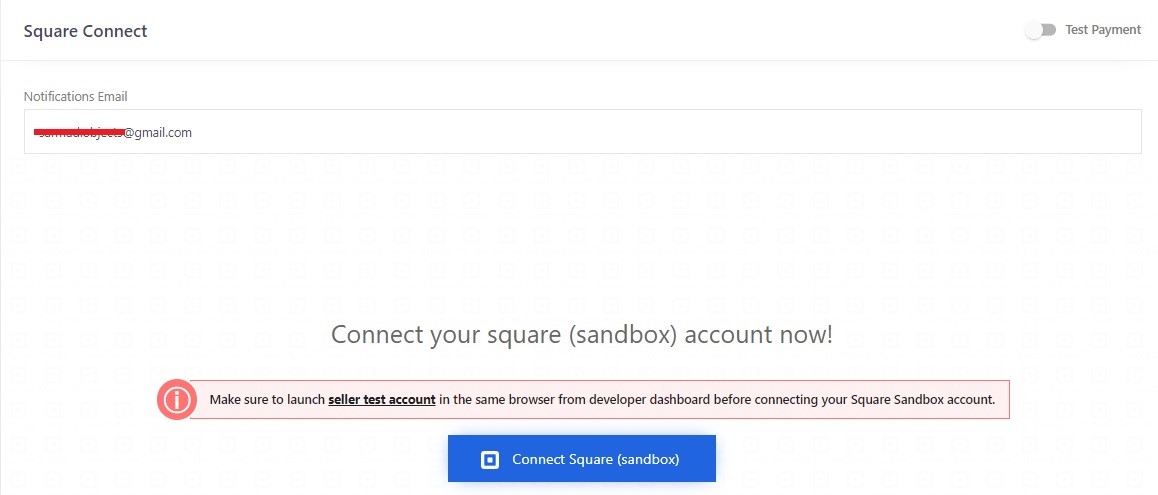
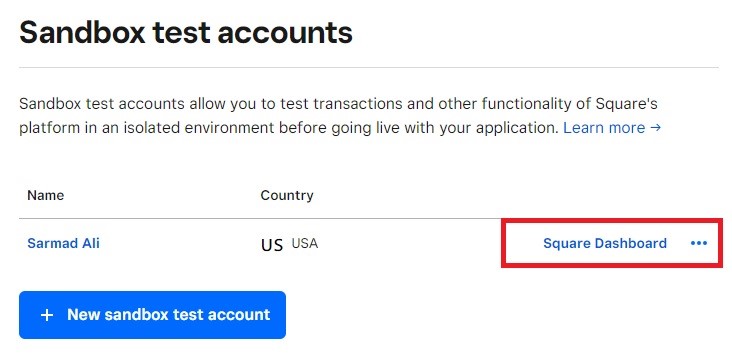
The sandbox must be signed in before you begin to use WP EasyPay. Simply click on the ‘seller test account’ and land the sandbox test account. Log in to your account or sign up if you have not already done so.
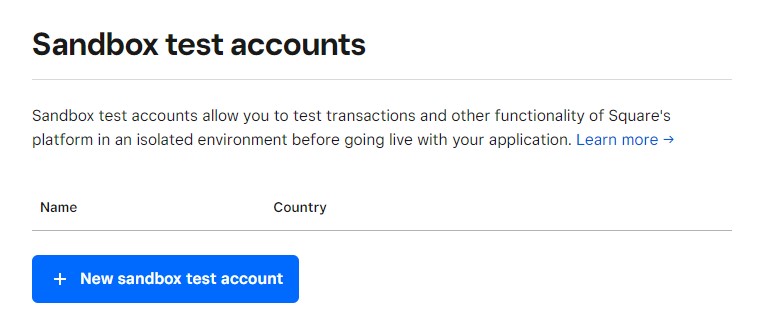
Tap the New sandbox test account button, and that will trigger a pop-up.
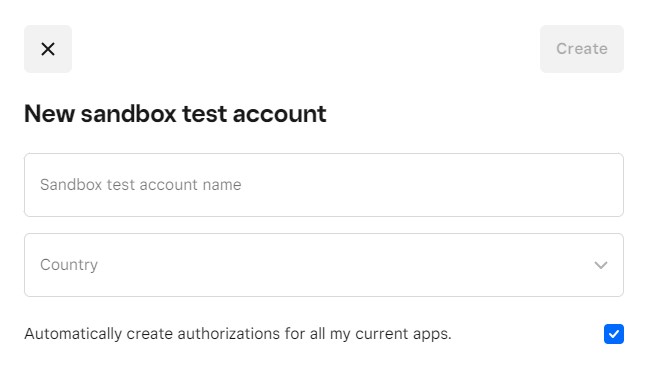
Enter your sandbox test account name and select the country from the drop-down menu. After entering the necessary information, tap the Create button.
Now, go to the account dashboard using the Square Dashboard button.
There you go!
Now, go to the previous tab in your WordPress dashboard.
Using the toggle button on the top right corner, select Test Payment.

Finally, press the Connect Square.
Connect using your login credentials, and you will be redirected to the next page, where you will be authenticated to Square.

Confirm redirection by claiming your site using the “THAT’S MY SITE – REDIRECT ME” button.
And now, you will find yourself on the Square Connect dashboard.
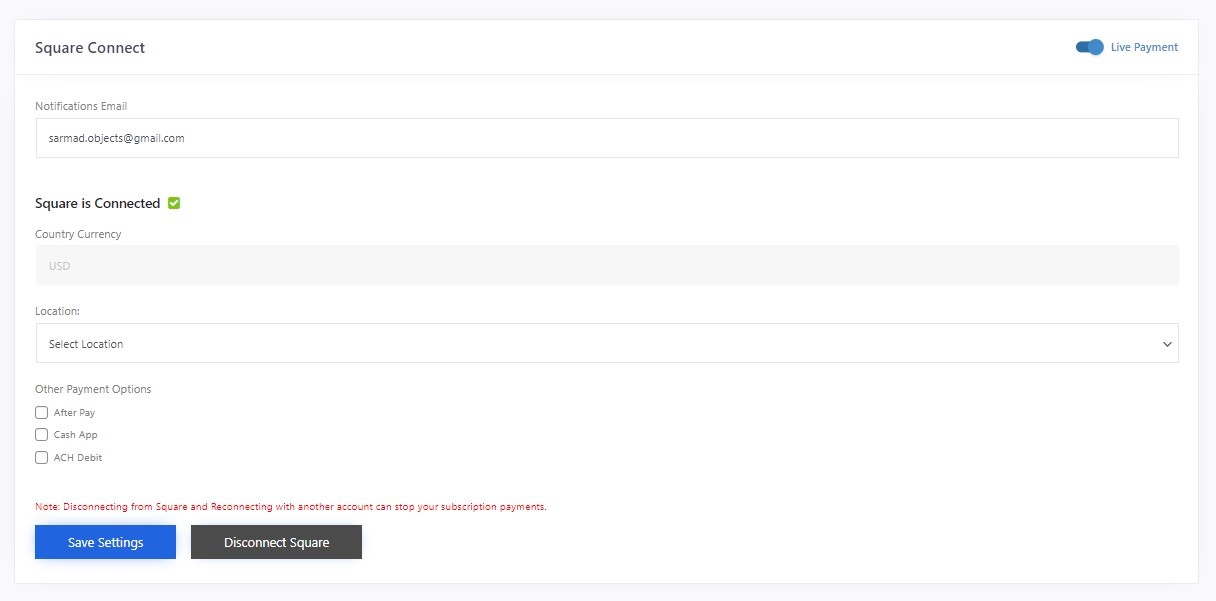
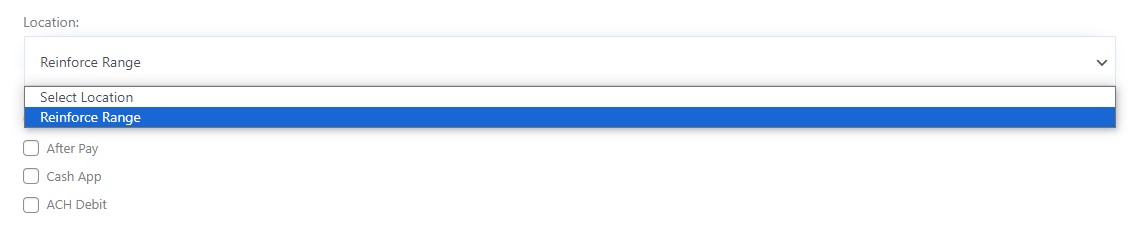
Select the location from the drop-down menu.
And check Afterpay.
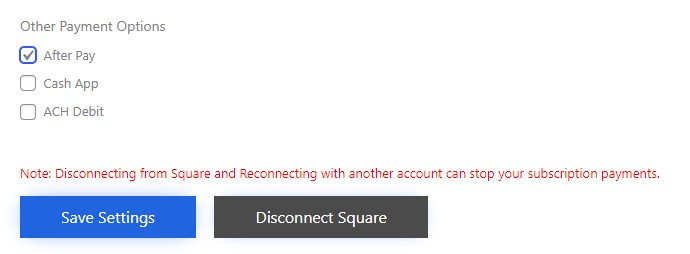
Now save settings…and there you go!
Congratulations! You just enabled Afterpay in WordPress.
???? You might also want to read this ???? How to Set up Apple Pay in WordPress [3 Easy Steps]
Final Thoughts
As we discussed, adding Afterpay in WordPress offers your customers an additional payment option. Moreover, they tend to pay higher prices quickly because Afterpay breaks them into small, payable chunks.
Consider a scenario in which a visitor lands on your website and likes a few things. They select a few, put the items in the cart, and head to the checkout process. However, they just realized that the total exceeds their budget. They are going to either leave and never come back or drop a few items from the cart. Your business will suffer in both circumstances.
But, if you are using Afterpay, they can easily use it as a payment option and instantly get their total split into four easily payable chunks. Afterward, they are not even going to think about it a second time before making the purchase.
Frequently Asked Questions
What should I do if Afterpay is not working on my site?
There can be several reasons for this. Ensure the versions of your WordPress or the store you are integrating with are updated, and you use a currency supported by Afterpay. Also, check if you have it enabled from the plugin settings.
Can I use Afterpay with any WordPress theme?
Yes! You can use Afterpay with any WordPress theme as long as your site is set up to support e-commerce functionality.
How often do I need to update the Afterpay plugin?
Outdated and disabled plugins cause cybersecurity issues and can be a gateway for unauthorized access and other malicious activities. Therefore, you should check for daily updates for all other themes and plugins, including Afterpay.
What platforms does Afterpay work with?
Afterpay works with all major eCommerce platforms, including Adobe Commerce—formerly Magento, BigCommerce, Shopify, Opencart, Wix, WooCommerce, and many more. Check out their official doc for the complete list.
What major websites use BNPL or Afterpay?
The US buy-now-pay-later (BNPL) market was valued at USD 1.64 billion in 2022 and has been rapidly growing since more companies adopted this payment option. Currently, many major brands, such as PUMA, JCrey, Levi’s, and David Jones, are using Afterpay.