One of the biggest names in digital wallets, Google Pay has over 150 million users worldwide.
Around 800,000 websites use Google Pay as a payment method, and for all the right reasons, 20% of all mobile purchases are made through Google Pay.
As the facts suggest, with this massive user base, consumers expect it on your WordPress website.
Thus, implementing Google Pay in WordPress is super necessary.
In this article, you will learn what it is, how to add Google Pay in WordPress using WP EasyPay, and why you should add it.
Let’s jump right in!
What is Google Pay?
Google Pay is one of the biggest mobile payment services by Alphabet. It allows online, in-app, and in-person contactless purchases across various smart devices, such as Android phones, tablets, and watches.
It offers enhanced security by using encryption, and it doesn’t share users’ card details with merchants when making payments.
As of writing, Google Pay is available in 86 countries worldwide.
Benefits of Adding Google Pay in WordPress
As we discussed earlier, your clients/website visitors are expecting Google Pay. If this reason is not enough to convince you, here are four additional benefits of adding Google Pay in WordPress.
- Blazing Fast Application
Google Pay allows users to make quick payments using their saved card details. This reduces the friction of purchasing by eliminating the need to fill out lengthy forms. This speeds up the checkout process and reduces cart abandonment.
Did you know? The longer customers take to decide, the higher the cart abandonment rate.
Thus, speeding up the process by integrating Google Pay in WordPress can help reduce cart abandonment rates and can be beneficial for your business.
- Enhanced Security
Google Pay uses a tokenization system instead of repeatedly inserting your sensitive information. This adds an extra layer of security, protecting customer data and reducing the chances of fraud.
Moreover, people trust Google for their security. Which makes them feel secure and to pay via Google Pay.
- Integration with Popular Plugins
Another fantastic benefit is the easier integration. You can effortlessly integrate Google Pay with any plugin, such as WooCommerce, Stripe, and all other major popular stores and plugins. Which makes it super easy to implement and customize according to one’s business needs.
- Increased Trust and Credibility
Offering trusted payment methods like Google Pay can increase consumer confidence in the security and professionalism of your site. Just like Apple Pay, there is also a vast fan base of Google that loves to use products owned by Alphabet or Google and Google Pay is no exception.
Simply put, adding Google Pay can significantly enhance the customer experience, streamline the payment process, and boost sales for WordPress websites.
How to Set up Google Pay in WordPress: 03 Easy Steps
Now that you are aware of Google Pay or GPay and why you should add it to your WordPress site, let us show you how you can set up Google Pay in WordPress using WP EasyPay.
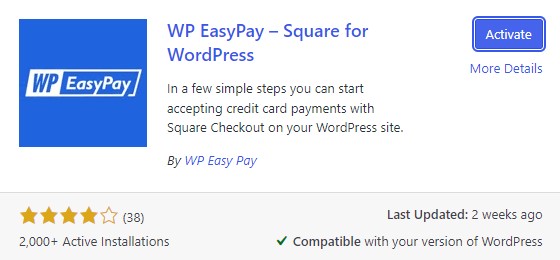
Step #1: Install and Activate WP EasyPay
Let’s begin by installing and activating the WP EasyPay plugin.
To do that, go to your WordPress dashboard, hover over the ‘Plugins’ tab, and choose “Add New Plugin” from the menu.
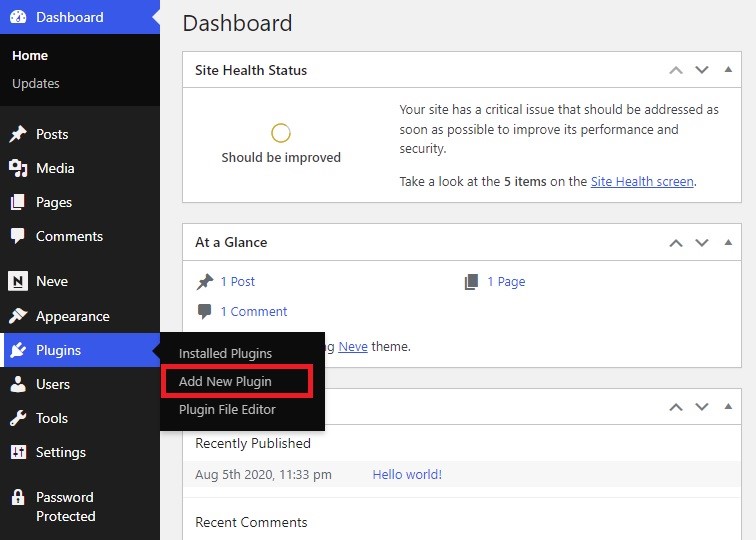
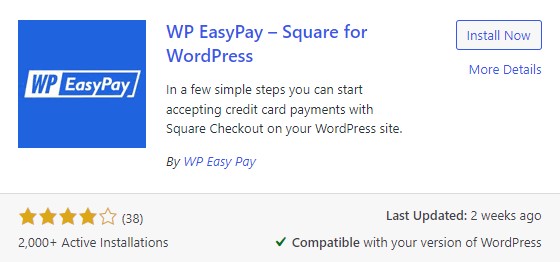
After clicking on add new, you will land on the WordPress plugin directory. Use the search plugin bar to search for WP EasyPay.
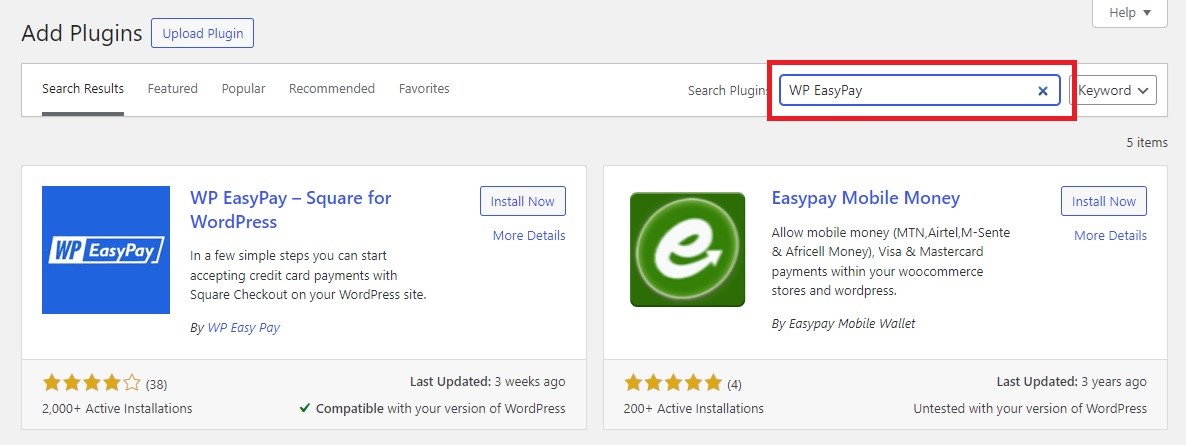
Install the plugin using the ‘Install Now’ button.
After installing the plugin, click on the ‘Activate’ button to enable it.
Alternatively, you can upload the plugin. Using the Upload Plugin button.

Choose your file from wherever you have downloaded it.
After selecting the file, click on Install Now.

You will see a screen like this:
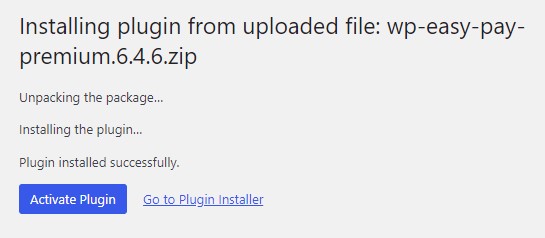
Click Activate Plugin.

Enter your license key, and you will be good to use WP EasyPay.
Step #2: Connect Your Square Sandbox Account
We are going to integrate Google Pay using Square.
Square is a payment processing system that accepts credit or debit card payments through online channels. It is a secure solution for WordPress stores trying to accept payment on their stores.
After connecting your Square Sandbox account, you’ll be able to configure the payment options, ensuring your store can securely handle transactions through the Square payment gateway.
To connect Square, navigate to the plugin’s settings from the WordPress dashboard and select Square Connect.
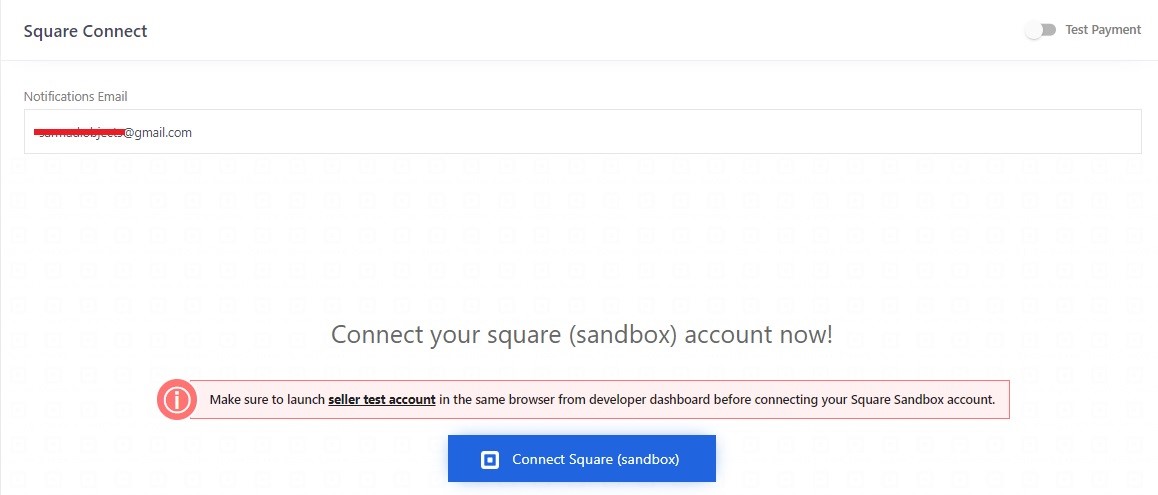
Make sure you are signed in to the sandbox account on the same browser. If you already have an account, log in.
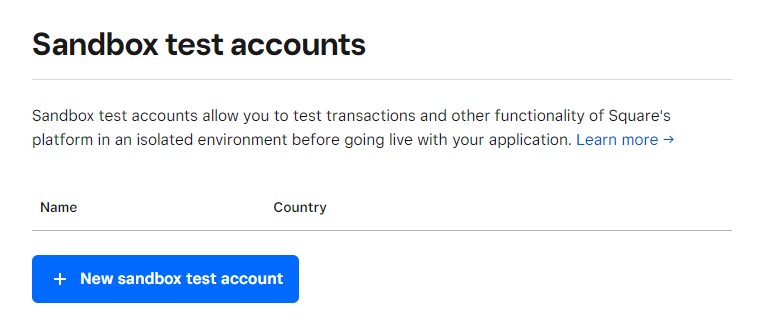
Tap the New Sandbox test account button, and that will trigger a pop-up.
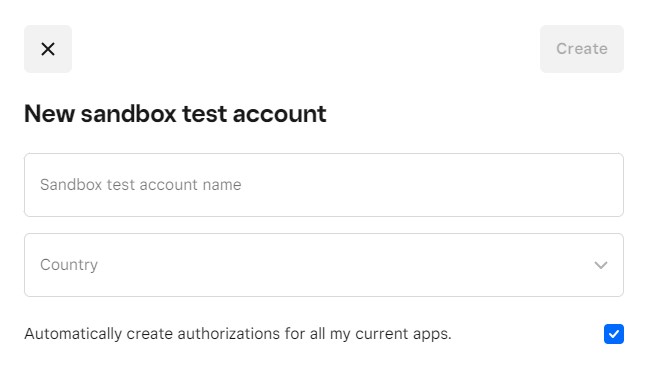
You will see two input boxes here:
- Sandbox test account name.
- Country drop-down.
Enter your sandbox test account name in the first box and select the country from the drop-down menu. Tap the Create button after filling in the necessary information.
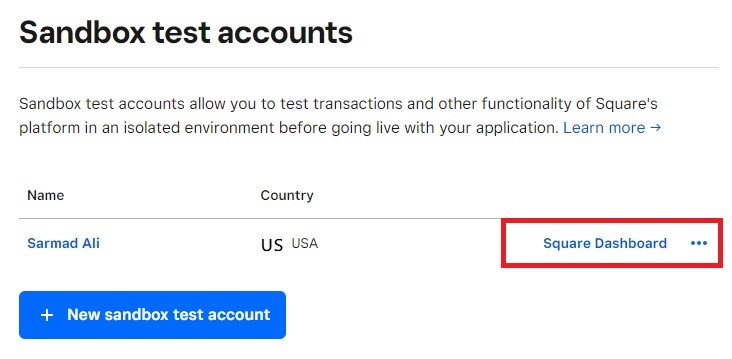
Now, go to the account dashboard using the Square Dashboard button.
That should integrate Square with WordPress. Now, it’s time to set up Google Pay in WordPress.
Open a new tab and go to your WordPress dashboard on it. Open WP EasyPay, and you should see a screen like this:

Press the Connect Square.
Enter your login credentials to proceed. After a successful attempt, you will be redirected to the next page.
This page will redirect you to your WP EasyPay dashboard.
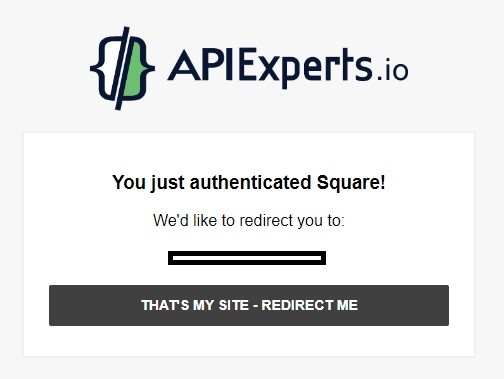
Press the “THAT’S MY SITE – REDIRECT ME” button.
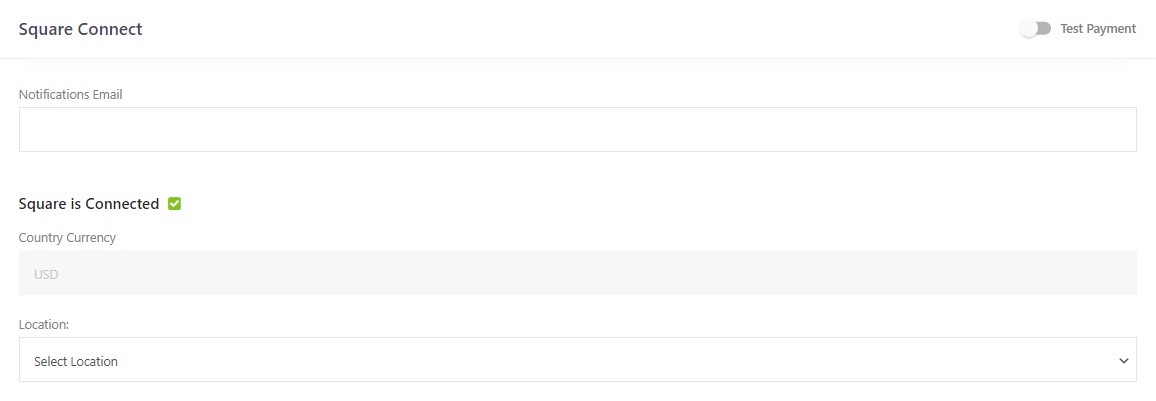
Pressing that button will take you to the Square Connect dashboard that looks like this:
Step #3: Check The Google Pay Box
Once you are on the dashboard, scroll down until you see a drop-down menu titled “Location.”
Select your location using the drop-down.

Finally, navigate to the next section, titled ‘Other Payment Options.’

Check the Google Pay box and all the other payment options that you want to integrate into your WordPress.
Save changes, and that’s how you set up Google Pay (GPay) in WordPress.
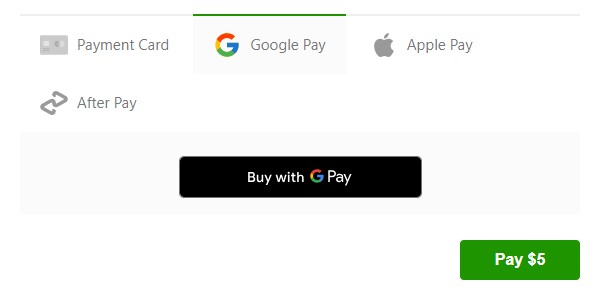
There you go! As you can see, the Google Pay is up and running!
Final Words
Adding Google Pay in WordPress can help you gain a solid advantage over competitors who are not using GPay as a payment option. Because more payment options maximize conversion rates, reduce abandoned carts, and improve user experience. In a nutshell, it is an effortless strategy that can significantly improve your business.
Thus try and incorporate many payment options for your consumers. Some might prefer BNPL services like Afterpay in WordPress and others may go with a common payment option such as Stripe. Having both options on your WordPress can enhance user-experience.
If you are still unsure, feel free to contact our support team. We are here for you 24/7.
Download WP EasyPay now!
Frequently Asked Questions
Yes! You can add Google Pay to your website using WP EasyPay. Install and activate the plugin and connect your Square account. Later, you can simply check the Google Pay box that would enable you to accept payments through Google Pay.
As of now, there are no charges for consumers or merchants. It’s up to business owners or merchants to collect and pay necessary taxes or levies. Google does not and is not responsible for collecting or paying any taxes related to your business.
Absolutely! Google uses secure infrastructures to help keep your account safe. It uses tokenization and other additional layers of security to keep your payments safe. When you pay in stores, GPay doesn’t share your sensitive information. So, it’s valid to say Google Pay is 100% safe.
Google Pay or GPay was used more often in India and Poland followed by the US and the UK in early 2024. In fact, Analytics India Magazine revealed, eight out of ten consumers in India had used Google Pay as a payment method.