
Are you looking for an easy way to add Square to process credit cards on WordPress website? You’ve come to the right place.
Square is undoubtedly a top payment gateway for small and medium-sized businesses. It offers a flexible solution for customers to make credit card payments easily.
In this guide, we’ll show you how to use the WP EasyPay plugin to set up Square to process credit cards on WordPress in just four easy steps.
Ready? Let’s get started!
Why Should You Consider Square to Process Credit Cards on WordPress
According to a study by Norton, 79% of consumers prioritize secure online transactions when shopping online.
That’s where Square really shines!
According to a user satisfaction survey, Square has increased customer trust by 15% by following industry-standard security protocols.
Here are some of the benefits you get for integrating Square payment gateway for credit card payments on your WordPress:
- Upgraded Security: Square employs industry-standard security protocols, including end-to-end encryption, to protect your customers’ sensitive information and build trust.
- Easy Integration: The WP EasyPay plugin makes it easy to connect Square with your WordPress site, and the setup process is smooth and hassle-free.
- Real-Time Analytics: You can access comprehensive reporting and analytics tools to track sales, monitor transaction histories, and make informed business decisions.
- Flexible Payment Options: Offer your customers multiple payment methods, which include major credit cards, debit cards, and digital wallets, to simplify their shopping experience.
- Quick Deposits: Receive funds from credit card transactions promptly, often within the next business day, improving your cash flow and financial management.
- Built-in Dispute Management: Square enables you to effectively manage chargebacks and payment disputes to prevent potential losses and maintain positive customer relations.
There’s no question that by integrating Square to Process Credit Cards on the WordPress website, your customers will have a better shopping experience, and your business will do better.
4 Easy Steps to Configure Square to Process Credit Cards on WordPress
To set up Square credit card payments on WordPress, we will use the WP EasyPay plugin. The plugin offers a user-friendly interface that allows you to create and customize payment forms effortlessly.
Also, WP EasyPay has a free and a premium version. For the time being, we will use the free version.
If you already have a Square account, you can jump right to Step #1. However, if you don’t have one, you can create one by following the steps below.
- Sign Up for a Square Account: Visit the Square website and click on the option to create a new account. Look for a sign-up button or link on the homepage.

- Enter Your Details: Provide the necessary information about your business, including contact details, estimated revenue, and other relevant data.
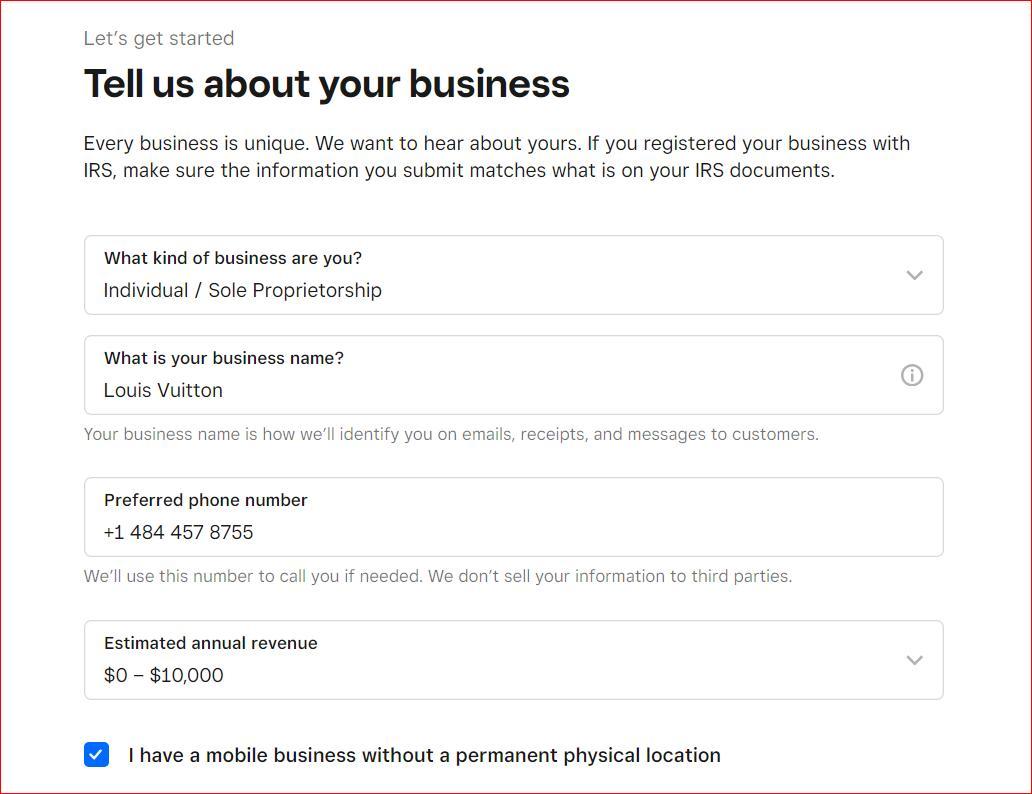
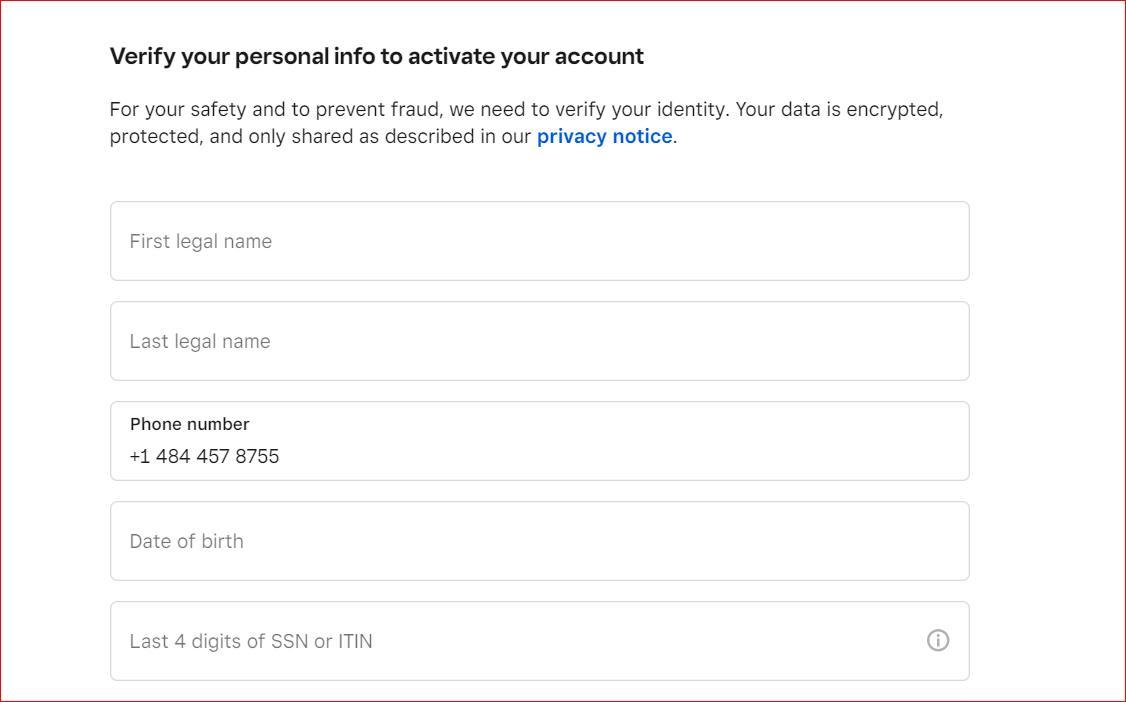
- Complete Verification: Square will verify your personal information to assure security and prevent identity theft. Follow the prompts to complete this process.
- Access Your Dashboard: Once your account is set up and verified, log in to your Square Seller dashboard to manage your payments and settings.
Step #1: Install WP EasyPay WordPress Plugin
To install the WP EasyPay plugin, follow the steps below:
- Log in to Your WordPress Dashboard: Start by signing into the admin area of your WordPress site.
- Go to the Plugin Installation Page: In the sidebar, click on ‘Plugins’ and then select ‘Add New.’
- Search for WP EasyPay: Use the search bar in the top-right corner and type in ‘WP EasyPay.’
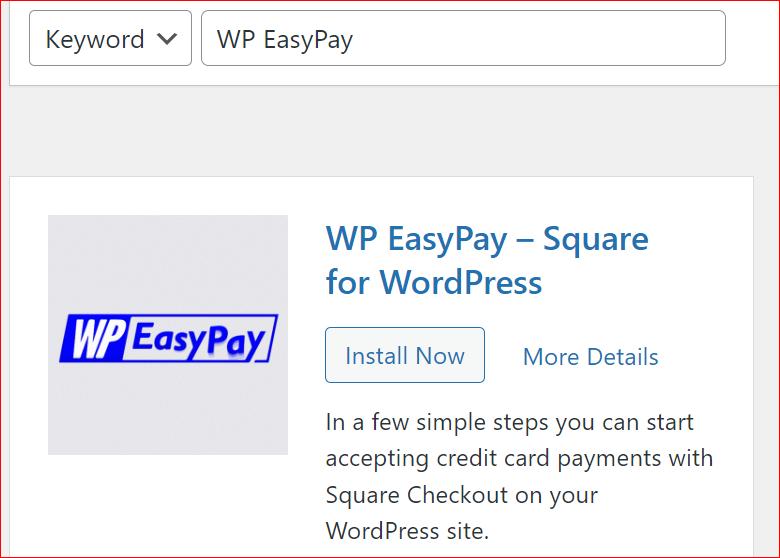
- Install and Activate the Plugin: Look for ‘WP EasyPay – Square for WordPress’ in the search results. Click on ‘Install Now’ and then activate the plugin by clicking on ‘Activate.’
Once activated, you’ll be ready to connect your Square account, which we’ll cover in the next step.
Step #2: Connect Square Account with WordPress
Upon activation, you will see the following screen. If not, then follow the steps to connect your Square account with WordPress.

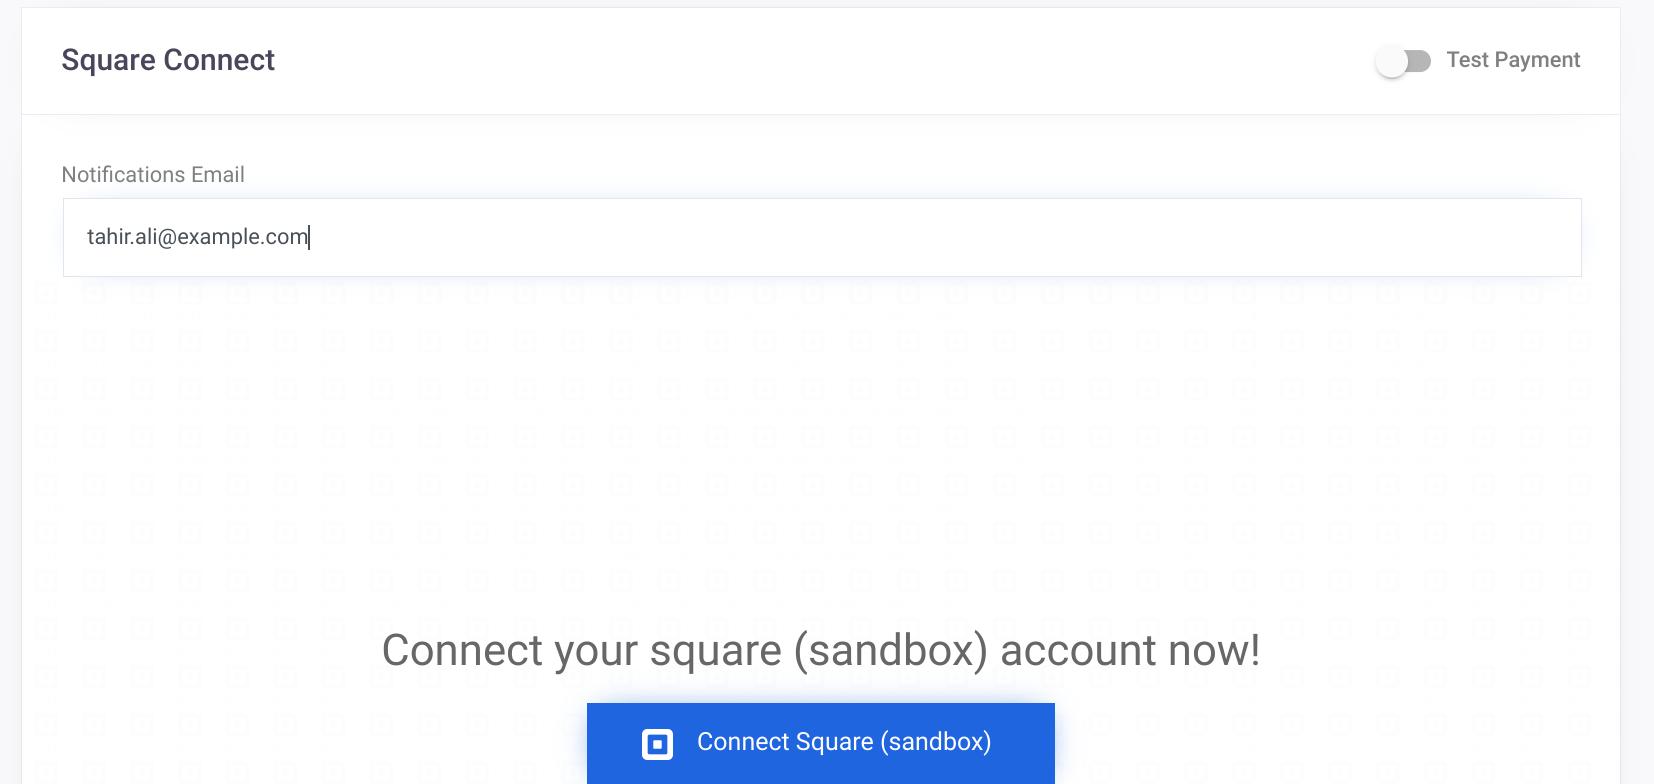
- Access WP EasyPay Settings: In your WordPress dashboard, go to ‘WP EasyPay’ in the left-hand menu and select ‘Square Connect.’
- Initiate Connection: Click on the ‘Connect Square’ button to start the linking process.
- Adjust Notification Settings (Optional): If you wish to receive email alerts at a different address, you can update the email in the ‘Notification Email’ field.
- Enter Your Square Credentials: On the next screen, log in using your Square account details.
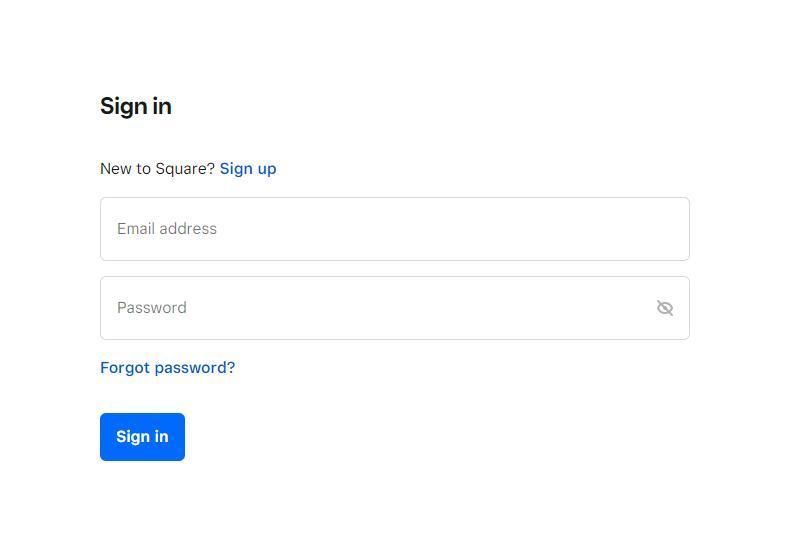
- Authenticate and Redirect: After successful login, you’ll be prompted to redirect. Click on ‘THAT’S MY SITE – REDIRECT ME’ to complete the connection.

- Verify and Save: Your Square account should now be connected. If you want to enable additional payment options, check them in the ‘Other Payment Options’ section and click ‘Save Settings.’
After connecting your Square account, you’re ready to create payment forms using WP EasyPay, which we’ll cover in the next step.
Step #3: Create Your Square Payment Form
- Navigate to Form Creation: In your WordPress dashboard, click ‘WP EasyPay’ and select ‘Create Payment Form.’
- Configure Form Settings: In the ‘Form Settings’ section, set up your payment form by defining parameters like the Form Title, Description, Payment Type, Amount Type, and Payment Success Message.
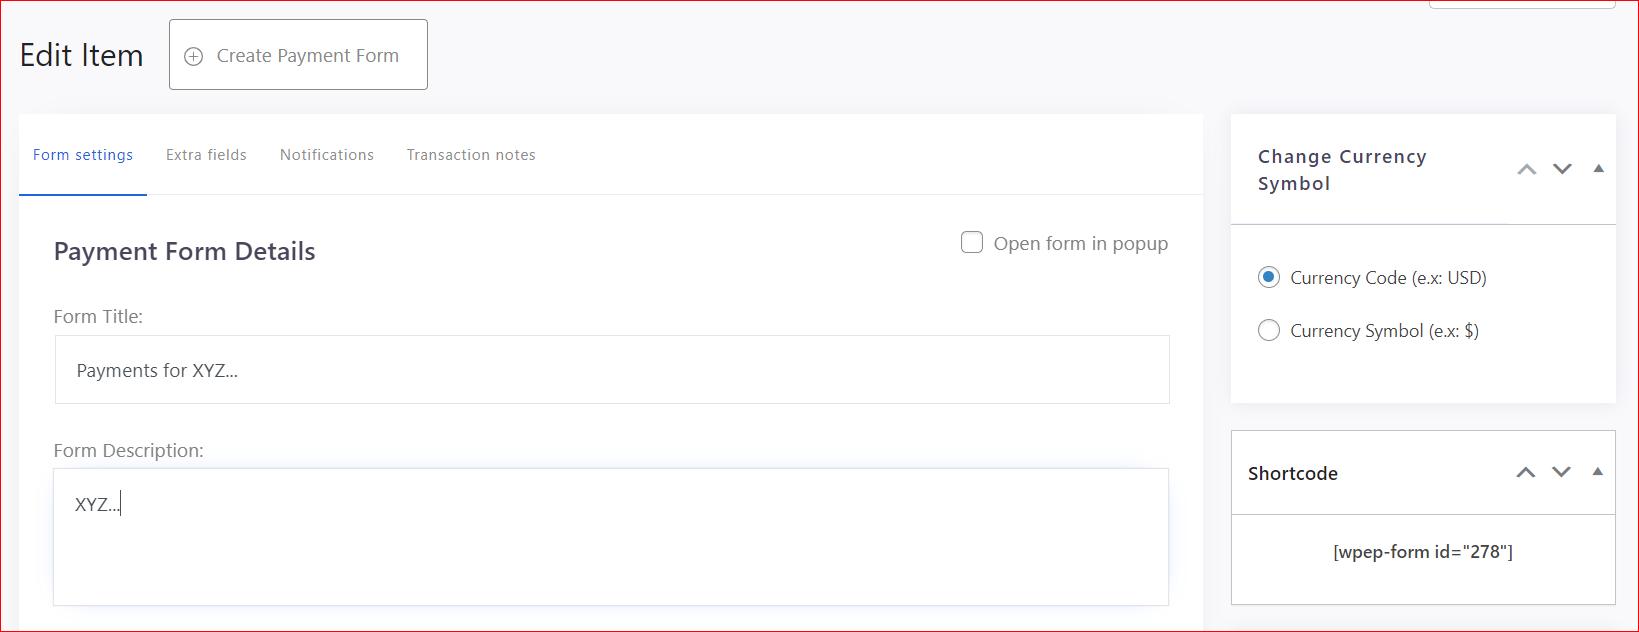
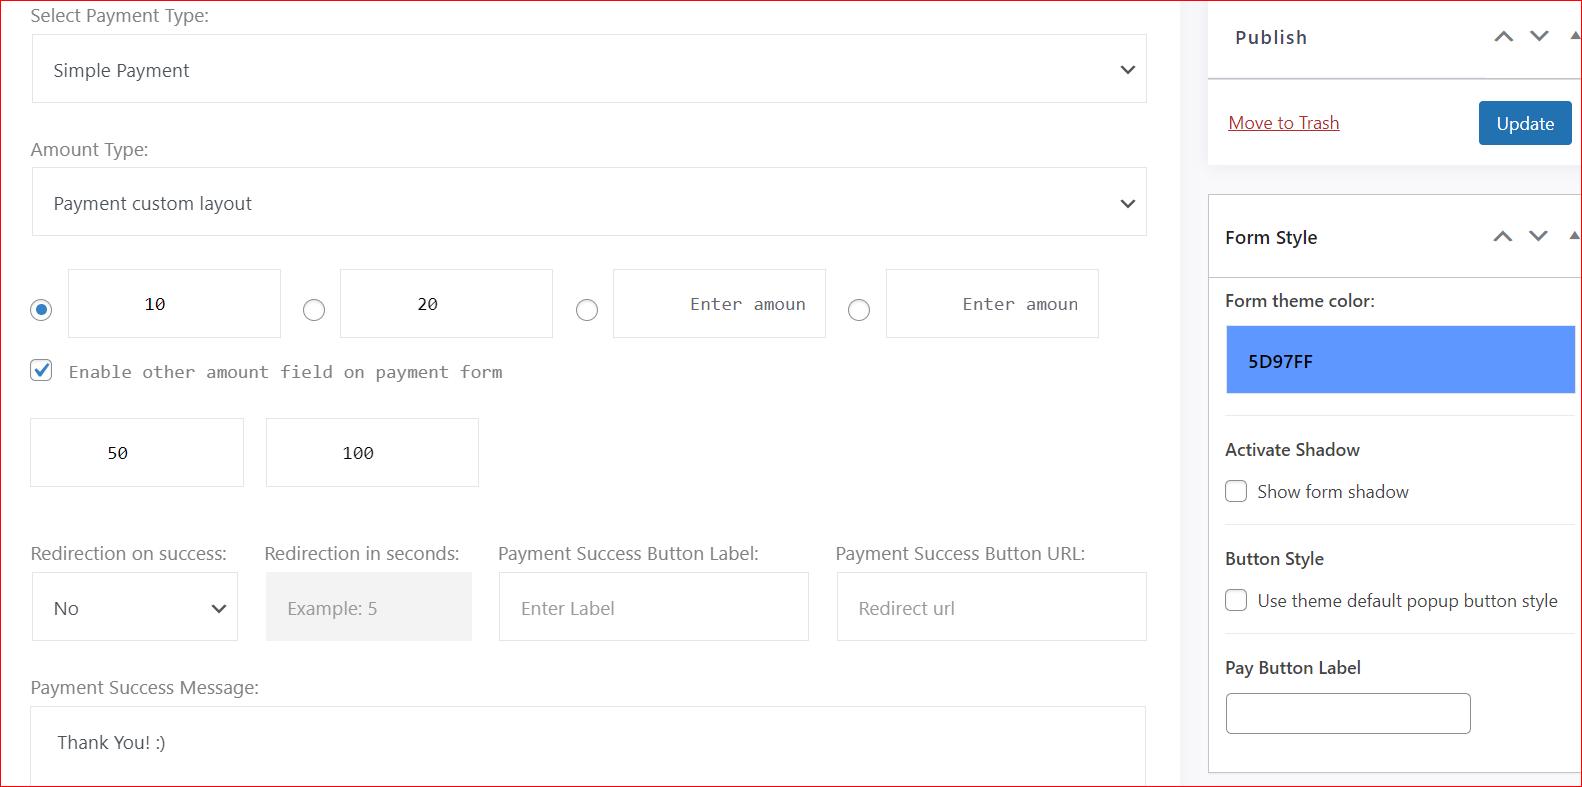
- Choose Payment Type: You have two options here—’Simple Payment’ or ‘Donation Payment.’ For this guide, we’ll use ‘Simple Payment.’
- Set Amount Parameters: Specify the amount type and set minimum and maximum limits if needed.
- Add Extra Fields (Optional): You can include additional fields under the ‘Extra Fields’ tab, but this feature is available only in the premium version.

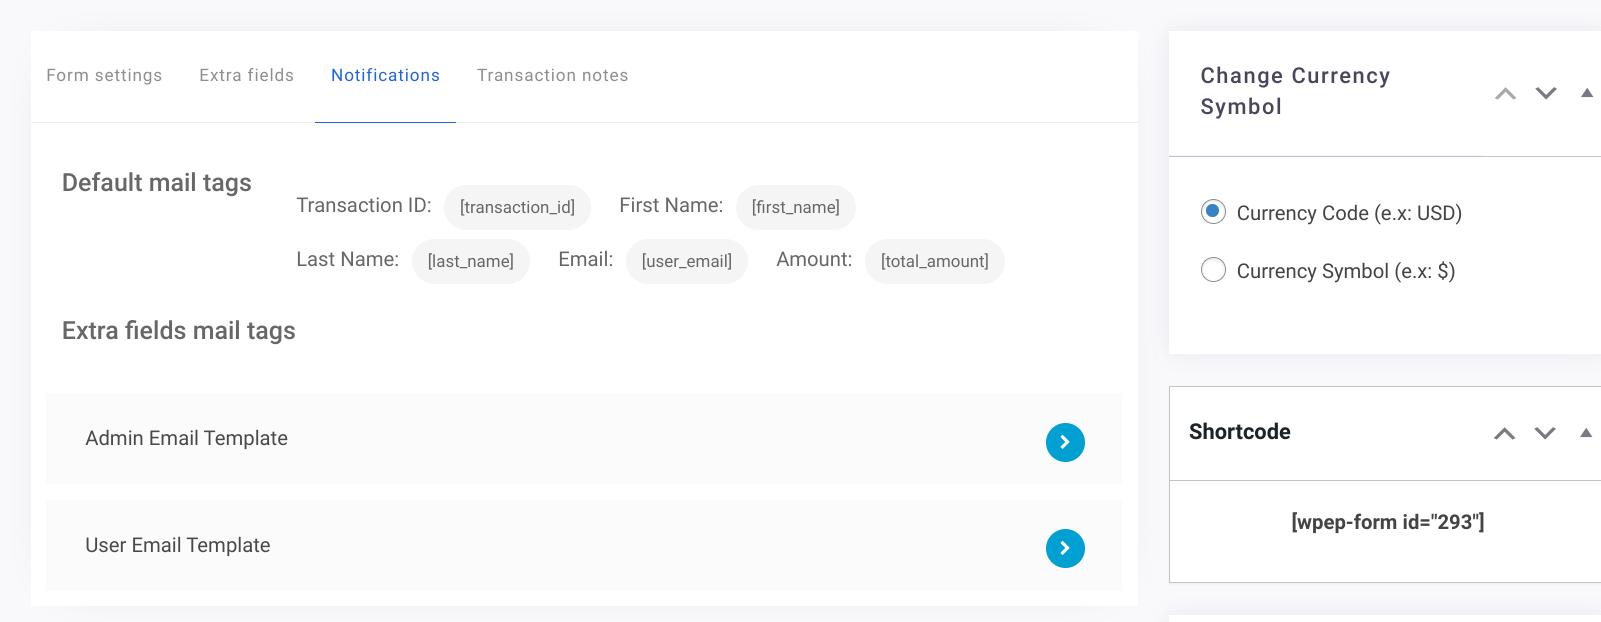
- Customize Notifications (Optional): If you want to adjust the default notification settings, make changes under the ‘Notifications’ tab.
- Include a Transaction Note (Optional): Also, add a transaction note if necessary.
- Publish Your Form: Click the ‘Publish’ button on the right-hand side menu to save and activate your payment form.

Now, you need to add this Square payment form to your WordPress page.
Step #4: Add Square Payment Form to WordPress Page
To add the Square payment form on your WordPress page, follow the instructions below:
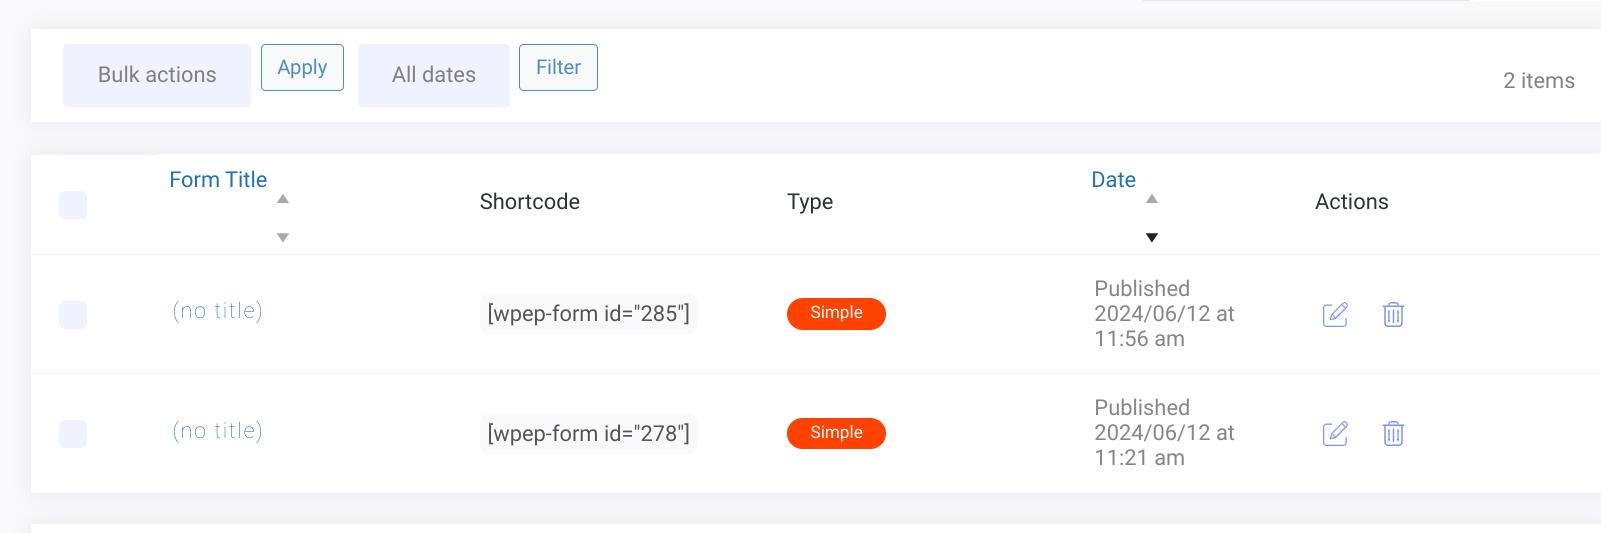
- Access Your Forms: Go to ‘WP EasyPay’ and select ‘All Forms’ to view the payment forms you’ve created.
- Copy the Shortcode: Find the form you want to add to your WordPress page and copy its shortcode.
- Insert the Shortcode into Your Page: Navigate to the WordPress page where you want the payment form to appear. Click on the “+” icon, add the “Shortcode” Gutenberg block, and then paste the copied shortcode into the desired location on the page.
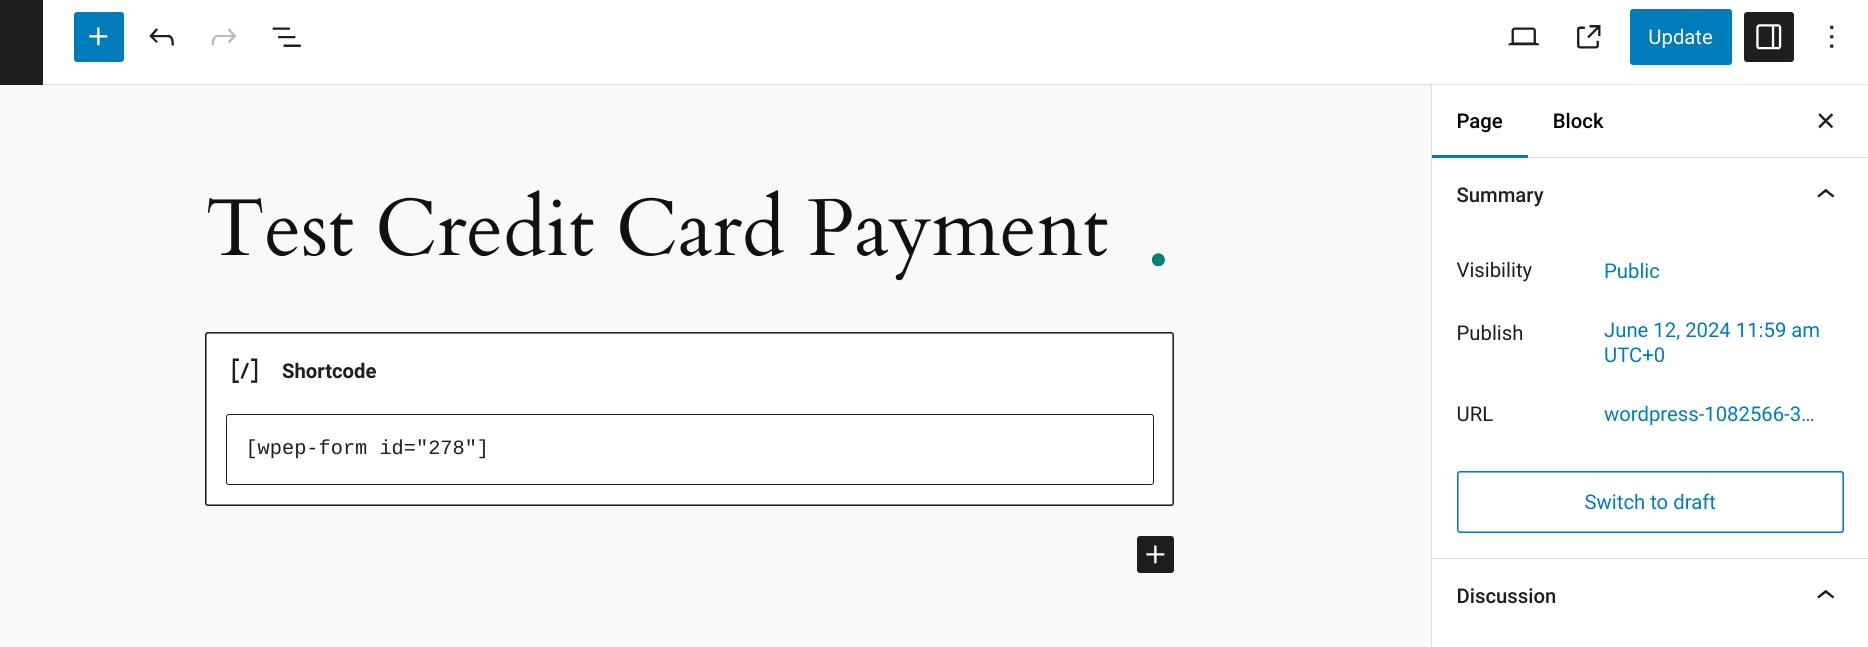
- Update Your Page: Make sure to save your changes by clicking ‘Update’ on the WordPress page editor.
- Preview Your Page: Visit the page to confirm that the payment form appears as expected.

- Verify Payment Confirmation: When a user submits the form, they should see the ‘Payment Success Message’ you configured during the form setup.

That’s it! You’ve successfully set up Square to Process Credit Cards on WordPress.
Final Thoughts on Square to Process Credit Cards on WordPress
Especially in today’s digital world, offering credit cards as a payment option on your WordPress site is absolutely necessary. However, managing all aspects of credit card integration—such as setting up payment gateways, providing secure transactions, and maintaining user-friendly forms—can be complex and time-consuming.
That’s where the WP EasyPay plugin helps you simplify the process. By following the four simple steps we have discussed in this guide, you can start processing payments securely and conveniently.
So, what are you waiting for?—install WP EasyPay today and set up credit card payments via Square with ease.