
Wp EasyPay’s recurring donation feature enables global philanthropy by empowering individuals and non-profits to accept donation payments using a subscription-based model.
People are generous by nature and they love to contribute to charities whenever they have the resources to do so. The best way to raise for a noble cause is through a convenient and reliable platform that actually matters.
WP EasyPay’s recurring donation feature provides a hassle-free way through which website visitors can donate using the Square payment gateway on a subscription basis. The entire process is automated and it cannot get any easier than this, let’s find out how it works.

WHAT IS WP EASYPAY?
WP EasyPay is a smart business solution that allows your WordPress powered website to integrate with the Square payment gateway in just a couple of minutes. You can embed dynamic buttons using shortcodes that generate payment forms on any of your site’s pages.
WP EasyPay creates a frictionless way of accepting simple payments, donations, subscriptions, recurring donations, and recurring payments. Also, easily manage Square Transaction Note, Email Notifications, and Subscription Reports from the admin panel.
Here are some of the premium features that make your website payment process easier, faster, and safer:
- Charge recurring payments from your customers directly and promptly.
- Subscription pause and run functionality – Allows the admin to control subscriptions from the back-end.
- Users can pause or cancel their subscriptions from the front-end (if allowed).
- Create parent subscription reports, and within those, multiple child subscription transactions report.
- Easily set and collect fixed amount payments for services or single products.
- Collect custom payment amounts from your customers by allowing them to enter a custom amount(s) at the time of payment.
- Collect donation payments easily – Simple and recurring payments
After having a brief overview of WP EasyPay, let’s explore how we can set up recurring donation settings by using the WP EasyPay premium plugin and your Square Account.

STEP#1:
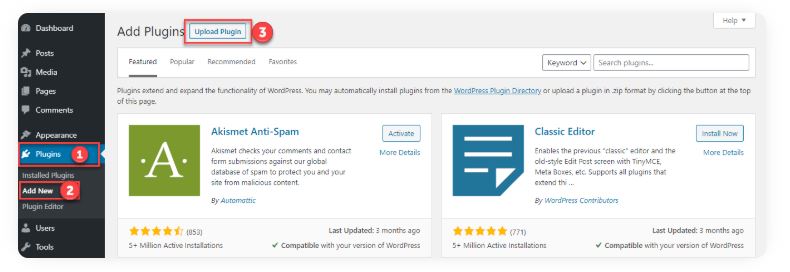
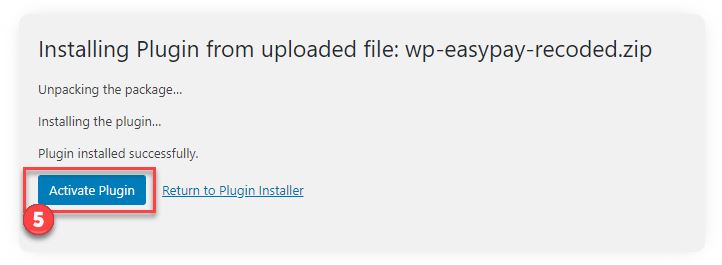
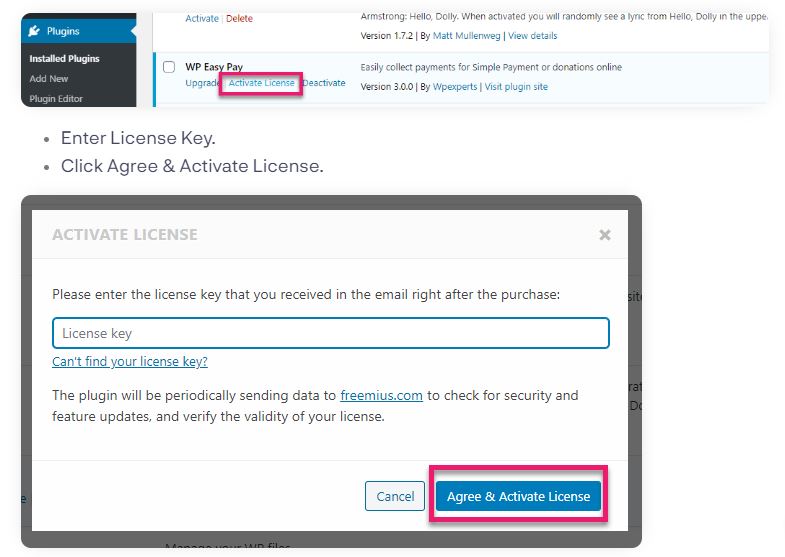
HOW TO INSTALL WP EASYPAY (PREMIUM) PLUGIN IN WORDPRESS SITE AND ACTIVATE LICENCE KEY
The first step is to install WP EasyPay (Premium) plugin on your WordPress site and activate its license key. You can read the complete technical documentation here.
(a) Uploading Plugin (WP EasyPay)
(b) Activate Plugin (WP EasyPay)
(c) Activate License Key (WP EasyPay)
STEP #2:
ACTIVE SQUARE ACCOUNT (YOU CAN SIGN-UP FOR FREE)
You need to have an active Square account in order to get started. If you already have a Square account then simply sign-in using your credentials. In case you don’t have a Square account, you can create one by visiting the official Square website.
STEP #3:
WP EASYPAY GLOBAL SETTINGS
Here is a glimpse of how WP EasyPay global setting mode works with the Live Payment option.
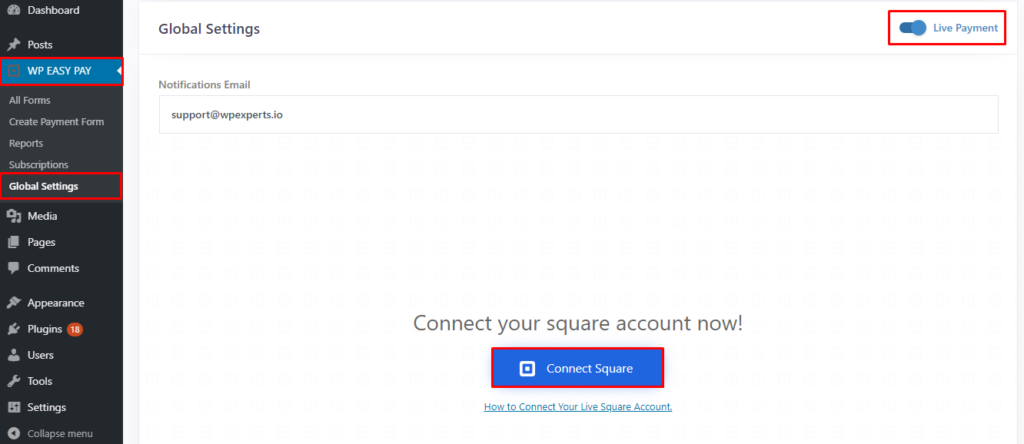
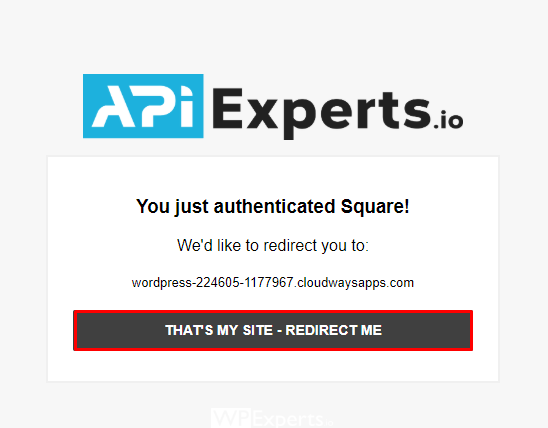
Once you click on the ‘Connect Square’ button, you will see an authentication message pop-up
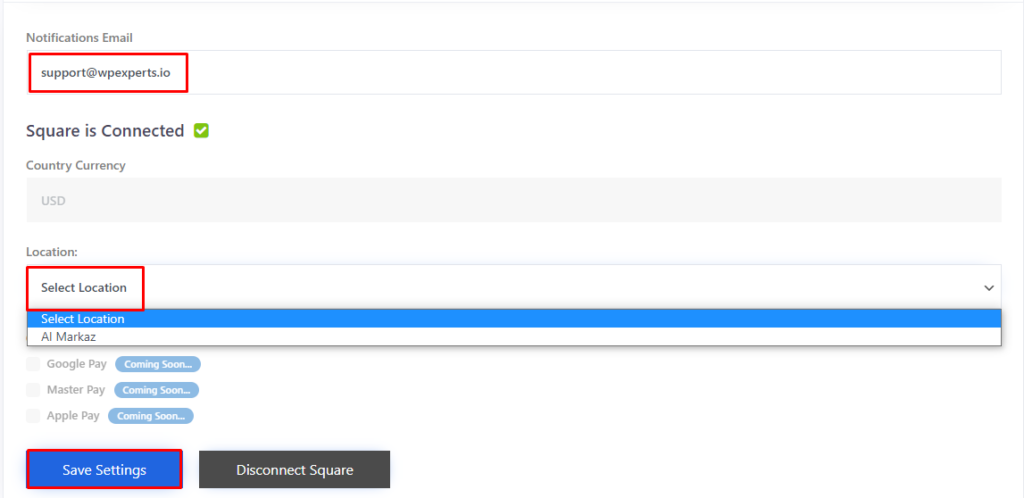
Now, you will be able to configure settings for email notification, currency type, and location. Make sure to click the ‘Save Settings’ button before moving forward.
NOTE: Your Square account currency type and WP EasyPay currency selection should be the same for them to work perfectly.
STEP #4:
CREATE PAYMENT FORM WITH WP EASYPAY
(a) Form Creation
After installing the WP EasyPay premium plugin and connecting it with an active Square account, you can create a payment form using global settings. Global settings enable you to connect multiple payment forms with your square account.

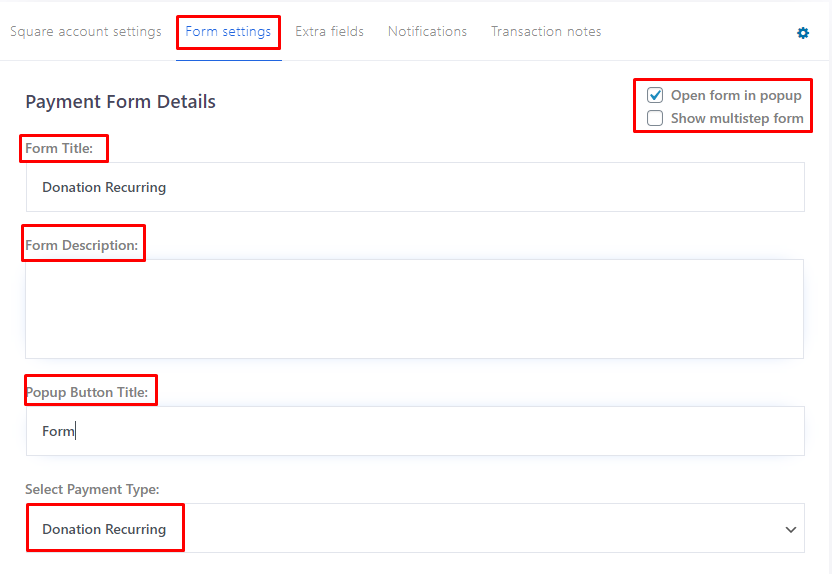
(b) Form Settings
Go to the “form settings” options to create a form title, form description, popup button title. Also, select your preferred donation type (like simple or recurring).
You can also choose how your WP EasyPay donation form should appear to donors (pop-up/modal or multi-step/wizard).
STEP #5:
RECURRING DONATION (SUBSCRIPTION CYCLE)
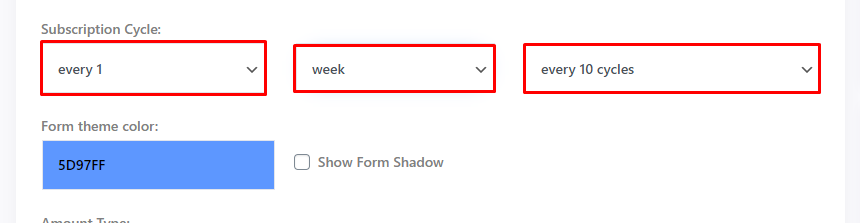
(a) Subscription Cycle
You can configure the settings for your subscription cycle by selecting your preferred options from a drop-down menu under each category (no. of payments, days/weeks/months, donation frequency).
You can also select the appropriate color scheme for your form as per your branding relatedness.
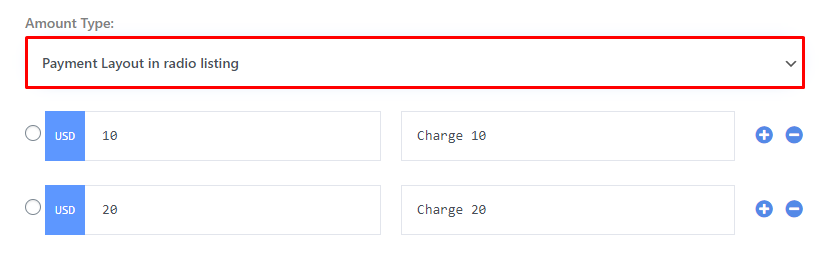
(b) Amount Types:
There are three types of payment layouts available for your form(s). The options are as the following:
(1) Radio Listing Layout
(2) Dropdown Layout
(3) Custom Layout
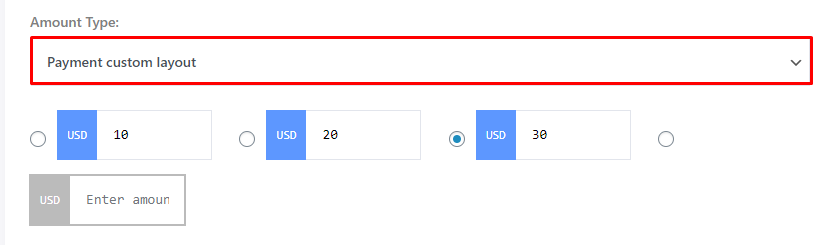
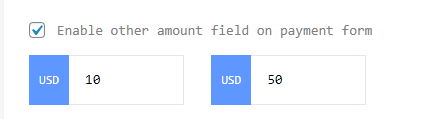
You can also enable a custom amount field on the payment form.
STEP #6:
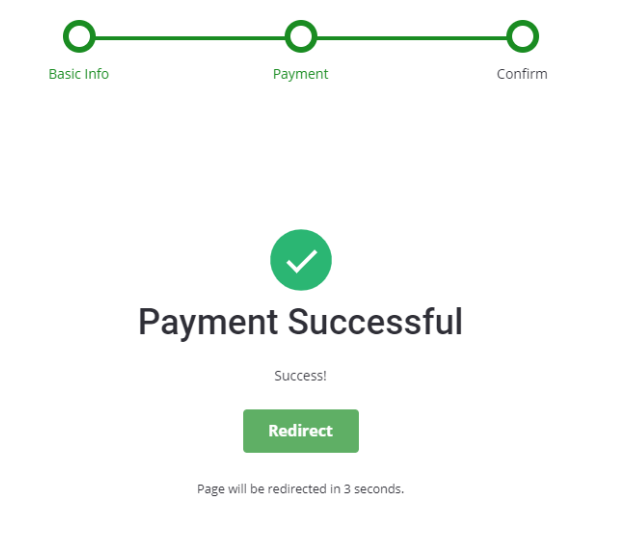
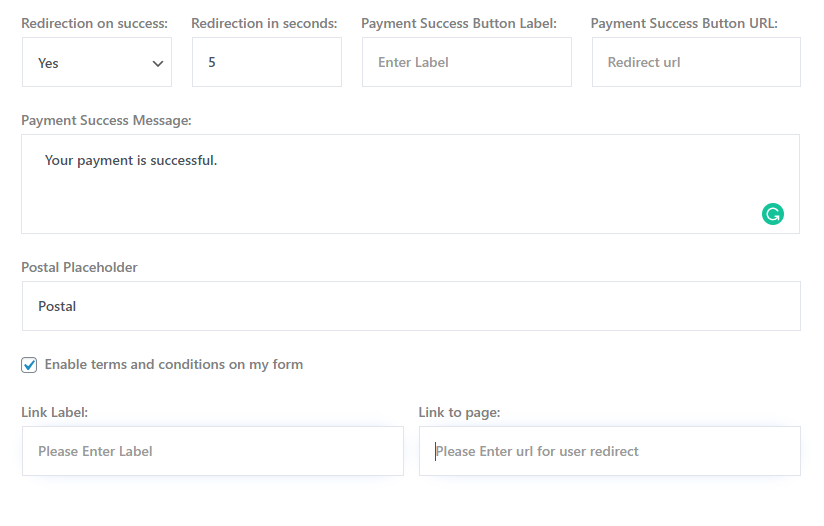
REDIRECTION ON SUCCESSFUL PAYMENT
The next step is to set up a redirection URL for donors who have made a successful payment. Set redirection time, successful payment message, button labels, postal placeholder, and terms and condition (If any).
FRONT-END VIEW OF SUCCESSFUL PAYMENT MESSAGE
This is what a recurring donor will see when they have made a successful donation payment.